


 Header Through Cloudflare")


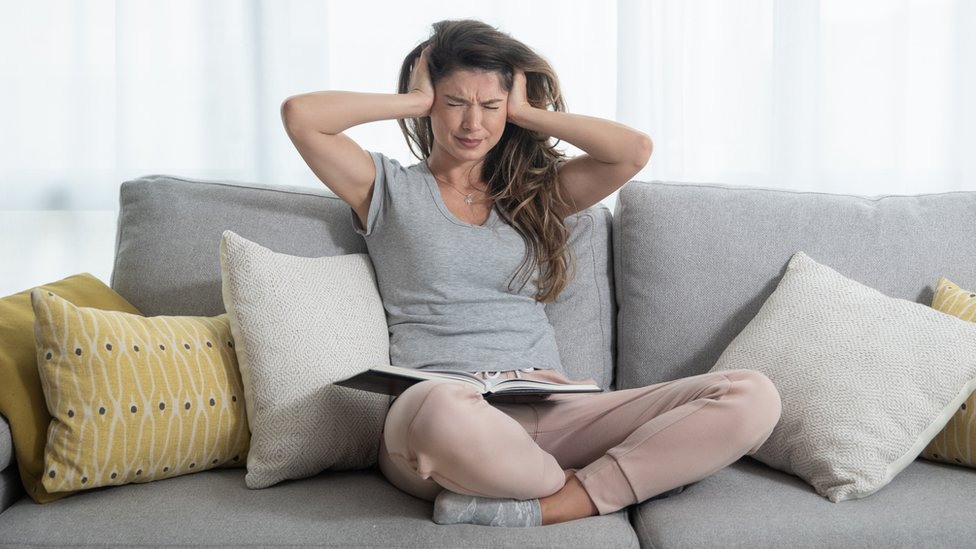
As we already know, making a video includes a variety of factors that determine a successful output. And out of those factors, getting the right audio or Recording your voice plays a significant role in the process. Many people would often over-emphasize video quality and neglect the audio. But in the end, the audio or recording quality will surely impact the success of the overall video. In this article, we will discuss a few tips or tricks that will help you achieve better-sounding vocal recordings. So here are 12 tips on recording your voice while making a video.
1. Shut off Noisy Devices
Anything in your room that is making a lot of noise is absolutely not essential to the recording process. Shut it off if you have a fan or an air conditioner running or if you have an air purifier running. Shut it off while you’re recording. The reason for that?
The noise is very distracting from what you’re trying to communicate. And to be frank, your audience doesn’t care if you’re warm or if you’re succumbing to the toxic fumes of stickers being burned. Your audience only really cares about understanding what you’re saying and having a good experience while they’re watching the video or the audio that you’ve produced.
2. Use The Polar Pattern to Your Advantage
Place any mandatory items that you can’t shut off that make a lot of noise in the dead area of a microphone. Microphones have something called a polar pattern, and when you look at this graph and tell you where the microphone picks up, sound around the capsule of the mic for spoken word recordings.
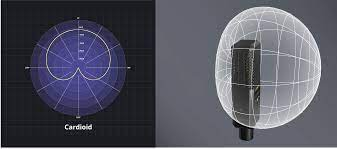
99% of the time you’re going to want to use a microphone with a cardioid polar pattern. This is the polar pattern that looks a little bit like the dead area, meaning the area around the microphone which will pick up the least amount of noise on a cardioid polar pattern is 180 degrees. So if you have a really loud computer fan, what you would want to do is arrange it so the microphone’s rear is pointed at that loud sound source. And that will decrease the amount of that sound source it picks up and make for a cleaner recording.
3. Get The Mic Closer To Your Mouth
Next up, if you’re recording it in untreated room, get the microphone closer to your mouth. The reason you want to do that is because of reverb. You don’t know what reverb is. That is the echoey sound that comes from your voice bouncing off all of the hard surfaces is in your room, and in some cases that can be awesome, but that’s mainly from music for spoken word.
On the other hand, you do not want that reverb in the recording, you want the driest signal that you can get. The farther away from you the microphone is, the more noticeable the reverberations are going to be. So instead of setting up a microphone two or three feet away from you, set it up a few inches away from your mouth. What this accomplishes is increasing your signal-to-noise ratio, which translates into the sound coming out of your mouth is much more prominent, in comparison to the reverb going around your room.
4. Get The Mic Off Your Desk
If you were going to be typing on a keyboard or clicking on your mouse while you’re recording or broadcasting get the microphone on a boom arm and get it farther away from those sound sources a lot of these entry-level USB microphones come with some kind of desktop tripod stand is convenient, yes, but it’s really not ideal, especially if you’re going to be typing on a keyboard or clicking on a mouse while you’re in a call or while you’re recording.
So if that describes you and you buying one of these microphones, do not rely on the provided desktop stand. Get it on a boom arm to get it farther away from the clickety-clack of the keyboard, which will yield a much better experience for your listeners and your viewers.
5. Avoid Plosives for Free
The next tip is if you don’t have or you’re not able to use a pop filter for recording. Instead of having the microphone directly in front of you, go ahead and move it about 45 degrees off angle and point at the corner of your mouth.
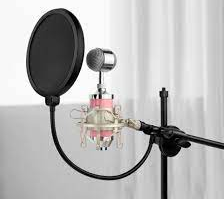
What occurs when a gust of air hits the microphone’s diaphragm? It causes that really loud and really obnoxious popping sound. So you want to avoid this at all costs. Yes, you are able to use a pop filter to avoid this, but as I mentioned, if you don’t have or you’re not able to use a pop filter, an easy way to avoid this is to move it 45 degrees off angle.
6. Record in your closet
If you’re recording in a room that has absolutely no treatment and you can’t afford to get any kind of sound dampening blankets or sound treatment foam, go ahead and try to record in a closet and you’re really only able to do this. If you’re not recording video because simply put, it doesn’t look very good, what it accomplishes is it allows you to use all of the clothes in your closet as sound dampening material, which will absorb the majority of your voice and not allow it to bounce around in the room.
Let’s continue with the rest of the 12 tips on recording your voice while making a video.
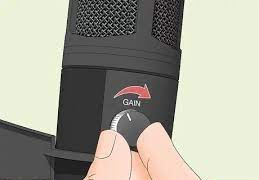
7. Set Your Gain Correctly
Set your gain properly and gain is essentially telling you how much you’re amplifying your microphone signal. If you set your gain too high you will end up with clipping audio. Conversely, if you set your game too low, you aren’t able to fix this in the post by boosting up the signal and some kind of an audio workstation but honestly setting your gain is a little bit more complicated than you would imagine.
8. Don’t Move Around
Stay as stationary as possible in relation to the microphone. The reason you want to do this is to maintain a consistent tone as well as a consistent level throughout your recording. If you’re constantly just moving around while you’re talking, you can tell that there’s a big change in the tone of the voice as well as the level of your voice. That makes for a very uncomfortable and very difficult listening experience for your audience. So when you’re starting out, it is a very good practice to stay stationary in relation to the microphone.
9. Speak into the correct side of your Microphone
Make sure you’re speaking into the correct side of the microphone. We know this sounds silly, but the number of people that we have seen speaking into the top of a mic like the Blue Yeti is absolutely insane. And absolutely wrong.
A mic like the Blue yeti is not an end address microphone, but rather it is a side-address microphone. You can tell that it already sounds exponentially better than when talking into the tops. Microphones have something called a polar pattern, meaning they sound different in different areas around the microphone.

So the first thing you should do when you buy a new microphone is to read the instruction manual because that will tell you where to speak into the mic, but also before you record anything that you end up publishing. Just play around with the microphone and record a little bit and spin it around so you can be absolutely certain that you’re speaking into the correct side of it.
10. Verify you’re recording on the correct Mic
Make sure you have the correct microphone and input source selected before you start recording and before you jump into a conference call. This is a mistake that we have seen a lot of other people make and it’s heartbreaking knowing that they spent a lot of money on an audio setup and they’re not getting the benefit of it. Check the audio processing software and check all the metrics over there. Ensure that it’s able to recognize your mic and the signals from the mic properly.
11. Practice, Practice, Practice – Recording your voice while making a video
The tip is to practice, practice, Practice. If you’re just starting to teach remotely or presenting in Teleconferences, or you’re starting a podcast or a YouTube channel, do not be afraid to practice. Record a bunch of tests, learn the gear that you are using, and get acclimated to speaking on a microphone.
Speaking into a microphone is not an inherent talent that anybody has. It is a learned skill. So if you want to come across as confident and competent on the microphone practice, learn the gear that you’re using, and think of at least one thing that you want to improve on each iteration of your recording.
12. Have a good script at hand
Always make sure to have your script ready beforehand. You can keep your drafts, and make necessary changes and markings. This will ensure that you finish your recording seamlessly without any breaks.

These tips will help you make a significant improvement in the audio and recording quality. Always leverage these 12 tips on recording your voice while making a video, and keep practicing them.


