


 Header Through Cloudflare")


You can now build your own gaming and streaming setup all by yourself. Having the right PC, desk, ergonomic chair, and lighting is essential. But there’s more to it, and I will tell you how you go about this process without biting your nails.
The United States has alone seen a massive rise in the number of gamers since 2020. As per the statistics, more than two hundred and twenty-six million people are in the gaming community.
Moreover, they are from different age groups of young and old coming together to beat each other at their skills.
The trend is growing strong, and many people are leaving their regular jobs to become full-time professional gamers. And if you, too, want to jump into the bandwagon but are struggling with finding the right gear and setup, you’re in the right place.
Must Read: How To Expand PS5 Storage With Solid State Drive?
Setup Part 1: Build A Gaming And Streaming PC
The first and foremost important thing to build your gaming and streaming setup is your gaming PC. It is not very difficult if you are handy with fixing screws and other technical stuff. Moreover, you will need a chassis for your PC with fans, RGB on the front (if you want it to look nice), and a mesh.
A tempered glass shows all your hardware enhancing its overall appeal. You will also need a motherboard and a CPU which are the main parts of your PC. Make sure that your motherboard is from a well-established brand and support the latest version of Intel or Ryzen that you will be using.
Both the motherboard and CPU will dictate what sort of experience you will have while gaming. In addition, you will need a high version of the NVIDIA graphics card as it will dictate your frames per second.
Building A Gaming And Streaming Setup
For RAM, a minimum of 16GB is required, but get the higher version if possible. That way, you won’t have to struggle with speed every few months. Moreover, a power supply that can hook up to the main components and keep your desk free of wire-clutter is necessary.
A 650 power watt of supply for most PC builds enough unless you want to spend thousands of dollars for it. Installing a power supply makes for a pleasant experience of shutting down and powering off.
You will also need enough storage for your games which you can do in two ways. First is getting a 4TB of HDD or SDD, which is becoming increasingly common these days. The thing with HDD is that they provide your PC with a lot of space to store heavy games like Call of Duty, Final Fantasy, and Gears 4, etc.
While on the other hand, SSD is better for processing your data and is lighter in weight than HDD. Moreover, you will need a USB drive with Windows 11 loaded on it. At this stage, you will also need a cooling fan which will make sure that your motherboard and CPU don’t cook themselves while working continuously.
Setting Up The Motherboard
Now you definitely don’t want to enter your giant head into the case of your CPU every time you want to add stuff to it, and it will only make your life difficult if you insert the motherboard first thing into the case.
Instead, take out your motherboard from its box and place it on your working table or slab. Also, place it in a well-lit room for better visualization.
Moreover, make sure your motherboard comes with two-three SATA cables. You will need them to attach your HDD or Solid State Drive. You might find the motherboard intimidating, but there are just ports and connections for a graphics card, headphones, USB cable, and hard drives. Read the motherboard manual to know which connection is for what.
Part 2: Choose Good CPU To Build Gaming And Streaming Setup
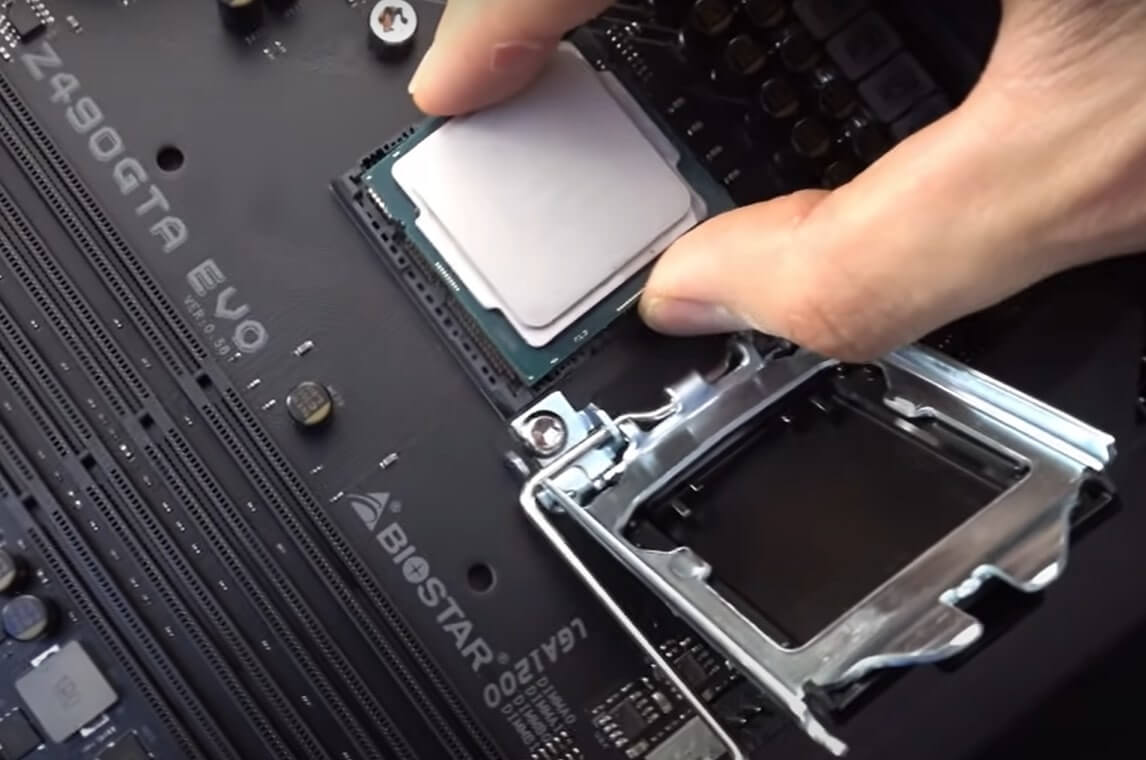
Take your Intel or Ryzen AMD processor as attaching it to the place given for it. You have to lift the little lever and gently add the processor in line with it. After that, gently drop your CPU down into its place.

Next, grab your RAM and go to the slots available for them on the motherboard. Find the little notch in the base and line it up with the notch on your RAM stick itself. With a gentle push, they will be set nice and easy. Ideally, you should be able to hear a small click sound which assures that it is set.
Pick The Right Graphic Card
For SSD, if you are using an NVME SSD, grab a small screwdriver and the SSD from your stack, and unscrew the top slot. Always go for the top slot as it is safer, and then remove the plastic sheet on it. Moreover, there will also be thermal pads on the SSD drive. Insert the SSD on its slot and screw it back down.
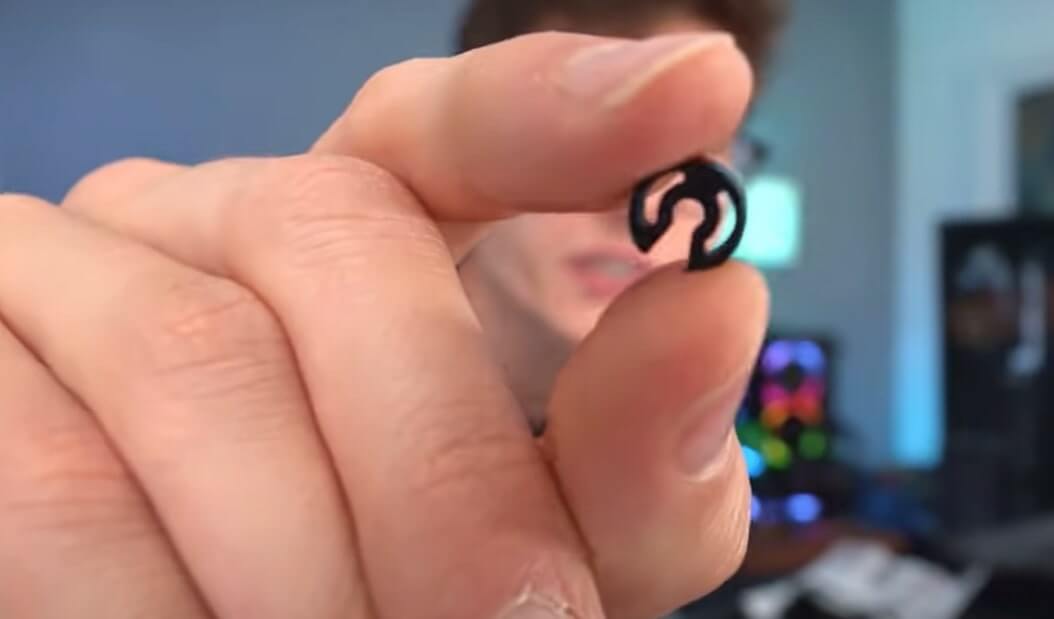
Lift your motherboard and find the large holes by turning them on the other side. Your motherboard will have tiny little C-clips that you have to holes you just poked through. Moreover, get your mounting brackets and attach the screws through them.
Detailed Steps To Build Gaming And Streaming Setup
Grab the brackets, place them on the cooler, and screw them in through the four screws provided. After that, all you have to do is drop the case on top of the motherboard and do a test fit to check if everything is alright. Once you check that, you will need some thermal paste on top of your CPU.
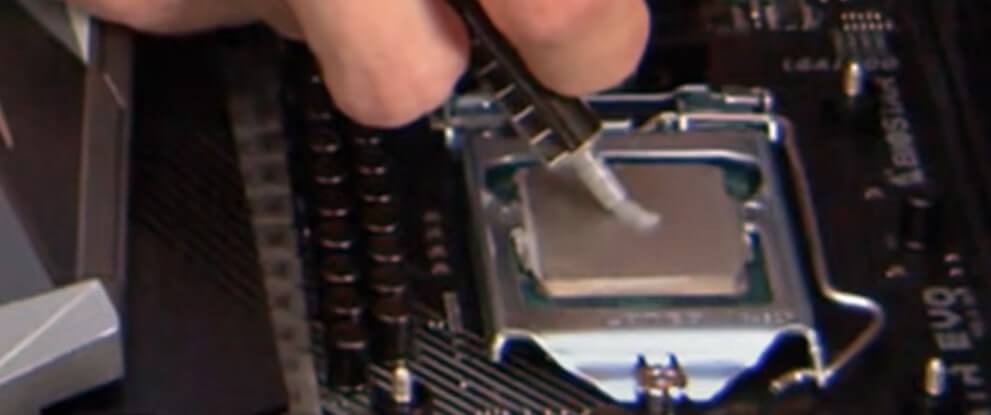
Usually, the cooler has some pre-applied, but it is better to make the attachment strong by adding a tube. Initially, after you try to put the cooler on top of the CPU with the little dot of glue, it may be a little fiddly, and that’s okay.
Next, turn the motherboard over, and screw everything from the other side to tighten them. Do it in a cross pattern, as it reduces any stress on the CPU socket. Furthermore, grab your little fan cable and plug it where it says CPU.
Your case now has two fans, one for the entire motherboard and other hardware and only for the CPU.
Insert The Motherboard In The Case
After all this boring hard work, you will finally be able to see it coming together. So grab your PC’s case and take off the tempered side panel. All you have to do is unscrew the big screws either by a screwdriver or your fingers and the same on the other side.
There are standoffs where your motherboard will sit and usually are pre-applied for the large motherboard on the PC case.
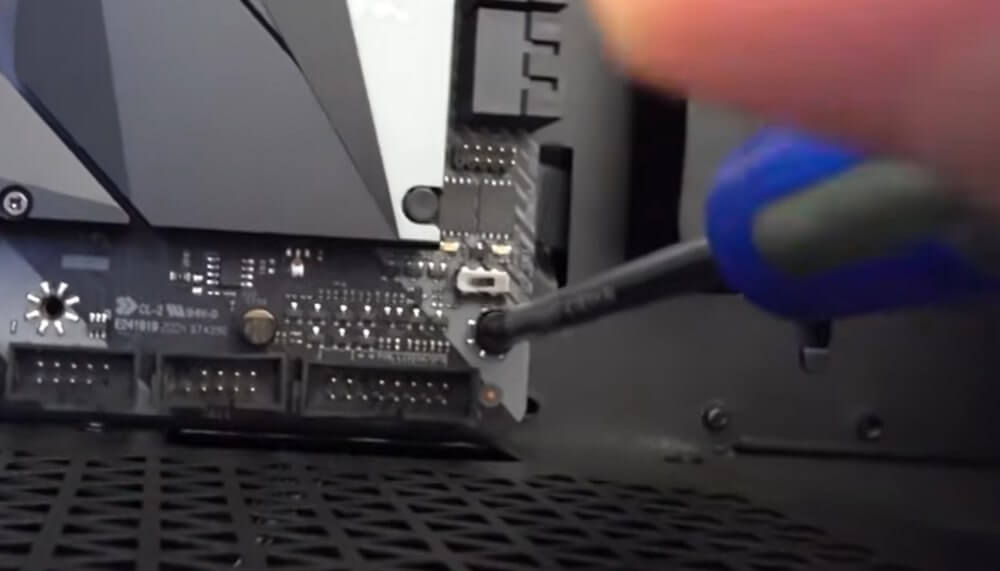
However, if your motherboard is small or mini, you will need to remove those standoffs. At the back of the case, you will get a lot of cables to plug in HD audio, USB type-C, the big USB cable, little case connections that will go down the bottom, an RGB header, and some fan headers.
Start Attaching The Hardware One By One
Get your case and lay it down flat on the table. After that, as gently as you possibly can, lower it into place. In case your motherboard has a fitting issue, as will be in most cases, you can unplug the case fan and place it somewhere else. Moreover, remove the dust filter at the top, and you will see that there are some pre-done holes there.
There are different sized channels like 120 mm and 140 mm for the small and big fans. In matching orientation, face the label upwards so that the air blows out of the case. Use one of your hands to hold the fan in place while using the other one to screw the fan on top.
Furthermore, grab your motherboard and start screwing it with the screws that come with it. Now pick up the SATA cables and plug them inside the little sockets. Turn the enclosure and start plugging the hard drives, which you have to put in the hard drive cage and screw it tightly in place.
Add SSD And Graphic Card In The Case
Moreover, now you can add the Solid State Drive, which has its own unique space. Here you have to take out one of the bays from the back, screw the SSD down, and put it back to where it belongs. Furthermore, start plugging the SATA cables where they belong too.
For fan cables, you need to find three fam cables and plug them into your motherboard.
Last but not least, grab the power connection for the actual case and plug it into the slot. Refer to your manual as every case and hardwire differs one from the other.
Get your NVIDIA graphic cards and remove the PCI-E covers at the back of the case. After that, line your graphics card with the slot you want to use and screw it back with your thumbs screw.
Furthermore, you have to attach the power supply. For this, you will find a box at the bottom of the case where you can keep the power supply facing downward. Plug in all the power cables now before shoving the power supply box into its enclosure.
Refer To The Manual For Specific Instructions
Moreover, after putting the power supply in its place as per the manual, you have to connect the wires with all the hardware. Once you are done, connect the plug to your monitor, close the glass tempered side and the other sides and switch it on.
It should start working successfully now. So you have built your own gaming PC all by yourself, so congratulations.
However, if your monitor is not starting, check if you have switched it on. Often, we forget to do the basics when we are excited or nervous about the outcome. If the monitor is on but still not working, then you will get an error message as to what is happening.
Maybe you can double-check each of the connections and redo the whole thing. But that’s unlikely if you follow the manual and my steps here.
Part 3: How To Connect Multiple Monitors To Build Your Gaming And Streaming Setup?
To enhance your gaming and streaming experience, you can connect your primary monitor with two or more monitors. I’d recommend that you buy all your monitor from the same brand and preferably of the same size.
However, if you have a different brand and size monitor, you can still use it. But the experience will not be great. Moreover, you will need to buy a VGA adapter to connect your old monitor to the CPU.
Process To Connect
First, plug in the input cable of your primary monitor into the graphic adapter/card’s output port. Secondly, do the same with the input cable of your second monitor. Furthermore, connect both the monitors with the power supply and switch them on.
If you want to plug in three or four monitors, make sure your graphic card has that many ports.
Depending upon which graphic card you are using, whether AMD or NVIDIA, you can see them on the Control Panel section of your PC. Moreover, here you will be able to switch between the two or three monitors as primary and secondary.
Also, using this same process, you have extended your screen, choose to display the same screen on both the monitors, and so on. In addition, you can perform the same task using a shortcut on the desktop. Right-click on the screen and select Display Settings.
Part 4: Additional Things To Build Setup For Gaming And Streaming
Once your gaming computer is all set, you can move on to the next set of things.
- An ergonomic gaming chair
- A spacious and sturdy table
- Wireless backlit keyboard
- Wireless gaming mouse
- A gaming controller
- Wireless Headset with noise cancellation and mic
- Appropriate lighting
Conclusion
Follow these steps to build your own gaming and streaming setup in 2022. These are essential if you are looking to become a professional gamer in the future. Not only will they amp up your gaming experience but also give you the much-needed boost to take it seriously. So make your colleagues and peers jealous by transforming your simple desktop into a gaming zone.
Also Read: Best 5 Gaming Processors Of 2022


