


 Header Through Cloudflare")


In this article, we will get to know how to fix the No Internet Secured Error in Windows 11.
Wi-Fi issues are a common sight in Windows operating system. While some of the issues are quite common, several users face a very rare No Internet, Secured when they try to connect to the connections already saved on their Windows 11 computer.
Since this issue is not a common sight, it is important to find out why you are facing this issue on your PC before you begin fixing it.
Also Read: How To Find Wi-Fi Network Security Key Password In Windows 11

What is No Internet, Secured Error in Windows 11?
This No Internet, Secured Error in Windows 11 error occurs when your system can connect to a secured Wi-Fi network after verifying the password but the system is unable to access the internet.
Commonly incorrect network configuration settings of your Windows 11 PC are the most common reason for this issue. But the misconfigured Power Management settings can be another cause of this problem.
Now that we know the cause of the problem, let’s move ahead and begin to troubleshoot it.
Also Read: 7 Ways To Fix Overheating Issue Windows 11
Update your Network Drivers
Doing this may seem pretty obvious but trust me this does a wonderful job of fixing the problem. So let’s see how can you update the network drivers of your PC:
- Firstly, right-click the Start menu icon and choose Device Manager from the flyout menu. You will directly be taken to the Device Manager page.
- Look for the Network Adapters option in the Device Manager window and click to expand it.
- Next, choose Wireless network adapters from the list and double-click them to directly access its properties window.
- Now switch to the Driver tab in the properties window and look for the Update driver button.

- Now a separate driver window will open up. Choose ‘Automatically update drivers’ to let Windows look for the driver and install it automatically.
After the driver is updated, try connecting to the Wi-Fi network again. Most probably you will no longer face the issue.
Run Network Adapter Troubleshooter
If the first method did not do any good, trying the Internet connections and network adapters troubleshooter can do the trick for you. So, let’s try the troubleshooter on your Windows 11v PC:
- For this go to Start Menu and Search for the Settings app in the search bar and double click the search result to access Windows 11 Settings. You can also use the Windows+I shortcut to directly access the Settings window.
- Now click on the System option in the left navigation bar and then scroll down and click on troubleshoot option.
- Next, choose ‘Other troubleshooters’ in the next window and then look for Network Adapters. Click the Run button present on the right of the edge.
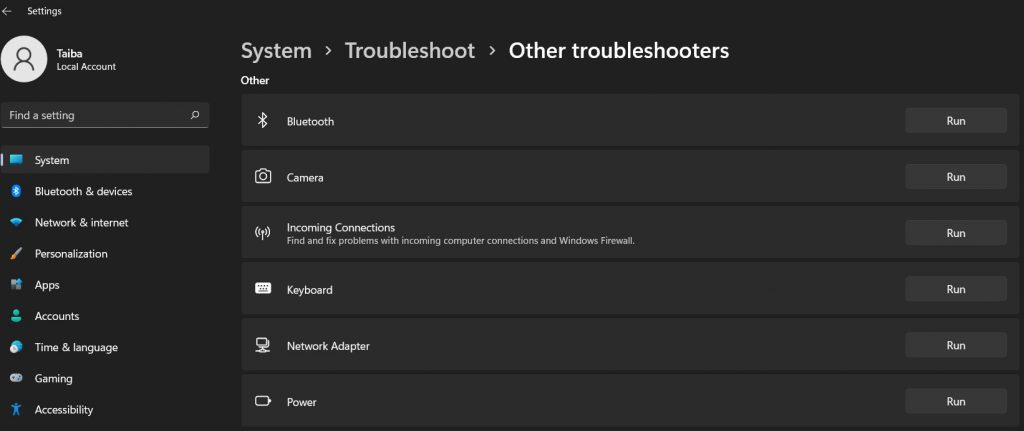
- Now a window will open up and Windows will try to detect any problem and solve it. Once the issue is resolved, try connecting to the network again.
Also Read: How To Run Troubleshooters In Windows 11
Disable IPv6 Option in Adapter Settings
If you are still facing the issue, you can try to turn off the IPv6 option in the network adaptor settings window. Doing so can also help solve the No internet secured error. Here’s how you can disable the IPv6 option:
- Once again go to the Start menu of your PC and click on the Gear icon in the pinned apps.
- In the Settings window, click on the ‘Network & internet’ tab from the left pane.
- Now keep scrolling and choose the ‘Advanced network settings’ option from the right pane.
- Next, look for the ‘Related settings’ section in the window and click the ‘More network adapter options’ option.
- Look for the ‘Wi-Fi’ option in the new window and then choose and then click on ‘Properties’ from the context menu.
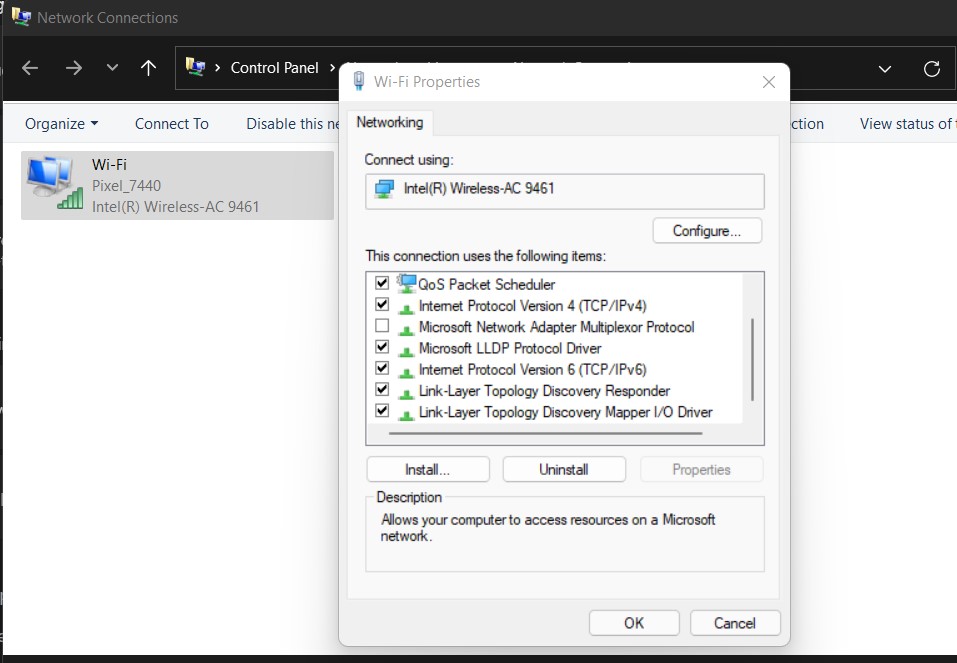
- Keep scrolling and look for the ‘Internet Protocol Version (TCP/IPv6)’ option in the new window and uncheck the checkbox for it.
- Finally, press the Ok button and then close the window.
Also Read: How To Remove Ads From Windows 11
Change Power Management Settings
If you are facing the issue on a laptop, then Power Management settings can also interfere with the Wi-Fi connection to save the battery.
So let’s try to modify the Power Management settings:
- For this, go to the Start menu and search for the control panel. Now click on the first search result to access Control Panel settings.
- Next, look for the ‘Power Options’ icon and then click to open it.
- Now look for the currently activated power plan. The one with the radio button is the plan currently activated.
- Now click on the ‘Change plan settings’ option present on the right side of the option.
- Next, choose the ‘Change advanced power settings’ option to open a new window.
- Look for the ‘Wireless adapter settings’ in the window and expand the settings to view the options.
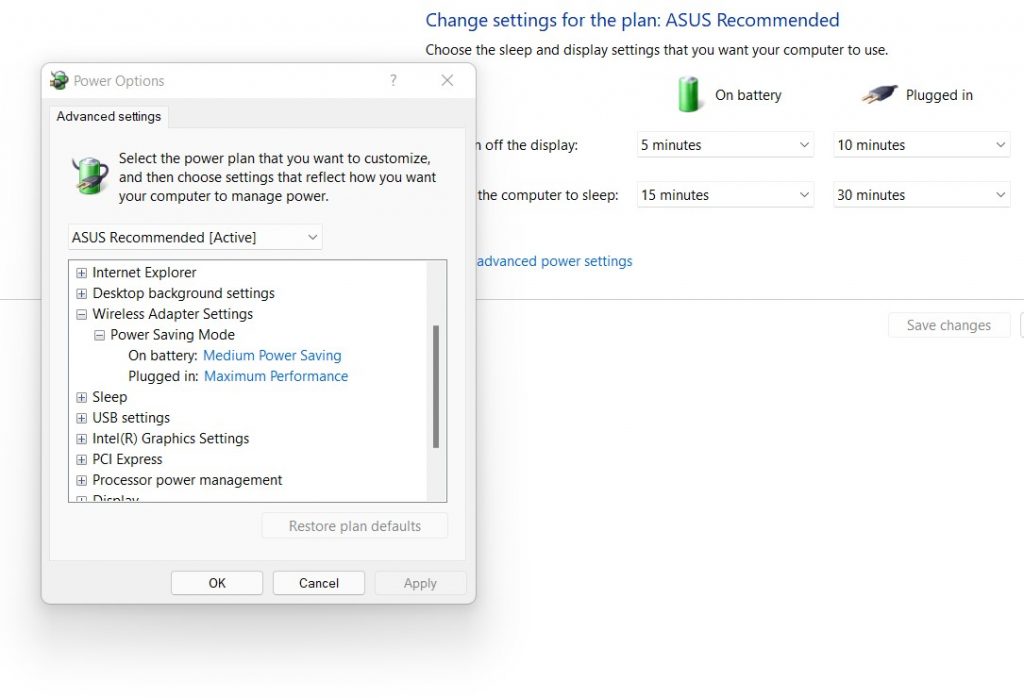
- Next, double-click the ‘Power Saving Mode’ option to access its settings.
- Now expand the drop-down menu for the ‘On battery’ option and choose the Best Performance option in place of it.
Also Read: AirPods Cannot Connect To Windows 11? Try These Fixes
Conclusion
That’s pretty much it! Hope you can connect to the intended Wi-Fi network after troubleshooting the issue with the above-listed methods. If you found the guide helpful, don’t forget to share it with others.


