


 Header Through Cloudflare")


iMessage is an Apple-developed app that allows you to send text messages, videos, photos, and audio clips over a Wi-Fi or cellular data connection. iMessage has always been a service available only to Apple product owners. Though many instant messaging services compete with iMessage, none have come close to defeating it as the most exclusive. But do you know that you can use iMessage on Android and Windows?
Fortunately, you don’t have to subscribe to the entire Apple ecosystem charade to use iMessage or stay in touch with a friend who has an iPhone. ‘AirMessage’ is a fantastic piece of software that allows you to use iMessage on any internet-enabled device.
That being said, the only limitation of AirMessage is that it requires a MacBook to function, and it must be turned on and connected to the internet to send and receive iMessages as it works as a private server.
This guide will walk you through a few ways to use iMessage on your Windows and Android devices and some of the risks you may encounter.
Also Read: How To Customize The iPhone Lock Screen In iOS 16
Accessing iMessage on Windows and Android
The various methods for using iMessage on non-Apple devices vary, and almost every successful process requires you to own an Apple device already. There are, however, some workarounds. Here are some detailed instructions for using iMessage on your Windows PC or Android device.
Use AirMessage (Android only)
iMessage is a service that relays messages from iMessage apps to your browser or Android device. A Mac computer is needed for this process to function.
- Move to the AirMessage website on your Mac and download the server.
- Add the app to your application folder. As soon as you launch the app, you will see a pop-up welcome message.
- Click the Connect Account button to link and sign up for your Gmail account. Image message AirMessage.
- First, you launch the app; you’ll be asked to allow AirMessage to send and read messages. Be sure to permit the app. Click the Open System Preferences button to get started.
Also Read: How To Connect And Disconnect AirPods To Windows 11
- To allow sending manually, go to System Preferences-> Security & Privacy-> Privacy-> Automation and enable it.
- To add the capability to read messages, go to System Preferences-> Security & Privacy-> Privacy-> Full Disk Access and add the AirMessage app.
To use the assistance, your Mac computer must consistently be performing, so you need to disable sleep mode to control your device from becoming inaccessible. To do this, go to the Energy Savings menu in System Preferences and move the Computer Sleep slider to Never.
From there, use your Windows computer’s browser to go to the web version of AirMessage and sign in with the same Gmail account you utilized on your Mac. For Android, download the iMessage app from the Google Play store. This functions exactly like the web version.
Also Read: How To Unsend Messages On iPhone, iPad, And Mac
Send and receive iMessage on your Windows device using the AirMessage web app
Using the iMessage app on Windows devices is straightforward. In addition, AirMessage provides a web interface, so you don’t have to download the app. Just log in using your favorite browser.
- To do this, open one of your favorite browsers on your Windows computer.
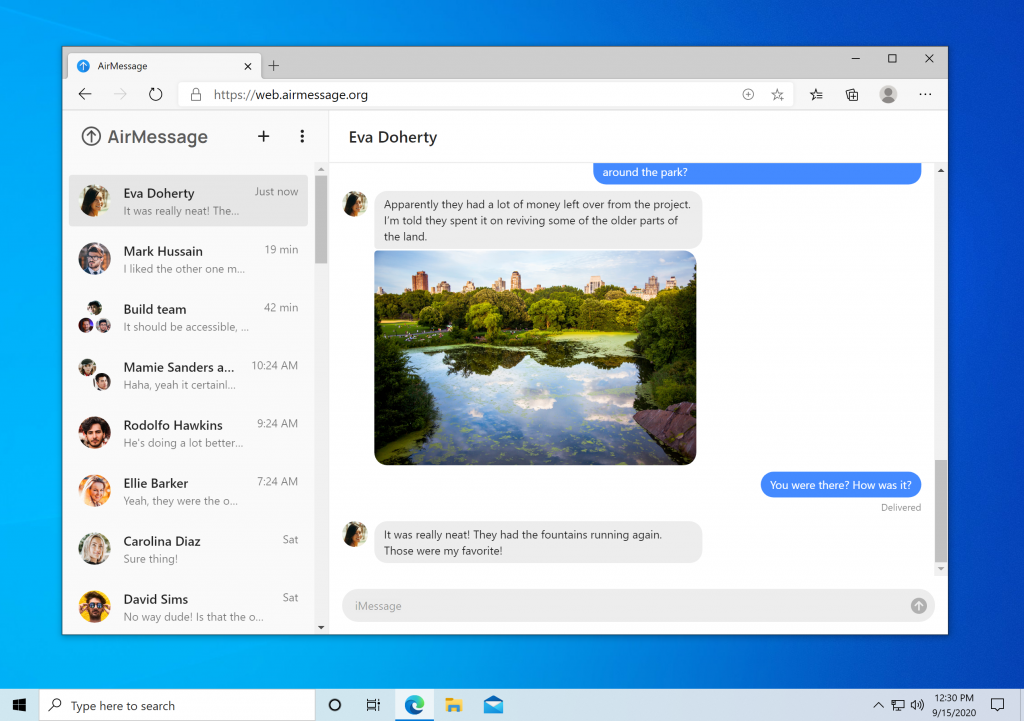
- Then go to web.airmessage.org. When the website loads, click the Log in with Google button.
- Now sign in with the same account you used to sign in to the AirMessageServer app on your macOS device. Once logged in, you’ll be able to see all your message history and the ability to send and receive iMessages on your Windows device.
Also Read: How To Enable Background Sounds On iPhone
Download and install the iMessage app on your Android device
After launching and running the AirMessage server, you need to download the Android app from the PlayStore and use the service to send and receive iMessage to and from your Android device.
- First, open the PlayStore app from the home screen or the app library on your Android device.
- Then tap the “Search Bar” at the top of the screen and type AirMessage. Then click the Search button in the lower right corner of the on-screen keyboard to perform the search.
- From the search results, click the Install button to download and install the iMessage app on your Android device.
- Once installed, open the app from the home screen shortcut or the app drawer on your Android device.
- Then tap the Sign in with Google option and sign in with the same Google account you used to sign in to the AirMessage server app on your macOS device.
You can now view the entire message history. Directly you can send and receive iMessage on your Android device if your macOS device is active and connected to the internet.
Also Read: Apps not updating after installing macOS Monterey
Conclusion
With this guide, everyone can now use Android and Windows devices to send and receive iMessage conveniently. If you have any questions, feel free to ask us in the comments below.


