


 Header Through Cloudflare")


This guide presents the solutions for the preview print dialogue box too-large issue in macOS Ventura.
It’s essential to remember that, like most software updates, the macOS Ventura update has its fair share of bugs and problems before getting too keen about the new segments and advancements.
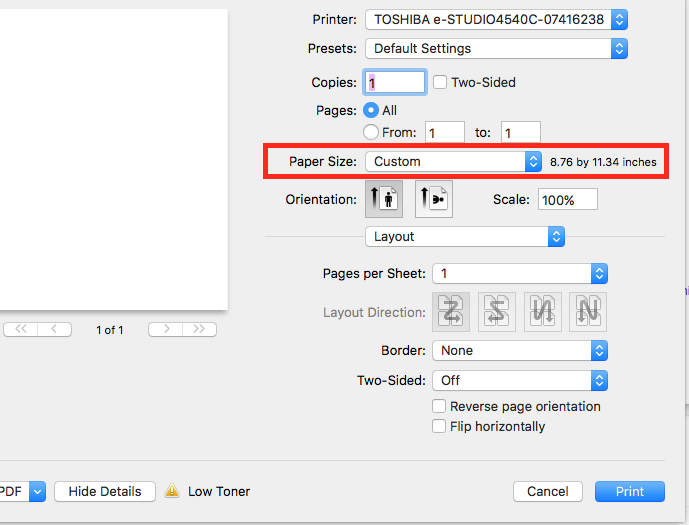
Take, for example like some people reported that when they tried to print, the dialogue box was so big that they could not see the print icon at the bottom.
As you can see, users using a wide range of printers appear to be affected by the issue. Due to this, it is impossible to attribute it specifically to a particular printer model or brand.
Although Apple has a general solution for printing problems we’ve shared below, the company still needs to acknowledge the issue directly.
Returning to system preferences and selecting the screen icon is a temporary fix. To make the dialogue box smaller to see and use the print button, you must set your size preference to the largest one.
Also Read: macOS Ventura- Preview Text Box Typing Upside Down Error [Fixed]
Let’s get into details of some workarounds that you can perform to resolve this issue:
Solutions for macOS Ventura Preview print dialogue box too large
Reset the Mac printing software (authorized fix)
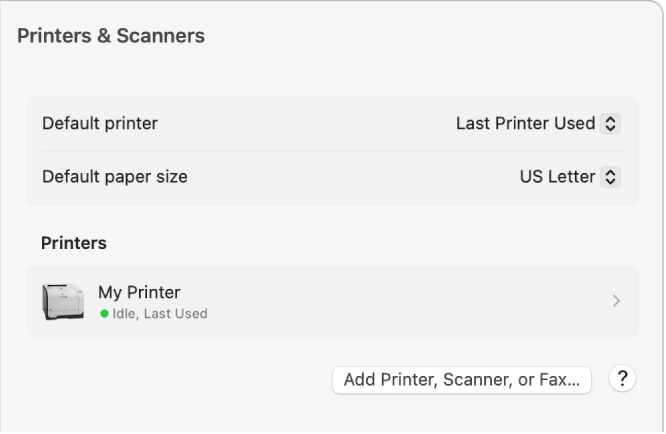
1. Select System Preferences from your Mac’s Apple menu, then turn Printers & Scanners on.
2. While holding down the Control key, click on the list on the left and select “Reset printing system” from the display option.
3. After you restart the printing system, the Printers & Scanners preferences list of printers will appear.
4. Add any printers once more.
For some users, this should resolve the issue, but there is a chance that even after following the above instructions, your printer may still not function.
Also Read: Advanced Language And Regional Settings Missing In macOS Ventura [Fixed]
Install the free Gutenprint driver
After downloading and installing the free Gutenprint driver, users appear to have solved the issue. Download the most recent package and install it on your Mac.

Verify you have the most recent drivers:
Ensure that macOS Big Sur runs on the Mac and that the most recent printer drivers are installed. The most recent operating system might not support the current printer drivers.
To resolve the problem permanently, update the drivers to the most recent version. You should be able to access the drivers within a few minutes since most manufacturers post them on their websites.
Turning off the Expanded Print Details Dialog
Need to turn off this new setting? There is a command for that as well.
1. Launch Terminal
2. Type the following command at the prompt:
defaults write -g PMPrintingExpandedStateForPrint -bool FALSE
3. To enter the command, hit Return. Again, there is no confirmation, but the default is now the regular Print dialogue screen.
Also Read: How To Change The Login Screen Wallpaper On macOS Ventura
Examine the printing configuration on your Mac
Your Mac’s printing subsystem is the last place to look for a fix for the Preview print dialogue box too large. Here, cases may be unique to your document or its app or be connected to the printer driver.
For your initial test, try opening your document in Preview as a PDF and printing it from there (in the print dialogue box, select PDF > Open in Preview).
Your Mac can print if it prints, so the issue is either with the document or the app. Print another exact copy from the app to determine whether the problem is specific to the paper or the app.
However, since you already have a copy of that document in PDF format that you can print, your immediate problem might already be resolved.
Naturally, you’ll need to find a solution if the issue is with the app. However, your printer driver is typically where the problem is.
Also Read: macOS Ventura- Exchange Calendar Does Not Synchronize On Mac After Upgrading
Nowadays, it’s rare for drivers to receive updates independent of macOS updates, but you can check System Preferences > Software Update to make sure.
Updates may also be found by searching for “printerNameAndModel Mac driver” on the manufacturer’s website for the printer.
Compare that to what you see when you select the printer in System Preferences > Printers & Scanners and click the Options & Supplies button. Download and install the most recent version if there is one.
Try removing the printer from Printers & Scanners and re-adding it if installing a new version doesn’t work. To remove a printer from the list, select it and press the – button at the bottom. Then add it back by pressing the Plus button.
A different option from the Use pop-up menu at the bottom can be selected if you try deleting the driver and adding it again. To ensure you’re using the manufacturer’s driver rather than Apple’s, start searching for the printer’s name instead of Secure AirPrint.
Also Read: macOS Ventura: External Display Resolution Issue (Fixed)
Conclusion
In the interim, please let us know if any of the solutions offered here were successful in helping you resolve the issue. Please let us know if we overlooked a solution that helped you solve the problem.


