


 Header Through Cloudflare")


The remote desktop control function is a great way to get the problems on your PC fixed remotely. It lets the added user have control over your PC from any other device. Apparently, the added remote desktop user will be able to access what’s there on your PC. This feature is especially useful when there’s something wrong with your PC that you want to get fixed remotely. So, in this article, we will learn how to add or remove remote desktop users on Windows 11.
There are various ways to add or remove remote desktop users on Windows 11. Broadly, It can be done through Windows Settings, Powershell and Command Prompt. So, in this piece, we will discuss all the possible ways to add or remove desktop users on Windows 11.
How to add desktop users on Windows 11?
In a nutshell:
- Press Windows+I hotkey to launch settings.
- Scroll down on the right pane.
- Click on Remote Desktop.
- Tap the Remote Desktop users option.
- Tap the Add option.
- Click on the Advanced option.
- Tap the Find now button.
- Select the user.
- Click on OK.
Now, let us discuss the steps to add or remove desktop users on Windows 11 in detail:
1. Add or remove desktop users through Windows Settings:
- First of all, launch the Windows Setting by pressing the Windows+I hotkey. Alternatively, just open the start menu by clicking the Windows icon on the taskbar. Now, access the System Settings from there.
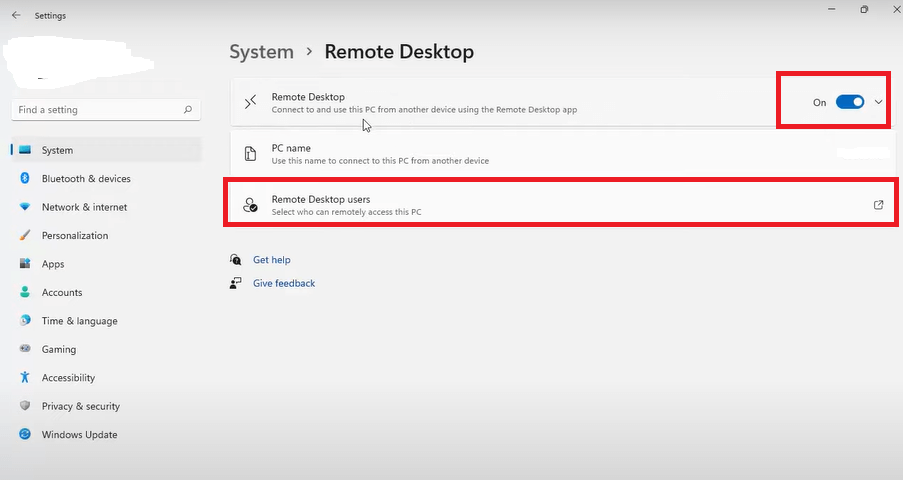
- Now, under the System tab, scroll down on the right pane. Then, click on Remote Desktop.

3. By default, the Remote Desktop option will be disabled. To enable it, just turn on the toggle next to the Remote Desktop option. Then, you need to click on the Remote Desktop users option.
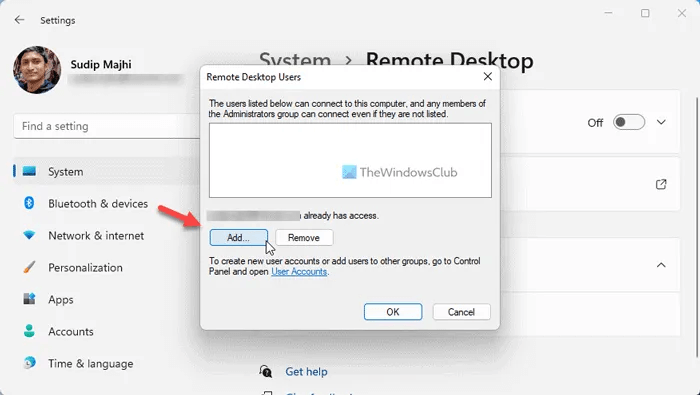
4. In the next step, the Remote Desktop Users window will open up on your screen. You just need to click on the Add option.
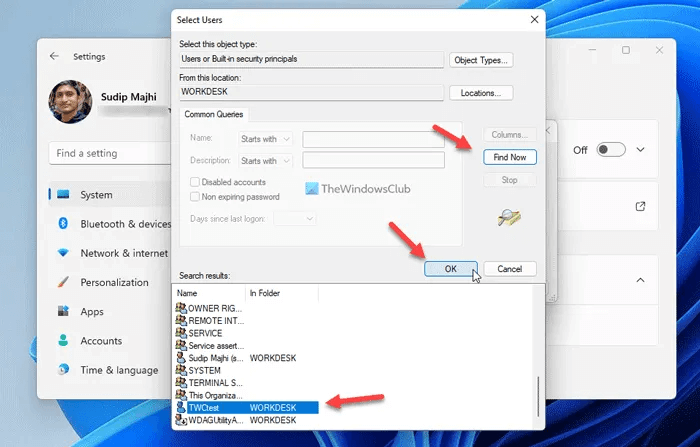
5. Now, click the Advanced option and then the Find Now button.
6. A list of the users you can add will appear on the screen. Then, select the user you want to add and then tap OK.
7. Again tap OK.
Also Read: How To Add Or Remove Widgets In Windows 11
How to remove the remote desktop user on Windows 11( through Windows Settings):
This is a very easy task. All you need to do is to follow a few steps given below:
- Launch the System Settings on your PC.
- Click on the System option( on the left side).
- Now, scroll down on the right side and click on Remote Desktop.
- Now, tap the Remote Desktop users option.
- In the next step, all the added remote desktop users will be displayed on the screen.
- Choose the one you want to remove.
- Then, click on the Remove button.(see the screenshot below)

So, this is how you can add or remove remote desktop users on Windows 11 using the Windows Settings application.
Also Read: How To Add Finger To Fingerprint Recognition In Windows 11
Add a remote desktop user using the Local Users and Groups
This is a very painless task. You can do it by just following a few simple steps given below:
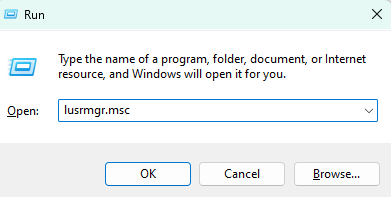
1. Press Windows + R hotkey to launch the Run dialog box.
2. Enter lusrmgr.msc in the dialog box and hit OK.
3. Tap the Groups folder on the left side.
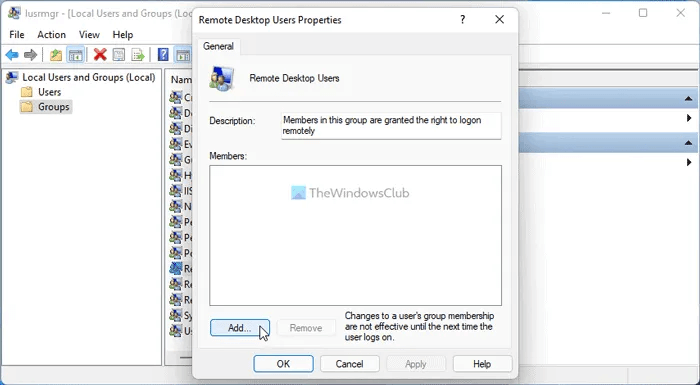
4. Now, make a double-click on the Remote Desktop Users option on the middle pane.
5. Click on the Add option.
6. Then tap on the Advanced button.
7. Click on Find Now. Then, select the users you want to add by clicking on it.
8. Tap OK and again hit OK to confirm
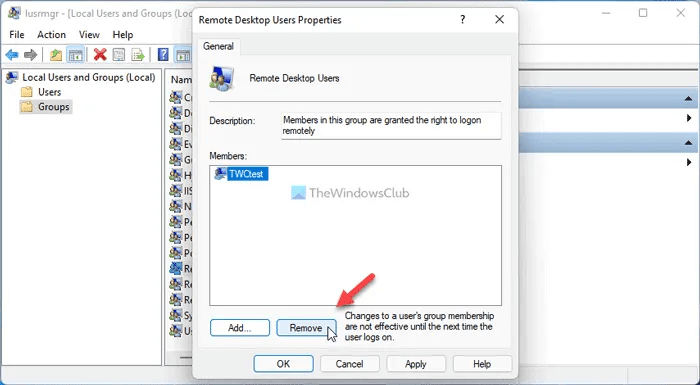
In case you want to remove a user, you can just perform steps 1 to 4. Then on the Remote Desktop Users Properties window, select the user and then click on the Remove button below it.
Add a user using the Command Prompt
Now, let us discuss how you can add or remove a remote desktop user on Windows 11 using the Command Prompt. So, just follow a few simple steps given below:
- Press the Windows + R key combination to launch the Run dialog box.
- Enter cmd in the dialog box.(cmd: Command Prompt)
3. Now, press the Ctrl + Shift + Enter hotkey to launch the Command Prompt with the administrative privileges.
4. Tap Yes to the User Account Control prompt.
5. Then, just paste the following control on the Command Prompt window and hit OK.
net localgroup "Remote Desktop Users" "username" /add
Replace ” username” with the actual username of the account you want to add.
6. Close the Command Prompt Window.
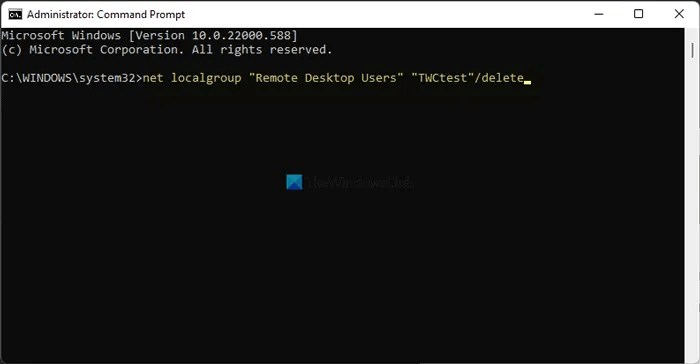
In case you want to remove a user using the Command Prompt: You just need to launch the Command Prompt with the admin privileges and enter the following command:
net localgroup "Remote Desktop Users" "username" /delete
Here, again you will need to replace the ” username” with the actual username.
Also Read: How To Set Up Microsoft Family App On Windows 11
Wrapping Up
So, that’s it for now. This is how you can use the remote desktop users on your Windows 11 PC. So, go ahead and try these methods. If you face any difficulties while doing so, do let us know in the comment section. We would love to help you!


