


 Header Through Cloudflare")


This article will guide you through the steps required to add an additional finger to the fingerprint recognition Sign-in in windows 11.
You can add as many fingers as you want to the fingerprint recognition system on Windows 11. For Sign-in, the System will catch only those already registered fingers. Additionally, adding more fingers in the fingerprint sign-in in Windows 11 is as easy as Setting up Fingerprint recognition for the first time.
As we all know, Windows Hello allows users to log in to their device in three ways including Facial Recognition, Fingerprint Recognition, and PIN. Also, Windows hello provides a more secure and personal way of logging in to the users.
Also Read: Set Up Facial Recognition Sign-in For Account In Windows 11
Add Finger to Fingerprint Recognition- Windows 11( At a Glance):
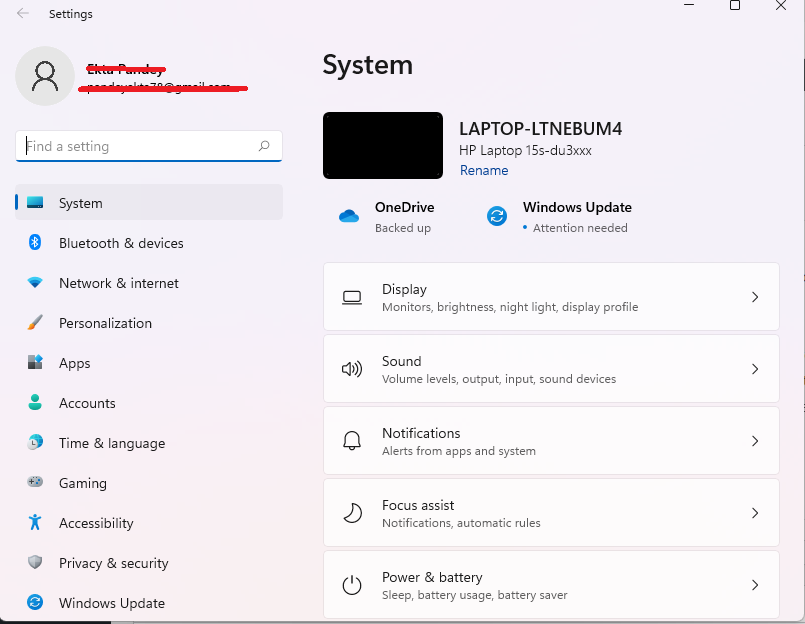
- Go to the System Settings on your Device. Press the Windows+i key to go to Settings.
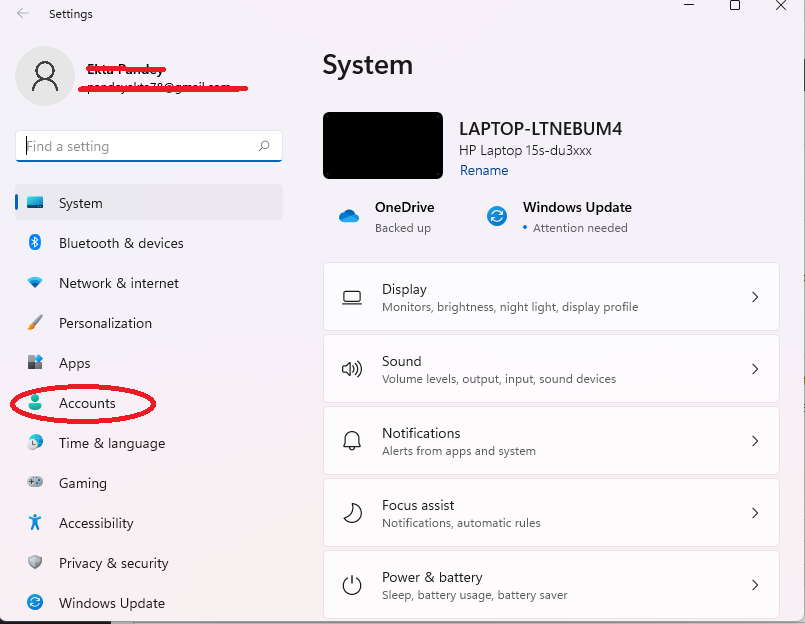
- Click Accounts on the Settings Pane(Left side).
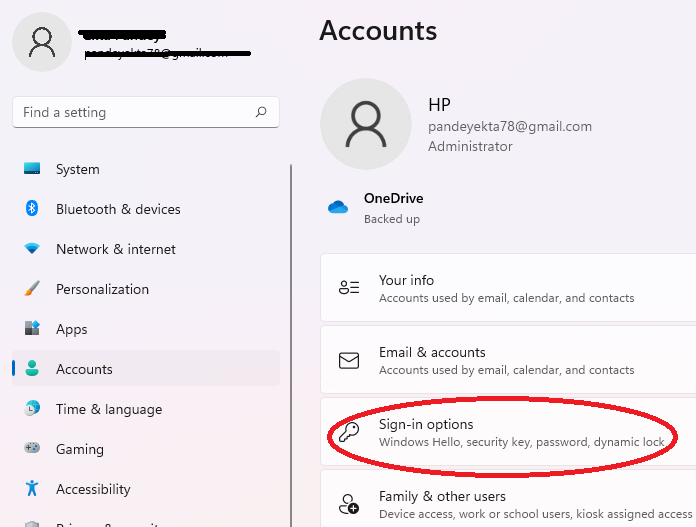
- Then, tap Sign in options from the sidebar on the right side.
- Then Select Fingerprint Recognition.
- Under Fingerprint Recognition, Click on Add a finger.
- Fill in Your Windows Hello PIN.
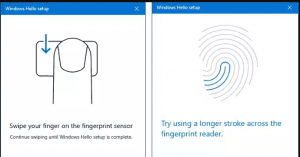
- Lastly, Swipe Your finger on the fingerprint sensor until windows get a full reading.
Also Read: Best 10 Ways Surface Shines On Windows 11
In detail
The steps to add a finger to the Fingerprint Recognition Sign-in in windows 11 are given below:
- Go to the Settings on your device. To go to Settings, simply press Windows key+ I. Alternatively, You can tap-open the Search icon from the taskbar. Then, Type settings in the search box and click the Settings icon.
- Next, Tap the Accounts option from the Sidebar on the left side of the Settings window.
- Then, Select Sign-in Options from the right pane.
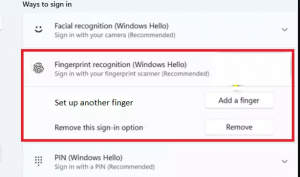
- From the Sign-in options menu bar, expand the Tap Fingerprint Recognition( Windows Hello) option.
- Under Fingerprint recognition, Choose Add a finger option next to Set up another finger.
- Next, Fill in your windows Hello PIN to proceed further,
- Lastly, you will be asked to Swipe the finger you want to add to the fingerprint Sensor. Swipe your finger until the windows get a full reading of your finger’s print.
- In the end, you will get a message of All set, and the option to Add Another finger will. So, to add another finger, click on Add another finger option. Again, Swipe your finger on the fingerprint sensor until windows get a full reading of your fingerprint print.
- This way, you can add as many fingers as you want. And once added and registered, you will be able to access your device through that finger.
Also Read: How To Show Clock on Taskbars on All Displays in Windows 11
There are two ways to add a finger to fingerprint recognition.
- You can add additional fingers while setting up the Fingerprint Recognition for the first time.
- You can also do it through your device’s Settings. Steps for this are given above.
Setting Up Fingerprint Recognition for the first time On Windows 11
Above, we talked about how to add an additional finger to the system of Fingerprint Recognition. Now, You will get to learn how to Set up Fingerprint Recognition for the first time.
- Head to Settings on your Device. Press the Windows+I key or open the Search app and type Settings in the Search Box.
- Then On the Settings screen, select the Accounts option from the left pane.
- Further, Click on the Sign-in options from the right side.
- Under Sign-in options, Select Fingerprint recognition.
- Next, Click on Set-up under Facial recognition.
- Then tap Get Started on the Bottom-left corner( windows Hello Setup page)
- Enter your windows hello PIN.
- Place your finger on the fingerprint sensor and follow on-screen instructions.
- In the end, you will get an All Set message.
Congratulations! Your fingerprint Setup recognition is complete. If you want to add another finger, Click on Add another finger, otherwise tap Close.
Read: 25 Search Engines Other Than Google
Steps to Setup Facial Recognition On Windows 11:
As already mentioned, Windows Hello allows users to log in to their devices using different methods. So, along with fingerprint recognition, you can also enable Facial recognition for system login. Steps to enable Facial Recognition on Windows 11 are given below:
- Go to Settings on Your Device. You can go to settings by Pressing Windows key +I. Else, you may go to Settings by clicking on the Search icon and typing it in the Search box.
- Now, Select Accounts on the Sidebar ( Left Side). Further, you have to click on the Sign-in options under Accounts.
- Next, Click on the Facial Recognition tile under Sign-in options and tap Set up.
- A Windows Hello Setup Window will display on your screen. Click on the Get Started option on the lower-left corner of the window.
- Then, you have to Look At the Webcam. It will scan your face for recognition and storing data.
- In Windows Hello, If you haven’t set up a PIN yet, you will now be asked to set one. So, you need to set up a PIN.
- Now, you will have the option to Access the webcam once again in case you want to improve recognition. This step is optional. This is only to help your device to recognize you either way( With or Without glasses).
- In the end, tap Close at the bottom of the screen.
Conclusion
That’s it for now. Now, you can easily add as many fingers as you want to Fingerprint Recognition in windows 11 for Sing-in by just following a few easy steps. Also, this guide talks about the steps to set up facial recognition for login in windows 11.


