Capture screenshots on Mac is a convenient tool to collect the information. A crucial skill for any Mac user, whether it’s tickets to a concert, an email you just received, or even just a quick photo of your desktop, is taking a screenshot.
If you have a Mac, there are three ways to snap a screenshot with keyboard shortcuts— plus a fourth approach if you have a MacBook with a touch bar. This guide will show you the numerous keyboard shortcuts you’ll need to snap a screenshot on your Mac. We’ll also walk you through what you can do with those screenshots once they’ve been taken. Apple provides several choices for quickly saving, deleting, and opening a screenshot for annotation.
Without installing any third-party software, the Mac has a variety of alternatives for taking screenshots. You can screenshot of the entire screen, a clean snapshot of a selected window, or a screenshot of specified parts.
A built-in feature also allows you to record a voiceover using your microphone, headset, or AirPods.
We’ll show you how to take screenshots on a Mac in various ways so you can choose what works best for you.
If you have the free Screenshot tool with the latest versions of macOS, it’s probably the easiest approach to acquire the exact image or video you’re looking for. However, we’ll teach you how to use Mac keyboard shortcuts for snapshots and screen recordings and how to capture your Mac’s screen using the built-in QuickTime Player.
Select your options in Mac’s Screenshot app
The Screenshot app can be launched in one of three ways:
- From the Launchpad platform.
- Shift-Command-5
- It can be found by pressing Command-Space and looking for it.
With macOS Mojave 10.14 or later, the Screenshot app is included. (To find out what version you’re running, go to Menu> About This Mac. If you don’t have the Screenshot software, proceed to the section below for Mac keyboard shortcuts to take a screenshot.)
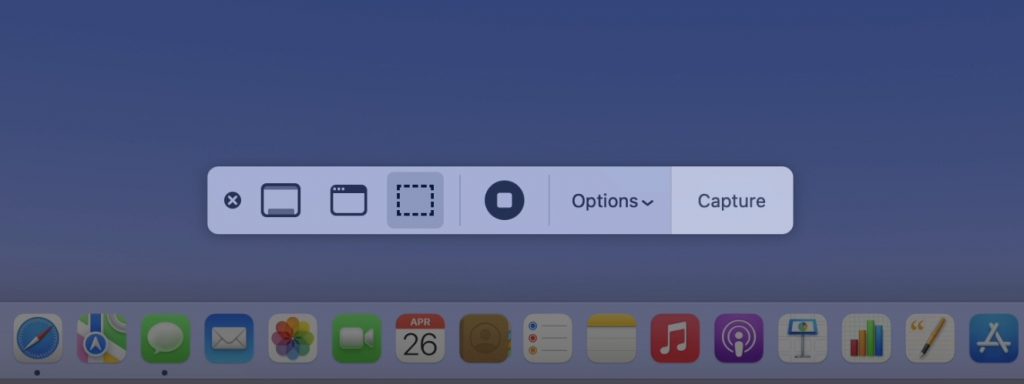
A toolbar will display on your screen after you run the Screenshot app. You can choose the screenshot you wish to take using the toolbar’s various buttons. The three buttons on the left will take a screenshot of the entire screen, a single window, or a specific screen area. The following two buttons will record a video of the whole screen or a portion.
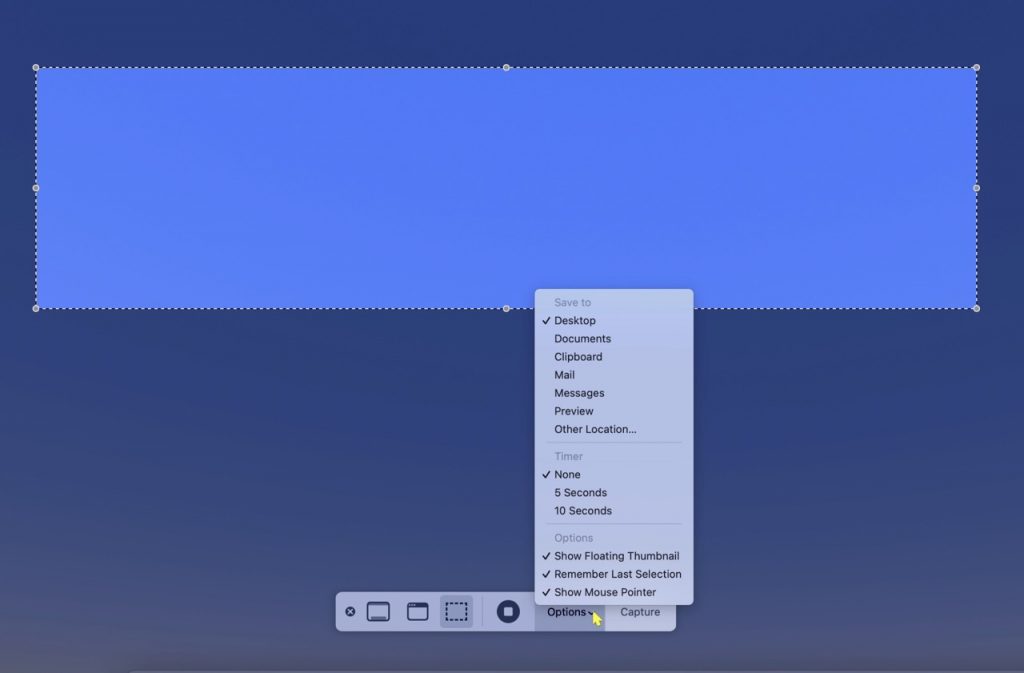
After that, there’s the Options button. When you click on it, a context menu appears, allowing you to adjust the following settings:
Save to: You can save the screenshot to a folder like Desktop or Documents, send it to someone using the Mail or Messages applications, open it in Preview (for still images) or QuickTime Player (for films), or copy it to the Clipboard to paste somewhere else.
Timer: This Option allows you to choose whether to take a screenshot right away or after a five- or ten-second delay.
Microphone: This allows you to choose whether or not to incorporate audio in your project (for video screen captures). You can choose which microphone to use if you want to add sounds.
Options: You can choose whether or not you want to get a preview of the snapshot after you take it in this area (Show Floating Thumbnails). It also allows you to remember your previous settings (Remember Last Selection) and whether or not the mouse cursor remains in the snapshot or screen capture (Show Mouse Pointer or Show Mouse Clicks, respectively).
Capture screenshots on Mac.
Capture Entire Screen with Screenshot App
Select the Option on the left and click Capture to capture the entire screen.
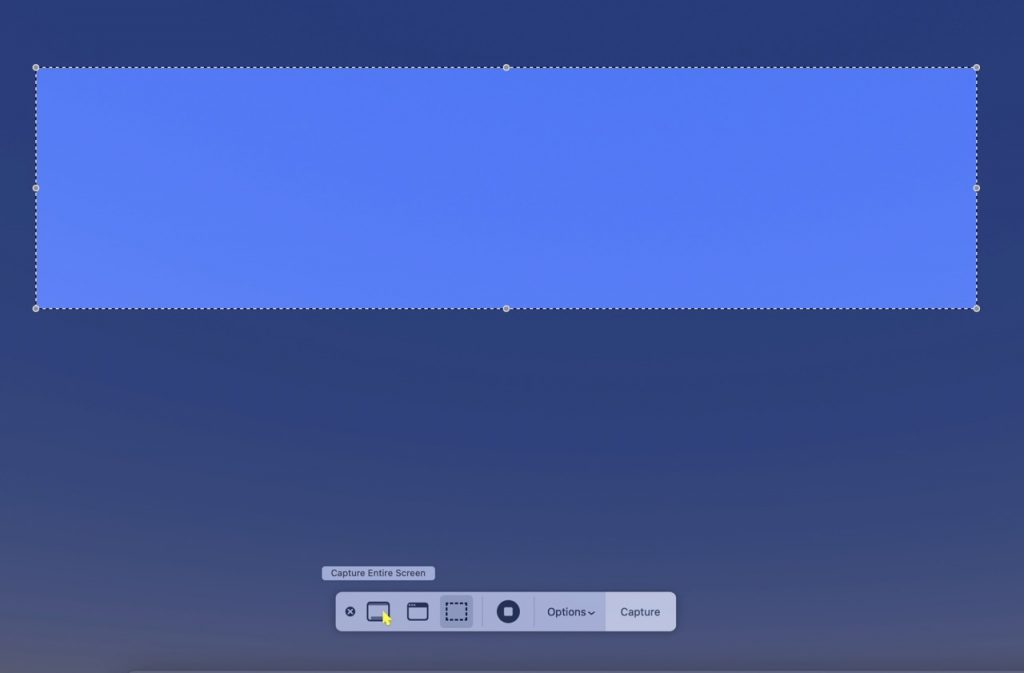
To take a screenshot of a specific window, go to the left, select the second mode, and click on the window you wish to capture. Hold Option while clicking if you don’t want the window shadow to appear in your screenshot.
Note that this screen capture mode is not limited to Windows. You can also capture the Dock, menu bar, desktop (with or without desktop icons), and other features on your Mac.
Select the third method from the left to capture a specified screen portion. Then resize and/or drag the box to highlight the desired region. Finally, press the Capture button.
Make a Mac screen recording.
From the left, select the fourth mode, then click Record to record the complete Mac screen. (If you have more than one screen, you must choose one.)
Click Options and pick the device to record sounds from your Mac’s microphone or linked AirPods. Click the Stop symbol in the navigation bar when you’ve finished recording.
Select the fifth method from the left to record a specific screen portion. Then, before pressing Record, move and resize the box to highlight the region you desire. The screen section that isn’t being recorded will be dimmed while your Mac is recording. Click the Stop symbol in the navigation bar when you’re finished recording.
How to use Markup to edit a Mac screenshot
If you save your screenshots to the Desktop or Documents with the Show Floating Thumbnail option checked, Apple’s Markup software allows you to alter the image.
A floating thumbnail will appear on the bottom right of your screen when you snap a screenshot. Move your cursor over the thumbnail and swipe it to the right to save it straight away.
To preview it and make immediate modifications, use the Markup app by clicking on the thumbnail. You may draw on it, add shapes, text, a signature, rotate it 90 degrees, crop it, and give it a description. Press Done to save it, Trash to delete it, and Share to share it over iMessage, Mail, AirDrop, and other services.
Keyboard shortcuts for taking screenshots.
You can use the Mac keyboard shortcuts to capture a screenshot quickly if you have an older version of macOS or if you need to grab a screenshot quickly:
Shift-Command-3: will take a screenshot of the entire screen.
Shift-Command-4: will pick a section of the screen. To choose a region, click and drag the pointer. When you release the mouse button, the screenshot will be taken. You can also hit the Space bar instead of clicking and dragging. Your cursor will change to a camera symbol, and everything you are hovering over will dim. To capture a specific window, click the Mac’s menu bar or anything else. If you don’t want the window shadow to appear in the screenshot, hold down Option as you click, just like before.
If your Mac has a Touch Bar, Shift-Command-6 will capture screenshots on Mac.
Note that if you have the Screenshot program installed on your Mac, these keyboard shortcuts will use the Screenshot app’s choices. Open the Screenshot program with Shift-Command-5 to modify the settings for saving your screenshot to the Desktop or the Clipboard.
Record your Mac’s screen with QuickTime Player.
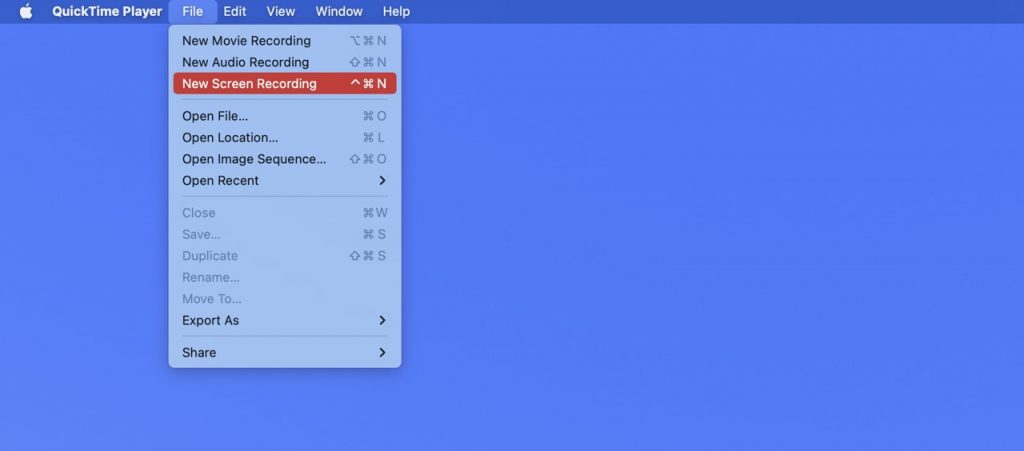
You can also use the Mac’s built-in QuickTime Player to record your screen. Open QuickTime Player from Launchpad or by searching for it with Command-Space. Select File > New Screen Recording from the File menu. Next, the Screenshot app’s toolbar or the QuickTime Player’s Screen Recording window will appear. After you’ve made your selections, click the Record button. Go to your Mac’s menu bar and click the round Stop icon to stop the recording.
Final Words:
Hence these are the methods that you can apply to capture screenshots on Mac. By default, all screenshots captured on a Mac are stored on the desktop. ‘Screen Shot (date) and (time).png’ is the title of these screenshots.
You can, however, alter the default location of saved screenshots at any time. Go to the macOS Screenshot app’s ‘Options’ Menu and make the necessary changes.


![The Apex Legends Digital Issue Is Now Live! Apex Legends - Change Audio Language Without Changing Text [Guide]](https://www.hawkdive.com/media/5-Basic-Tips-To-Get-Better-On-Apex-Legends-1-218x150.jpg)


