


 Header Through Cloudflare")


If you love to travel and explore new places, like shops to visit and restaurants to eat around, then the Apple Maps Guide will come in handy! Let’s explain how. Apple allows you to create guides in its native Maps app which helps you organize and refer to new places and shops in that particular location.
What’s interesting is that you can also share this guide with your family and friends don’t forget the general public who can draw inspiration from it when they visit that area. Moreover, it is also possible to add your daily travel route so that you can discover all the shops or restaurants on the way. Looks fascinating right!
So without wasting any more time, let’s see how to create and manage your Apple Maps Guide. We’ll also see how to refer to a Maps guide created by someone else in that area.
Also Read: Apple Mail App Not Working On iPhone And iPad? Try These Fixes
How to create your guide on Apple Maps
Apple gives you the freedom to create any guide to your liking in Apple Maps. These guides can be ‘Favorite Ethnic Shops’ or ‘Top 10 Places to visit in Paris’. Besides, it just takes the touch of your fingertips to create a guide in Apple Maps. Let’s see how to create one!
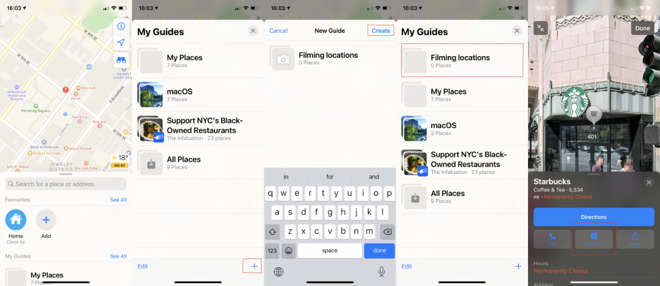
- Launch the Apple Maps app and swipe the toolbar at the bottom to reveal the Create New Guide button. Tap this button to create a new guide.
- Give a name to your Map Guide and tap the Create button. Now since your guide is ready, it’s time to add places in it!
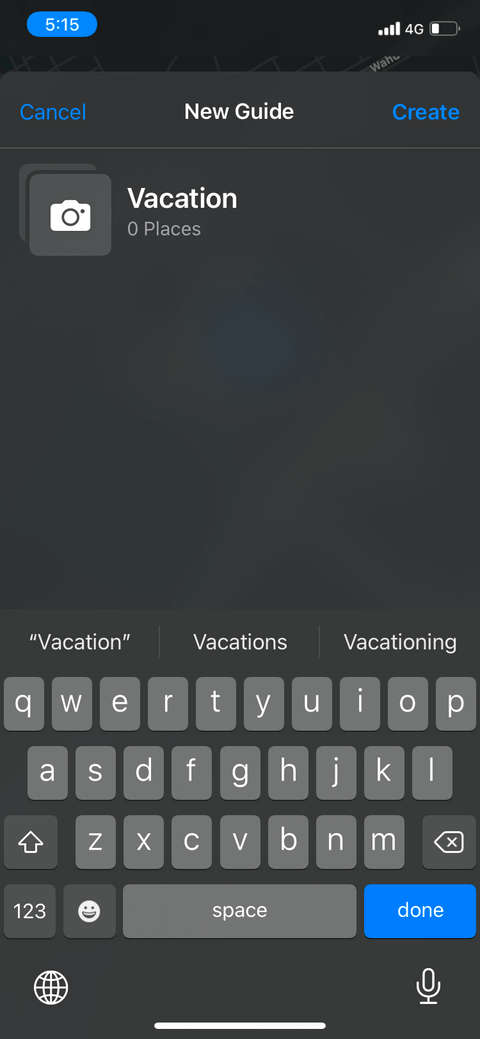
- When you will hit the create button, you’ll reach the home screen of Apple Maps. Scroll the Apple Maps to see all the Guides created by you until now. Tap the name of the guide you’ve just created.
- Now tap the ‘Add a Place’ button and hunt for places by their names or addresses to add here.
- After mentioning the place, tap the plus + symbol to add the destination in your guide.
Now mention all the destinations one by one in a similar manner. - You are free to add more places in this guide whenever you want to. As of now, if you are done adding the places here, tap your guide to save the destinations.
You’ll see that each place will have a different icon. This depends on the nature of the destination. For instance, gardens and parks are depicted by Flowers and Coffee Cups mark Coffee Shops.
Also Read: How To Create And Manage iCloud Shared Albums In iOS 15
How to edit your Apple Maps Guide
It’s is possible to fully customize the Apple Maps guide created by you. You can change the icon of your guide, give a new name to it or delete the places that you no longer need here. Let’s see how to customize a guide.
- Open Apps Maps Guide and swipe the name of the guide until it occupies the screen.
- Now look for the Edit button in the bottom-left corner and tap it to open the guide in edit mode.
To Edit Guide Icon: Tap the ‘Camera Icon’ on the guide icon to change the photo of your Guide Library.
To Edit Guide Title: Tap the ‘Edit Title’ option under the guide name.
Delete Destinations from Guide: Tap all the destinations that you want to delete. This will highlight the circle next to it in green. After selecting all the destinations, tap the Delete All option.
How to share your guide with other users
If you are a travel freak, chances are you’ll be creating lots of travel and destination guides when you visit new places. You can share these with other travelers and even your family. Let’s see how to share your Maps guide.
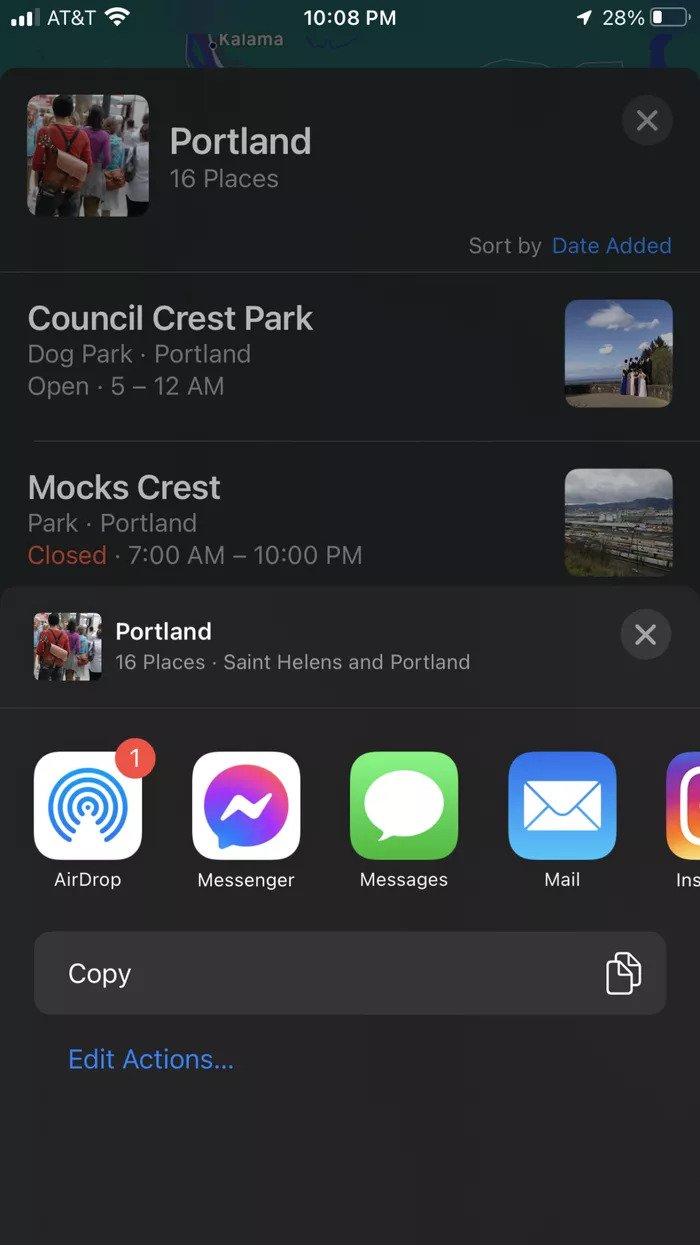
- Launch the Apple Maps by tapping the icon and scrolling down to see a list of all the map guides created by you. Tap the guide that you want to share with someone.
- Now tap the ‘Share’ icon in the middle of the screen when your guide opens.
- Finally, you need to select how you want to share the Maps guide with others. It’s possible to AirDrop, or use a messaging app, iMessage, or Mail app to share the guide.
View Guides Created by other People
It’s also possible to view and take inspiration from map guides in that area which have been created by other people. Let’s see how:
- Type the name of that city in the Search bar for which you want to search the guide.
- Now swipe up the screen and look for the ‘Explore Guides button’ at the bottom of the screen.
- Now open any guide and if you like any destination and want to add it straight to your guide, just press the + icon.
Also Read: iCloud Storage: How To Delete Files, Photos, And Backup?
Conclusion
Apple Maps Guide is a very handy way to organize all the places that you wish to visit while you are traveling. On the other hand, you can also share the guide you’ve created so that others can get inspiration from it. This is a very handy feature for all travelers who like to explore places. Now that you know how to create and share an Apple Maps guide, it’s time to start creating one of your own!


