


 Header Through Cloudflare")


Get to know how to enable and disable the File Explorer Quick Access feature on your Windows 11 PC with ease.
Windows 11 is all about ease of use and productivity. To help you with searching the apps and quickly access the frequently used ones, Windows 11 has a directory within the File Explorer windows. Quick Access Menu displays the list of the apps and folders that you’ve accessed recently as well as those that you tend to visit frequently. This way all the folders important to you such as the Documents, Download, and Desktop folder are in one place and you can reach out to them from one place.
Also Read: How To Fix Bluetooth Audio Delay In Windows 11

This handy feature was first introduced in Windows 10 and before that, a similar feature was available as the ‘Favourites’ folder within the File Explorer. To use the Quick Access feature in Windows 11, you first need to enable it since it is disabled by default in Windows 11.
To help you with enabling and disabling the Quick Access feature in Windows 11 we have brought this quick guide to your disposal. So keep scrolling to find out.
Also Read: How To Fix Black Screen With Mouse Cursor Issue In Windows 11
How to Enable Quick Access Feature in File Explorer
Follow these steps to Enable Quick Access Feature in File Explorer without any hassle.
- First of all, Use the Windows + E shortcut to launch the File Explorer window on your Windows 11 PC. Alternatively, you can also go to the Start menu and type it in the Search Bar and click on the first result to see.
- Once you are in the File Explorer window, click on the ellipsis icon present on the toolbar.
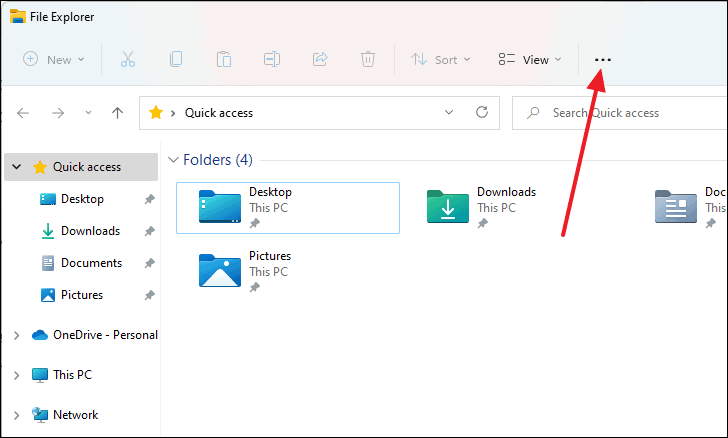
- This will fire up a small menu. Choose the ‘Options’ option listed here.
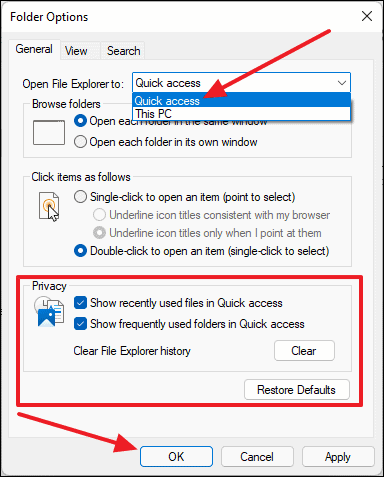
- This will open up the ‘Folder Options’ pop-up. Here you will see the option to turn on the Quick Access feature.
- To do it, locate the ‘Open File Explorer to:’ label and expand the drop-down menu next to it.
- Now select the ‘Quick access’ option in the drop-down menu.
- Next, find the Privacy tab under the ‘Folder Options’ pop-up and Enable or Disable the recent and frequently used files and folders option according to your preference.
- If you want to see the recent and frequently used files and folders, simple check the boxes for ‘Show recently used files in Quick access’ and ‘Show frequently used folders in Quick Access. But if you do not want to see the frequently used files or folders, just uncheck these options and you’re good to go.
Disabling the Quick Access in File Explorer from the Registry Editor
If you want to disable the Quick Access option in File Explorer, you can do it through the Registry Editor. Let’s see how to go about it.
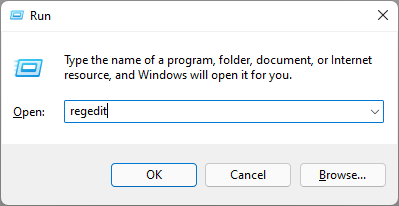
- First of all, use the Windows+R shortcut to bring up the Run dialog box on your PC.
- When the Run dialog box appears, type ‘regedit’ within the command box and then press Enter key. This will fire up the Registry Editor on your Windows 11 screen.
- Now copy and paste the following command in the command line window and press the Enter key.
HKEY_CURRENT_USER\SOFTWARE\Microsoft\Windows\CurrentVersion\Explorer\Advanced - Once you do it, a string label known as ‘LaunchTo’ will appear on the right side of the registry window.
- Next, you need to double-click on this label so that a small window opens up on the screen.
- Now see the number 0 number for ‘Value data’ and press the OK button to apply the changes.
- When the Registry Editor window closes, you will have to restart your Windows 11 PC and the Quick Access section will disappear from the File Explorer window.
Permanently remove the Quick Access feature using Registry Editor
It is also possible to permanently remove the Quick Access folder from the Navigation pane of the File Explorer window. To do this, you will have to edit the registry editor. Let’s see how to do it:
- Firstly, First of all, use the Windows+R shortcut to bring up the Run dialog box on your PC.
- When the Run dialog box appears, type ‘regedit’ within the command box and then press Enter key. This will open the Registry Editor window on your Windows 11 PC.
- Now copy-paste the following path in the address bar of the Registry Editor and press the enter key.
Computer\HKEY_LOCAL_MACHINE\SOFTWARE\Microsoft\Windows\CurrentVersion\Explorer - In the next window that appears, right-click anywhere on the space and choose the New option from the ‘Context’ menu.
- Next, choose ‘DWORD (32-bit) Value’ from the submenu to create a new string here.
- Now rename this string as ‘HubMode’
- Next, double-click on this string to bring up a new window.
- Now see the 1 value in the ‘Value data’ text box and press the Ok button to save the changes.

- Finally, restart your PC to apply the changes.
Conclusion
That’s how you can enable and disable the Quick Access feature of File Explorer on the Windows 11 PC easily. If you find this how-to guide helpful, don’t forget to share it with others. With this, signing off!
Also Read: Right-click not working in Windows 11? Try these fixes


