


 Header Through Cloudflare")


In this article, we will learn how to fix Windows update error 0xc8000247.
Many users have reported the error code 0xc8000247 during a Windows update. It usually occurs while installing specific updates. Most of the affected users experienced this issue on Windows 7. So, in this article, we have discussed a few effective solutions that can help you fix Windows Update Error 0xc8000247.
How to fix Windows Update Error 0xc8000247?
- Run the Windows Troubleshooter
- Run SFC and DISM scan
- Update IRST Driver
- Get rid of overprotective antivirus
- Perform a clean boot
Now, let us discuss the steps to fix Windows Update Error 0xc8000247 one by one in detail. You can try all these solutions in no specific order. One of them is sure to fix your issue.
1. Run the Windows Troubleshooter
The first and the most common solution you can try is to run the Windows troubleshooter. It is an in-built tool that can help you fix many issues on your Windows PC. So below is how to run the Windows troubleshooter:
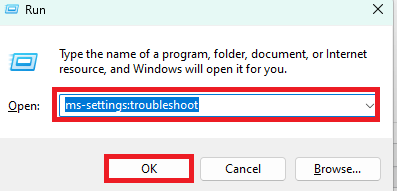
1. Press Windows + R key to open the Run dialog box. Enter ms-settings:troubleshoot in the dialog box. Then, press OK.
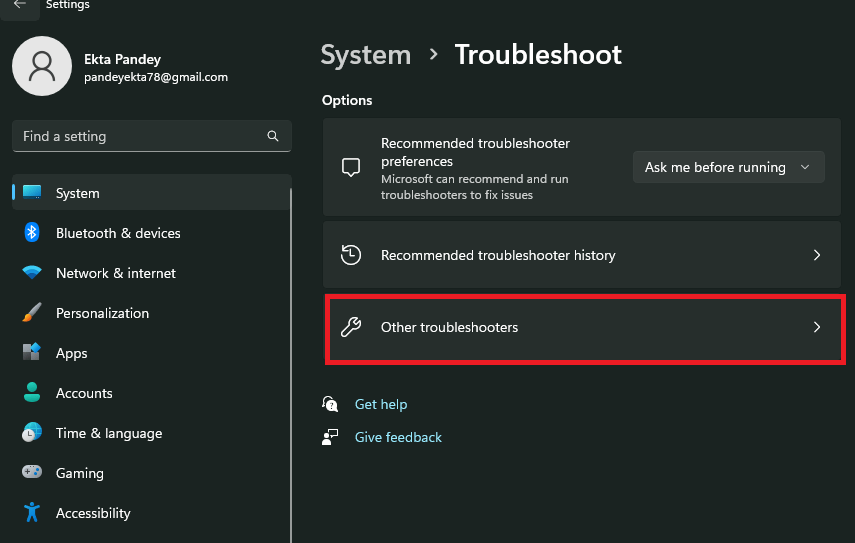
2. On the Settings Window, click on Other troubleshooters.
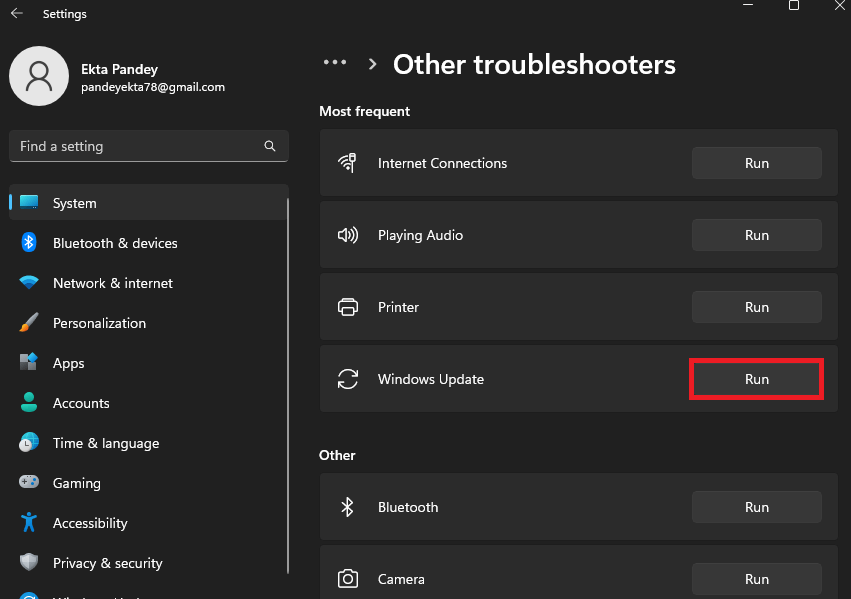
3. Click on Run next to Windows Update. This will run the Windows Update troubleshooter.
4. If a feasible fix is found, you’ll be sent to a new window where you can click Apply this fix to begin implementing the recommended repair method.
To perform the suggested fix, you will have to follow the on-screen instructions. Once done, restart your PC to see if the issue has been fixed. In case the issue persists, kindly try the next solutions given below.
Also Read: Steps To Perform A Clean Boot On Windows 11 ( Simplified)
2. Run SFC and DISM scan
The next fix you can try is to run the SFC and the DISM scan. So, let us perform these scans one by one. Let us start with the SFC( System Files Checker ) first:
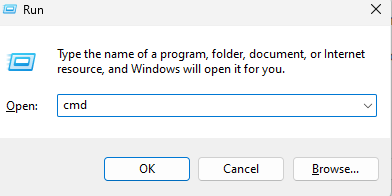
- Press Windows + R key to launch the Run dialog box.
- In the run dialog box, enter cmd.
- Press Ctrl+Shift+Enter to launch the Command Prompt as an administrator.
4. Enter the following command in the command prompt and press Enter.
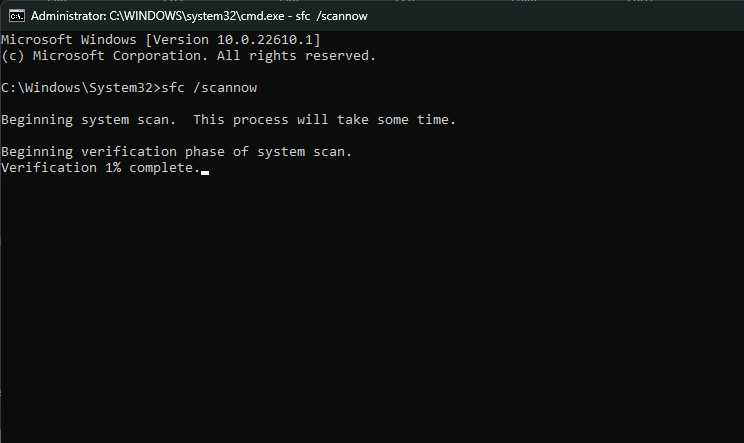
sfc /scannow
5. Now, this process will take time. So, wait until the verification is completed 100%. You will get one of the following results. Confirm the result you got and act accordingly.
SFC scan results
- Windows Resource Protection did not find any integrity violations – It indicates that the system did not find any missing or corrupted files.
- Windows Resource Protection could not perform the requested operation – It indicates that an error took place during the scan. So, perform an offline scan.
- Windows Resource Protection found corrupt files and successfully repaired them. Details are included in the CBS.Log %WinDir%\Logs\CBS\CBS.log – It means that the system found corrupted files as well as successfully repaired them.
- Windows Resource Protection found corrupt files but was unable to fix some of them. Details are included in the CBS.Log %WinDir%\Logs\CBS\CBS.log –It indicates that the user must repair the corrupted files manually.
Run DISM scan
If you couldn’t resolve the issue with the help of an SFC scan, you can try a DISM scan as the next solution. So, to do this, follow a few simple steps given below:
- Follow steps 1 to 3 of the SFC scan above.
- In the next step, enter the following command and press Enter.
DISM /Online /Cleanup-Image /RestoreHealth
Also Read: How To Remove System Requirements Not Met Watermark On Windows 11 Desktop
3. Update IRST Driver
Sometimes, this error is also caused due to outdated version of the Intel Rapid Storage Technology Driver(IRST). So, another solution you can try is to update the IRST Driver. Below is how to do it:
- Go to Intel.com
- Download SetupSRT.exe
- Open the file and follow on-screen instructions to install it on your device.
- Check if the issue has been fixed. In case the problem persists kindly, try the next solutions given below.
Also Read: Fix System Restore Error 0x8000FFFF Catastrophic Failure On Windows 10/11
4. Get rid of the overprotective antivirus
Sometimes, the third-party antivirus on your PC fails to identify a particular program and mark it as a threat. Likewise, the overprotective antivirus on your PC may also be the reason behind the Windows update error code 0xc8000247.
To get rid of this issue, you can try disabling the real-time protection on your antivirus. You can just turn on the real-time protection of your antivirus during the installation. In case, this doesn’t work, you can uninstall the antivirus as a whole. After that restart your PC to see if the issue has been fixed.
Also Read: How To Change Taskbar Location On Screen In Windows 11
5. Perform a Clean Boot
Another fix you can try is to perform a clean boot. After performing the clean boot, reboot your PC and see if the issue has been fixed.
Also Read: How To Customize OEM Support Information In Windows 11
CONCLUSION
So, these are the various ways to fix the Windows Update error code 0xc8000247. Go ahead and try these fixes in no specific order. If you face any difficulties while doing so, do let us know in this comment section. We would love to help you.


