


 Header Through Cloudflare")


")
In this tutorial, we will explain how to install macOS Ventura on a separate partition on Mac.
Apple has finally introduced the macOS Ventura at the WDCC 2022 event, and its public beta is already available for download. The good news is that you can install macOS Ventura on your Mac and run it along with another macOS version. To achieve this, we will have to partition the Mac disk, and in the first volume, the current macOS version will run. The newly created volume will run the macOS Ventura. Let’s see how to install and run macOS Ventura on a new volume on Mac. But first, we need to create a separate macOS Ventura volume.
Before installing the latest macOS version, we need to create a separate volume. This is necessary because macOS Ventura is still in the beta phase and bugs are present in it. These underlying bugs create several technical glitches, making the operating system unstable. In the developer beta phase, any operating system is not reliable, and you are likely to experience several app crashes.
To avoid such problems, it is sensible to install macOS Ventura on the second volume instead of the main volume. When successfully installed, the primary hard disk volume will have the stable macOS Monterey OS along with all the data stored on your Mac. The newly created volume will house the latest macOS Ventura.
Also Read: macOS Ventura: How Is It Different From All Other versions
How to create separate volume for macOS Ventura
Now that we know what it is important to create a new volume before installing macOS Ventura, it’s time to create a new volume on your Mac. Here is the step-by-step procedure to create a new volume on your Mac.
- Launch Disk Utility on your Mac currently running on macOS Monterey.
- Choose the main APFS volume from the left sidebar located on the left of the Disk Utility window. The default name of the APFS volume will be Macintosh HD.
- Press the Edit button and choose the Add APFS Volume option.
- You will have to assign a meaningful name to this volume.
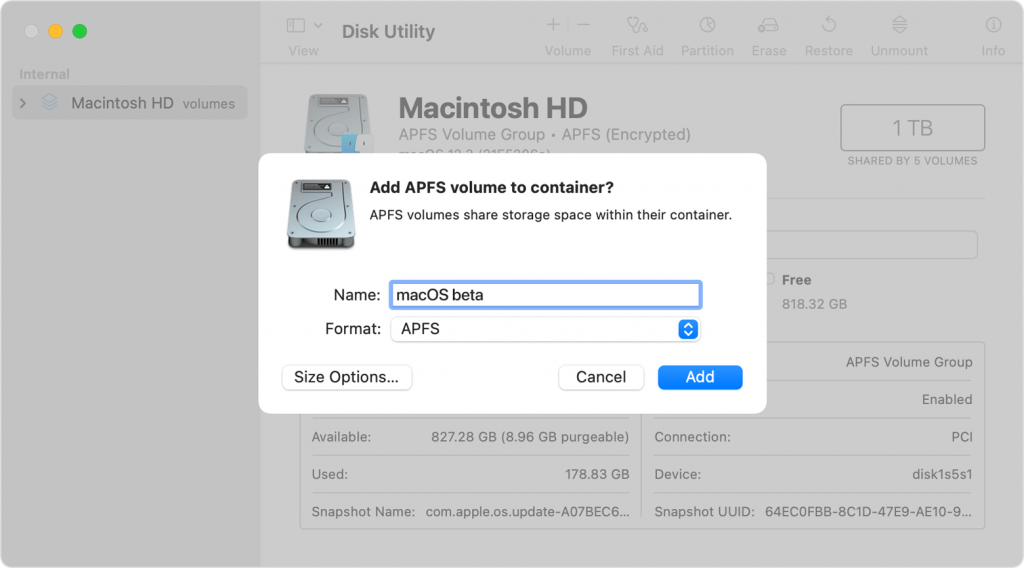
- In the Format type dropdown menu, choose the APFS option.
Note: The APFS volume can manage the site itself, but it is advisable to assign a minimum reserve size and quota size by clicking the Size Options.
Also Read: macOS Ventura: 6 Amazing Features Introduced
- After assigning the reserve size, press the OK button.
- Finally, press the Add button.
- After creating the new volume on your Mac, hit the Done button.
You have successfully created a new volume on your Mac, let’s see how to install macOS Ventura.
Before installing macOS Ventura, you need to make sure that your Mac meets the requirements prescribed by Apple to run the latest macOS version.
Also Read: Tips To Clean Up The Mac Startup Disk
How to install macOS Ventura on the newly created volume
Right now, macOS Ventura is in the developer beta phase. So, you cannot download it from the Apple App Store just like you’ve downloaded the previous stable versions of macOS Monterey, macOS Big Sur, macOS Catalina, or others.
- To download the developer version of the macOS 13, you need to head to the is developer.apple.com and sign in to your developer account.
- After signing in successfully, you can download the developer beta version of macOS Ventura.
- If you have not created a developer account, you can find third-party websites which provide beta profiles for download. However, this method is unethical and can damage your Mac.
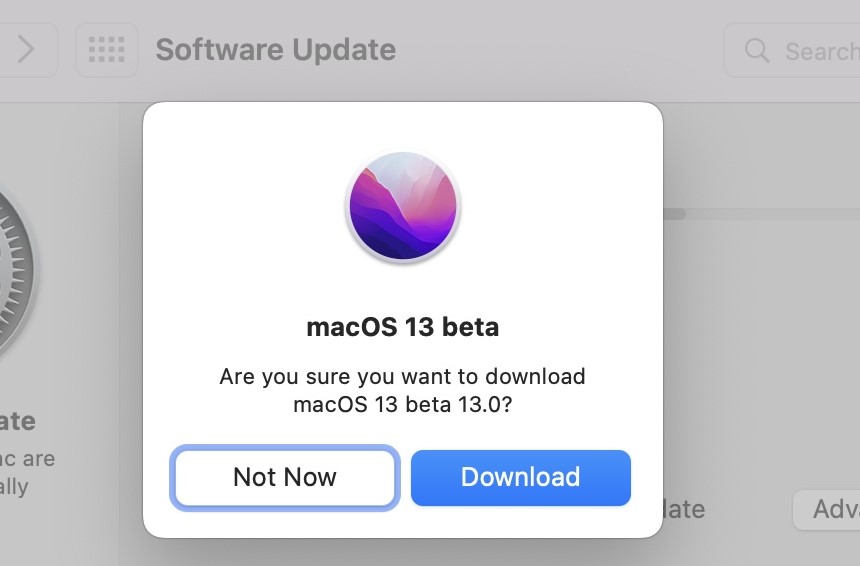
- After you install the beta profile, you will be taken to the Software Update screen inside the System Preferences window automatically.
Also Read: 8 Ways To Use The macOS Recovery Tool On Mac
- Press the Upgrade Now button and wait until the massive macOS finishes downloading.
- After the download is finished, the macOS installer will automatically pop up on the screen.
- Press the Continue button and choose the newly created volume present on the window saying- macOS 13 beta will be installed on the disk.
- If that volume is not listed, press the Show All Disks option.
- After you select the newly created volume, press the Next button.
- Next, choose a user to assign as the owner of the newly created volume.
- That’s all. Now, the installer will carry on the installation process of the latest macOS 13 on the newly created volume on Mac.
- After the macOS Ventura installation, a pop-up will appear on the screen stating to restart your Mac.
- During the booting, the Apple logo and a progress bar will appear on the screen several times.
- After the booting is completed, the setup screen will appear on your Mac. Finish the setup process to try out the latest features of macOS Ventura.
Also Read: Syncing Memoji From iOS To macOS
Conclusion
That’s all in this guide about how to install macOS Ventura in a different volume on your Mac. Now, go ahead and install the latest macOS Ventura on your Mac, and continue your work on the previous version available on a different volume.


