


 Header Through Cloudflare")


Recently purchased one of those vibrant-looking M1-powered iMacs? Or brought yourself an all-new MacBook Air or MacBook Pro? Regardless of the model you own now, you need a big Congrats! The experience of getting a new Macbook for the first time is beyond this world and you deserve a grand welcome in the Apple Family.
Whether you replaced an old Macbook or migrated from Windows to Mac, we know how excited you must be to tear open the packaging and see your precious Ac for the first time.
You would desperately want to boot your Mac for the first time and go through those setup wizards and finally get it working.
As you might be thinking, the setup process of Apple’s Mac is straightforward and you simply have to sail through the on-screen prompts. But if you are a newbie in Apple’s Ecosystem, you might get confused with Apple’s native language and what these terms mean.
Also Read: How To Set Up A VPN On Mac In 2021?

But you don’t need to worry at all! In this detailed guide, we will assist you in the process of setting up your new Mac. This will include turning on your PC, going through the setup, and how to migrate your data from an older Mac.
So let’s get started and get your new Mac functional!
Make sure that there is an internet connection
Before getting started on Mac’s setup process you need to ensure a stable internet connection or Wi-Fi along with its password. You will have to connect to the internet in the course of setting up a new Mac.
Also Read: How To Speed Up Safari Browser On Mac
Power on your new MacBook
Now you need to take your Mac out of its protective packaging ( if you’ve not already done that!) and plug one end of the charger in the wall socket and another in your Mac.
Even though Macbook carry about fifty percent charge when they are tested and packed, it is recommended to ensure a continuous power supply so that your Mac does not run out of battery during the installation process.
On the other hand, if you purchased a Mac Mini or a Mac Pro, you will have to connect its peripherals like Monitor, keyboard, or Mouse. At this point, you should not plug in your Mac Mini until the hardware is all set up.

Once completing the above steps it’s time to press the Power button on your Mac.
Run Mac’s Setup Assistant
After you turn on your Mac, you will see the Mac’s set up wizard on the screen. This is also known as Mac’s setup assistant and it simplifies Mac’s setup process by walking you through each step of your Mac.
You can even skip a few steps of the setup process if you want to attend to it later. This can be setting up your Siri or Touch ID.
Let’s see all the steps of the Wizard one by one below.
Setting up your Macbook
As mentioned above when you boot your Macbook for the very first time, you’ll see a Setup Assistant on the screen.
This wizard gives you options to set up your Mac, connect to the Wi-Fi network, and take you through the process of Account creation.
You can also access and read the legal documents and choose your privacy settings. For instance, you can enable the Find My option here.
There will be an array of set-up screens where you need to choose an option and press the Continue button. Let’s see all of them:
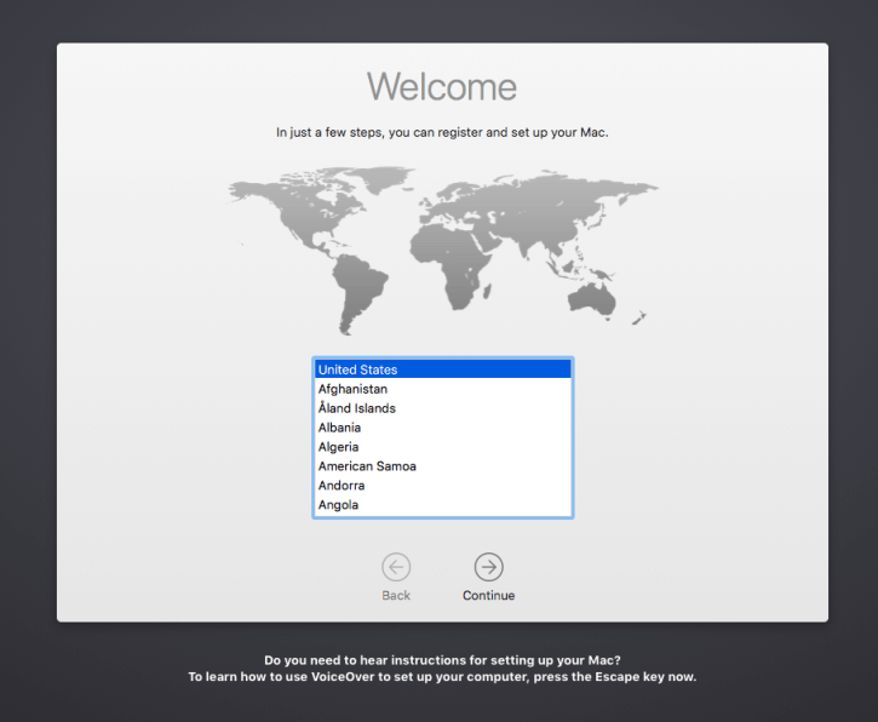
- On the first screen, you will see a World Map. Here you will have to choose your Country and hit the Continue button on the wizard. This is essential to sync your Mac’s click with the current time zone.
- Next, choose your keyboard according to your region. For instance, if you are in the United Kingdom you should choose the layout of the British Keyboard.
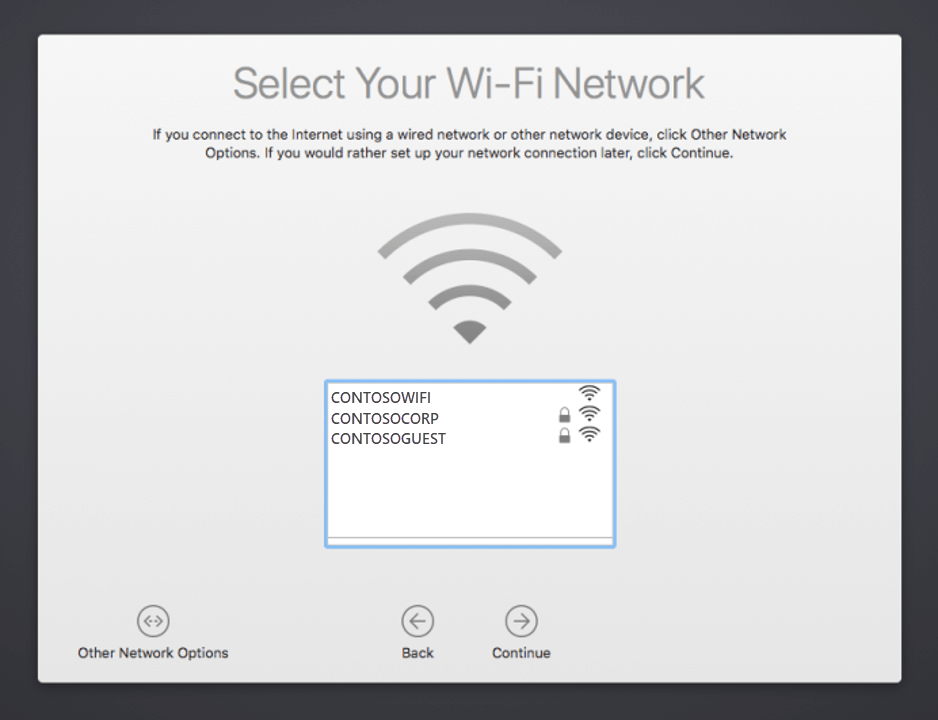
- After this, you should connect your Mac to a Wi-Fi network. Choose the SSID of your Wi-Fi network and enter its password in the setup assistant. If you don’t have an idea of the password of your Wi-Fi, you should look for it on the side of your router or you’ll find a card under the router with the password of your Wi-Fi.
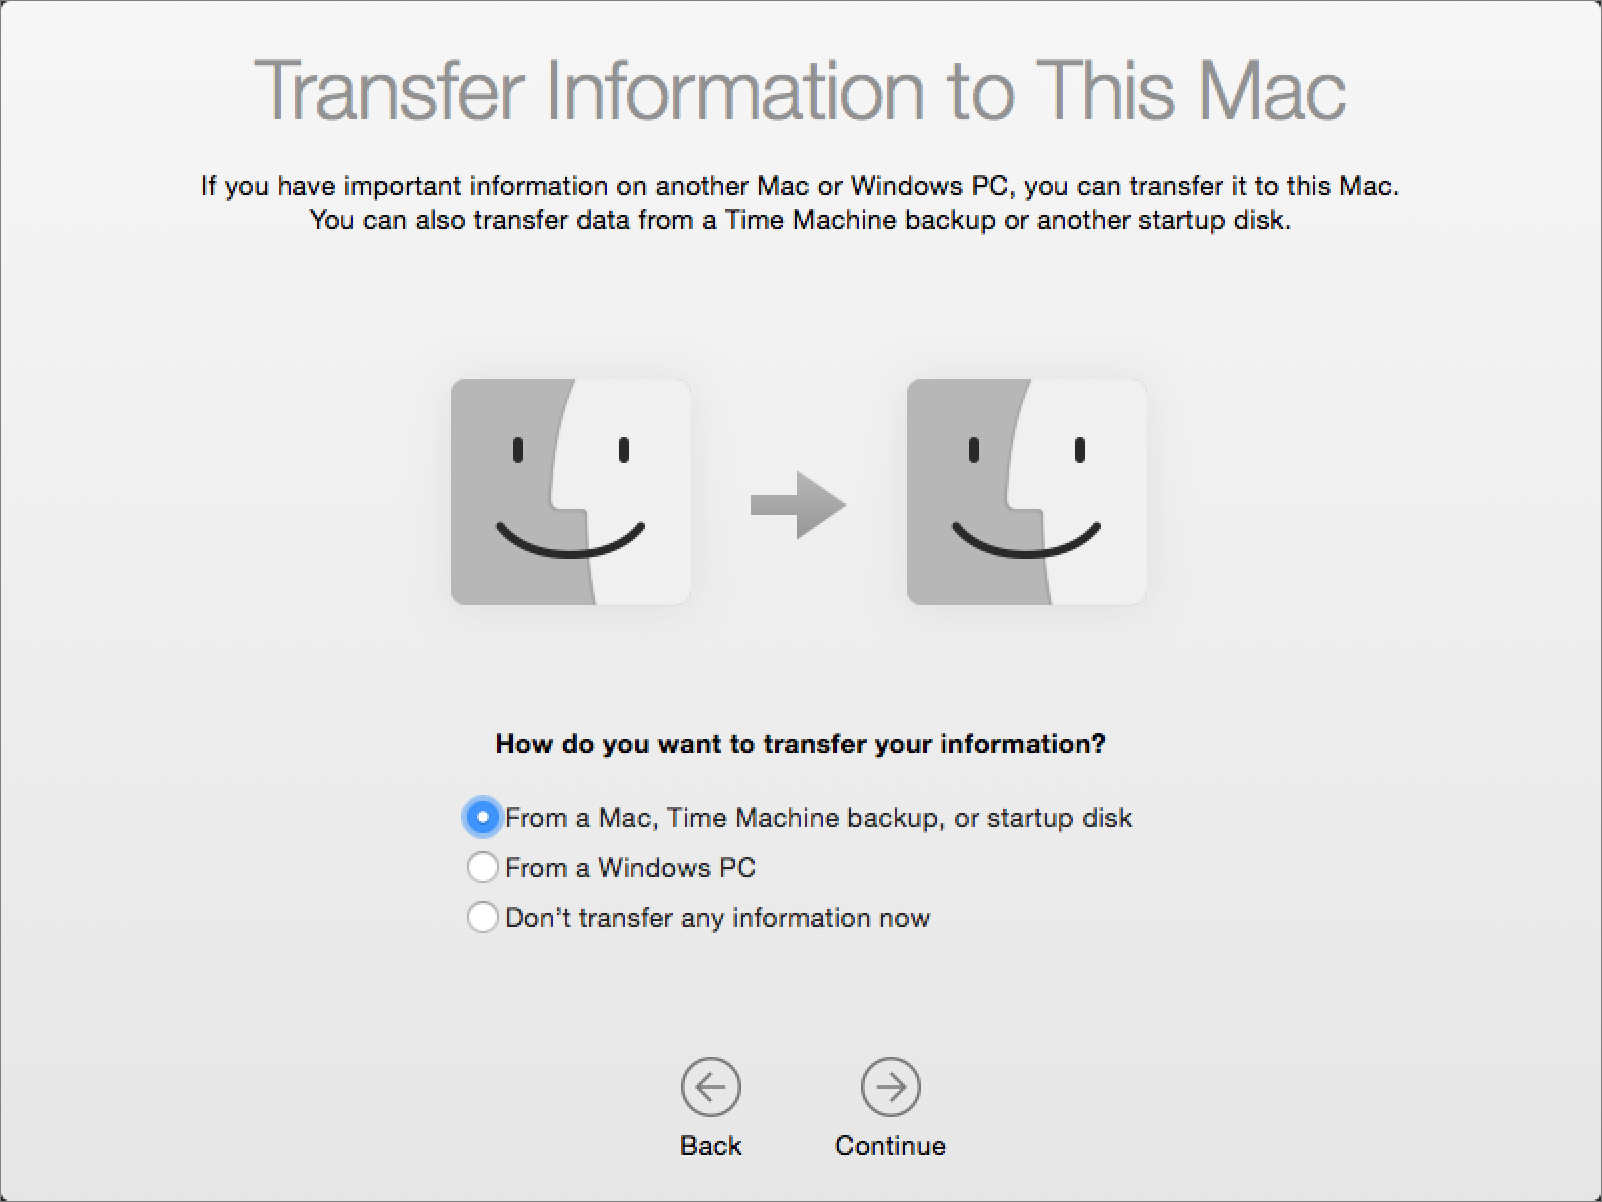
- At this moment you can transfer all your data along with the previous settings and preferences using the Time Machine Backup if you are moving from an old Mac. But keep in mind you should have created the Time Machine Backup of your old Mac to restore the backup here. Apple allows you to restore the Time Machine Backup through the Migration Assistant any time you want; even later. So if you don’t want to restore the backup as it takes some time, you can skip the Migration Assistant as of now. To skip the set of restoring Time Machine backup, simply press the ‘Not Now’ and ‘Continue’ buttons.
- In the next step, you have to enable the Apple Location Services such that your location can be accounted for. This setting is important so that ‘Apple Maps’ and ‘Find My’ can access your location. If you want to make use of these apps, it’s sensible to enable the Location Services here. But you can always skip the step if you want.
- Next, you’ll be taken to the ‘Data & Privacy’ window. It will inform you that Apple will notify you whenever they need to access your Personal Information. You simply have to click the Continue button here.
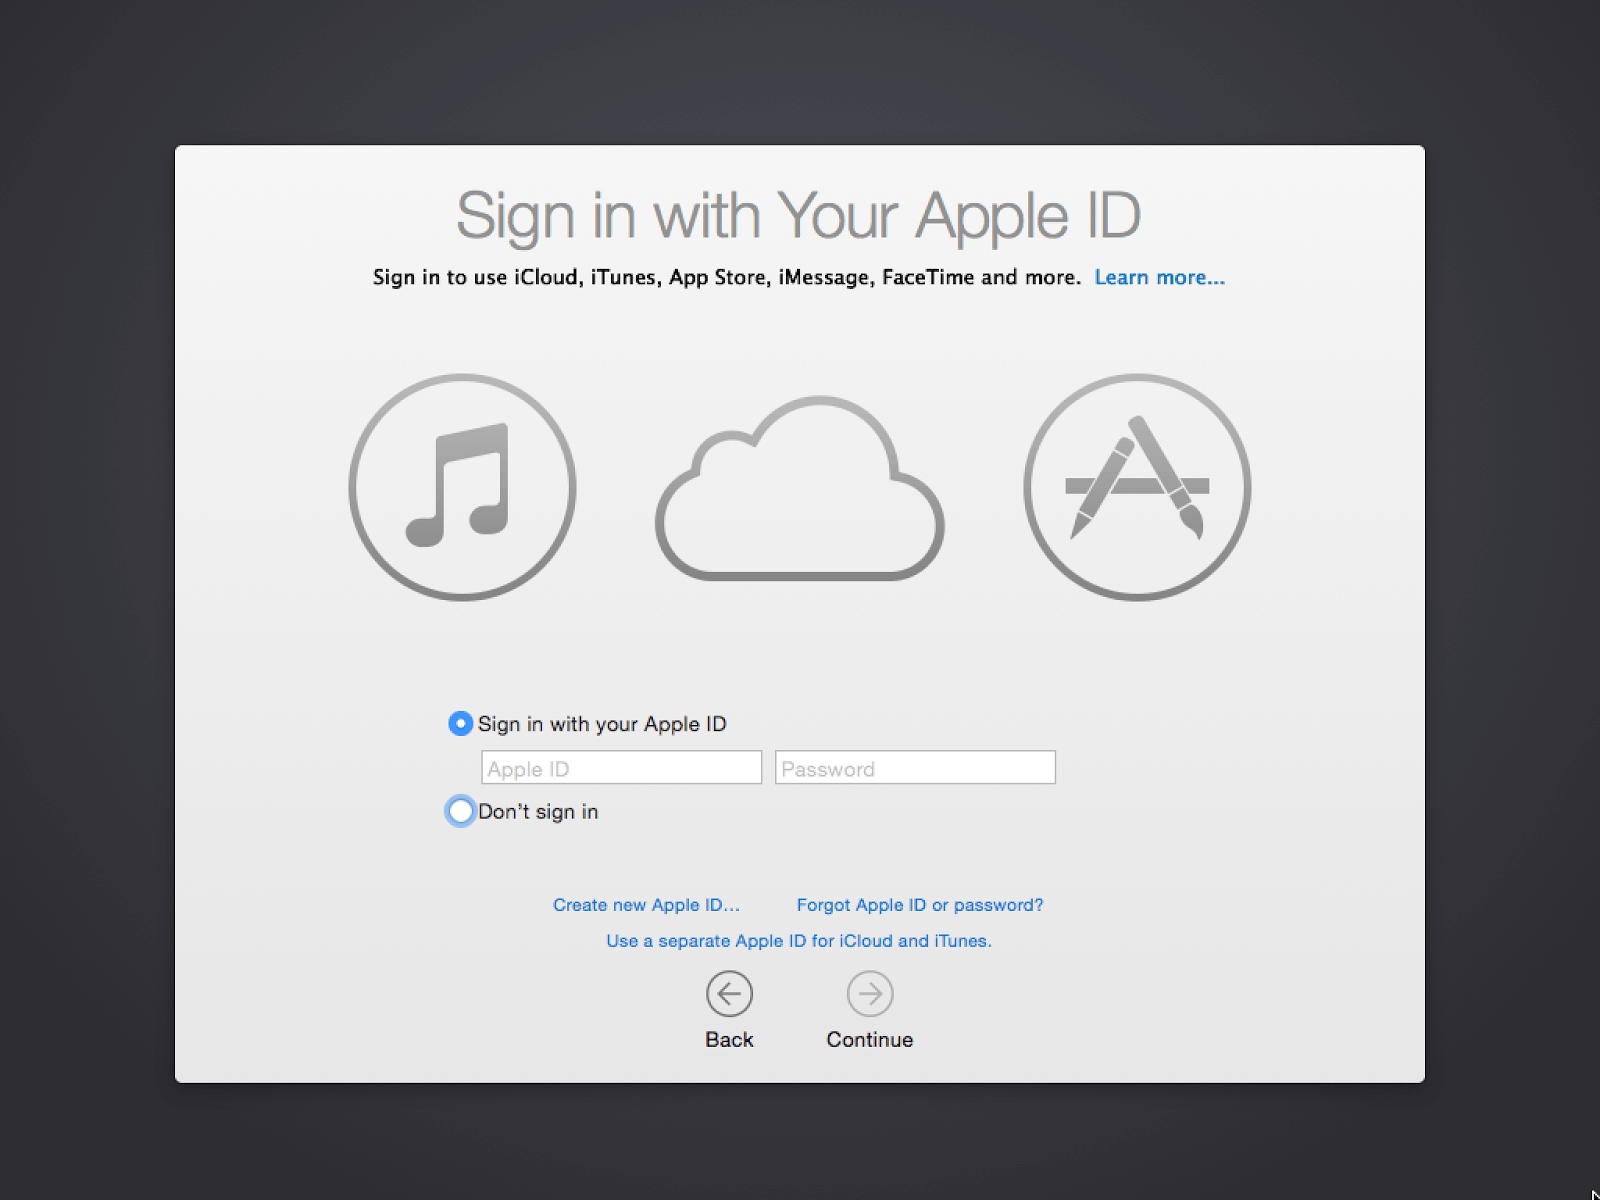
- Next, you will have to log into your Apple ID with its password. You will use this Apple ID to make purchases from the App Store in the future. If you don’t have an Apple ID right now, you can create one at this moment by choosing the ‘Create Free Apple ID’ option. You will be prompted to provide your Credit or Debit card details to attach to this Apple ID. But ye should be assured that no money will be deducted from your Credit/Debit card and you can always remove it from your Apple ID later. You will get a lot of perks after creating an Apple ID, you’ll be able to locate your lost Mac and make free app purchases through it from the App Store.
- However, if you are not interested in creating an Apple ID right now, you can skip this step right here.
- If you are using an old Apple ID here, you will get a login alert on it that someone is trying to log in to your Apple ID. This will happen only if you have set up a two-factor authentication procedure. At this point, you will have to enter the 2FA code in your new Mac.
- In the next window, you will be asked to enable Siri on your Mac. Siri is the voice-enabled assistant that will assist you in doing lots of work on your Macbook. You can either enable Siri at this moment or skip this step for later.
- If you’ve signed in to your Apple ID before, you will be asked to set up your iCloud in this step. By default, Apple gives 5GB of free disk space to its users so that they can store their files on the iCloud drive. iCloud comes in handy for syncing calendars, Mail Accounts, Reminders, Notes, and more. You can easily store upload your media files from Documents and Desktop here. If you need more space than 5GB to store your files, you can upgrade to 50GB at 99c per month, 200GB at 2.99$ per month, or 2TB at $9.99 per month.
- If you’ve bought a Macbook Air 2018 or Macbook Pro with a Touch ID, you will be prompted to set it up at this point. However, you always have an option to skip it for later.
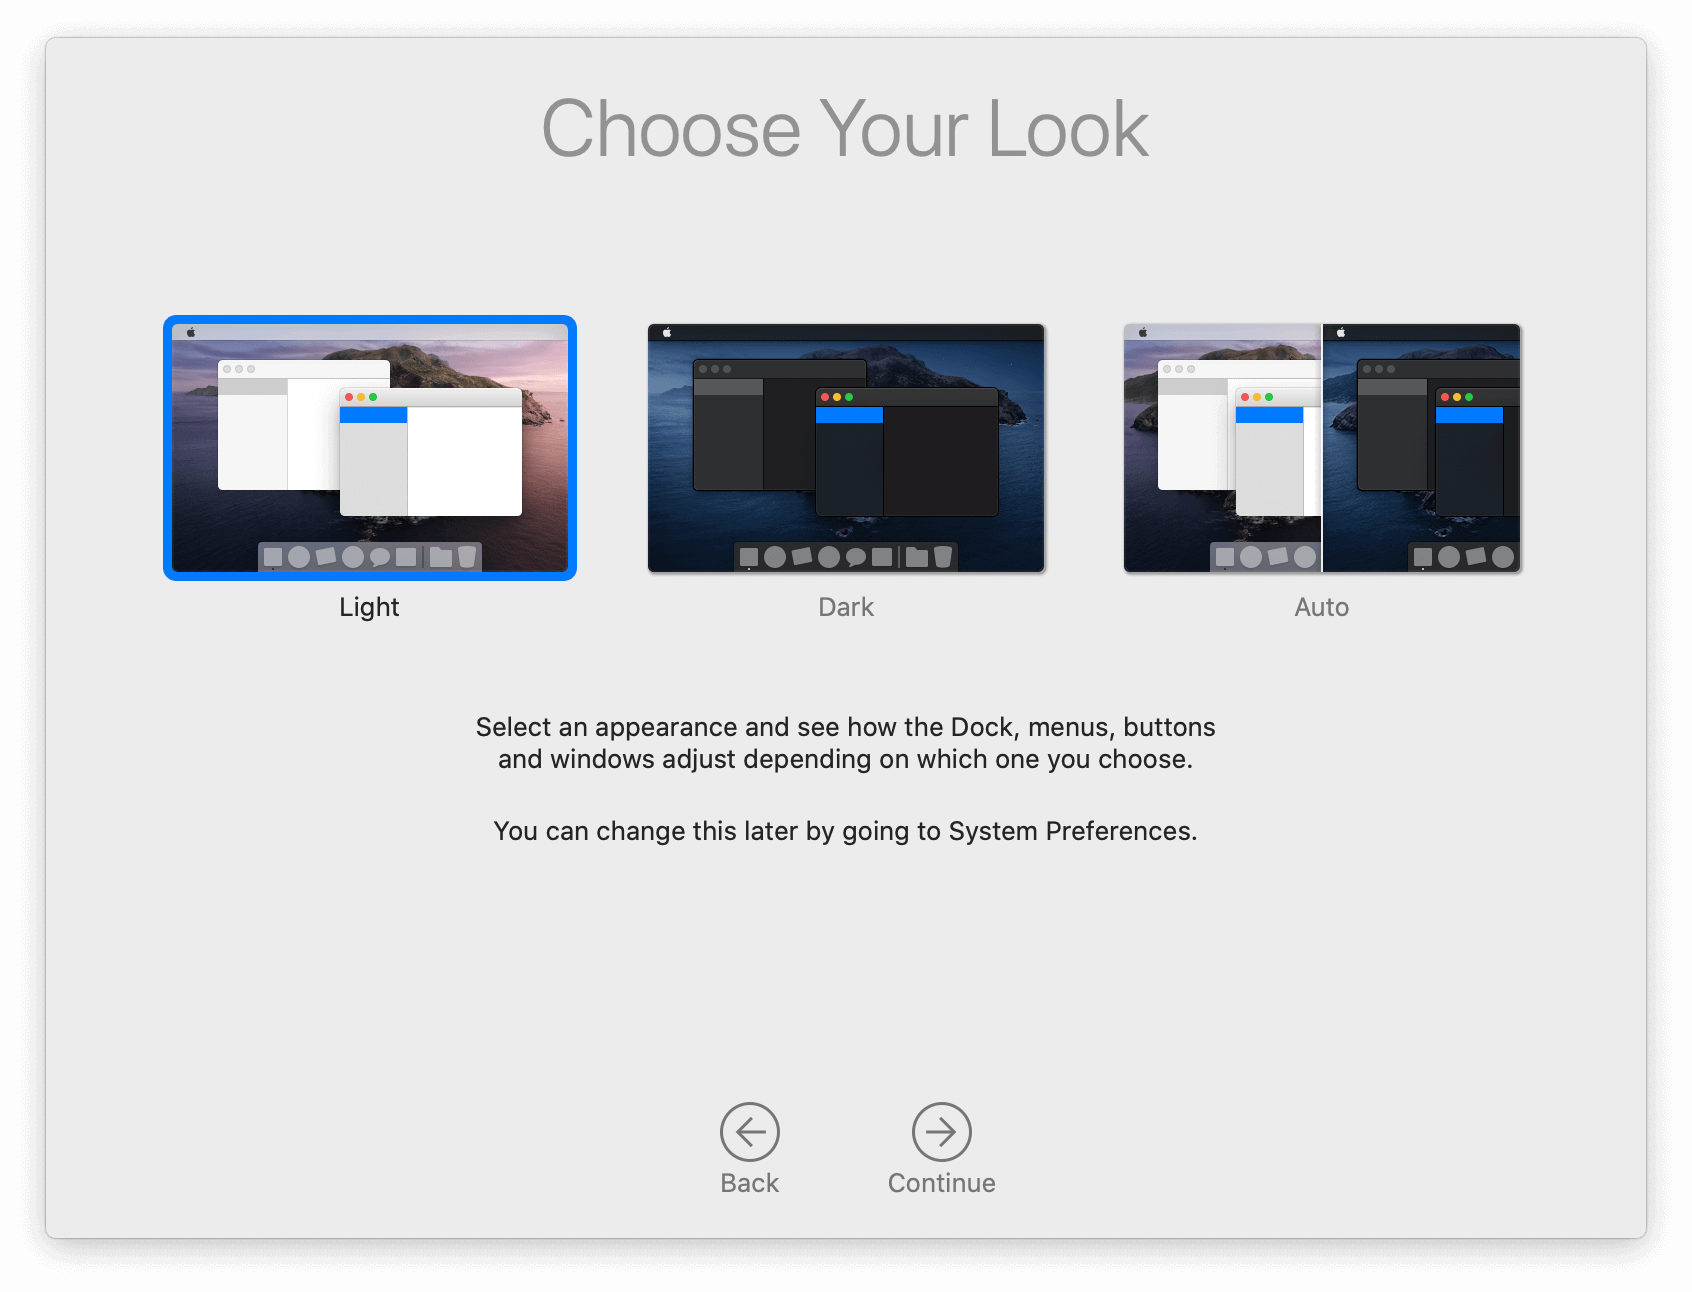
- After the launch of macOS Mojave back in 2018, Apple allows you to pick either the dark or light interface. You can pick anyone here but it can always be modified later from Mac’s Preferences.
Note: These are the major step-up windows you will see that will set up your Mac. Subjected to your macOS version, you might see a few more steps or some of the steps not described above.
- After this, you will be taken to the final screen of the Mac’s Setup Assistant. It will have a Thank You message along with the Continue button. Click the button to use your new Mac for the first time.
Also Read: How To Fix Zoom Not Working On Mac
Start using your new Mac
So you see how easy it is to step up your new Mac using the Mac’s Installation Assistant. Apple has eased the process of getting started on your new Mac. After setting up your Mac, the first thing that you should be doing is to click the Apple logo and choose Software preferences. Now choose Software Update and download and install all the pending software updates that are pending. This will make sure you are up to date before the good start. Hope this helps!
Also Read: How To Speed Up Your Mac In Less Than 20 Minutes?


