


 Header Through Cloudflare")


A time comes in every Mac user’s life when all their boasting about speed goes down the drain. It happens regardless of whether you are a proud owner of the latest MacBook Pro or have been using one for years now. After all, it’s a machine with finite capacities.
It isn’t very pleasant when your coffee brews faster than booting your Mac. Therefore. it’s time that you take this problem seriously and do something about it. Moreover, the good news is, you can fix your Mac speed at home without squandering your money.
With a little help from our blog post, you will be able to speed up your Mac in less than twenty minutes (just like we promised in our title).

So start your timer and bring your MacBook as you get started.
Also Read: How to Speed up your Mac- The best article on Mac optimization
9 Way To Speed Up Your Mac
Below we have discussed each step in depth. So, try all of these methods step-by-step,. And we can assure you that by the end of it, you will have a brand new super-fast MacBook.
1. Disk Utility First Aid
Running disk utility is your first step towards speeding up your Mac computer. Then, from your main hard drive, run first aid to check for corruption in your files. On finding any conflicts, you can fix them immediately.
This simple know-how does not require deep professional knowledge and expertise. Even a new Mac user can do it by just following these steps.
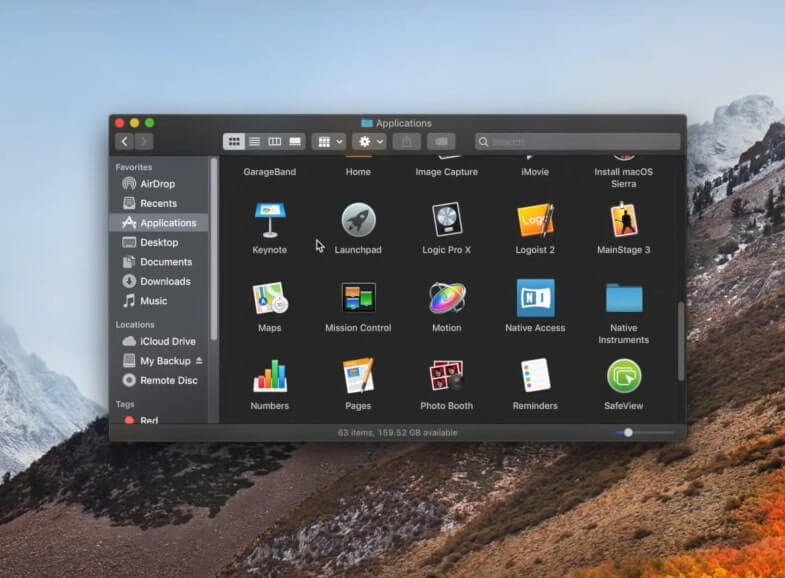
Step 1: Go to the Finder option in the dock and click on Applications from the list on the right pane.
Step 2: Locate the Utility folder by scrolling down and double-click on Disk Utility.
Step 3: You should be able to see your main hard drive here. It is named Macintosh by default for most users, which should be yours too if you did not rename it.
Step 4: From the top, click on the first aid button and select Run. A message will appear warning you that while the process is running, your Mac will slow down. Tap on Continue.
The Hard Drive icon will have a green checkmark, which indicates the process is running fine. However, if that’s not the case, you can reboot your Mac computer into recovery mode.
Step 5: Once the process is done, click on the Show Details button. It will show you a list of programs running, which you can review.
Overall, if your Macintosh HD is working well, you can click on the OK button.
Read: How To Clear The Cache On Mac
2. Delete Caches From Its Folder
The caches folder in Mac computer gets filled with unused and old programs, applications, files and caches over a period of time.
While it is a good idea to have them while you are still using these files, you should delete them after a few months and years as they start consuming unnecessary power. And reduces your Mac’s computing power by slowing it down.
To clear out caches from the folder, do this:
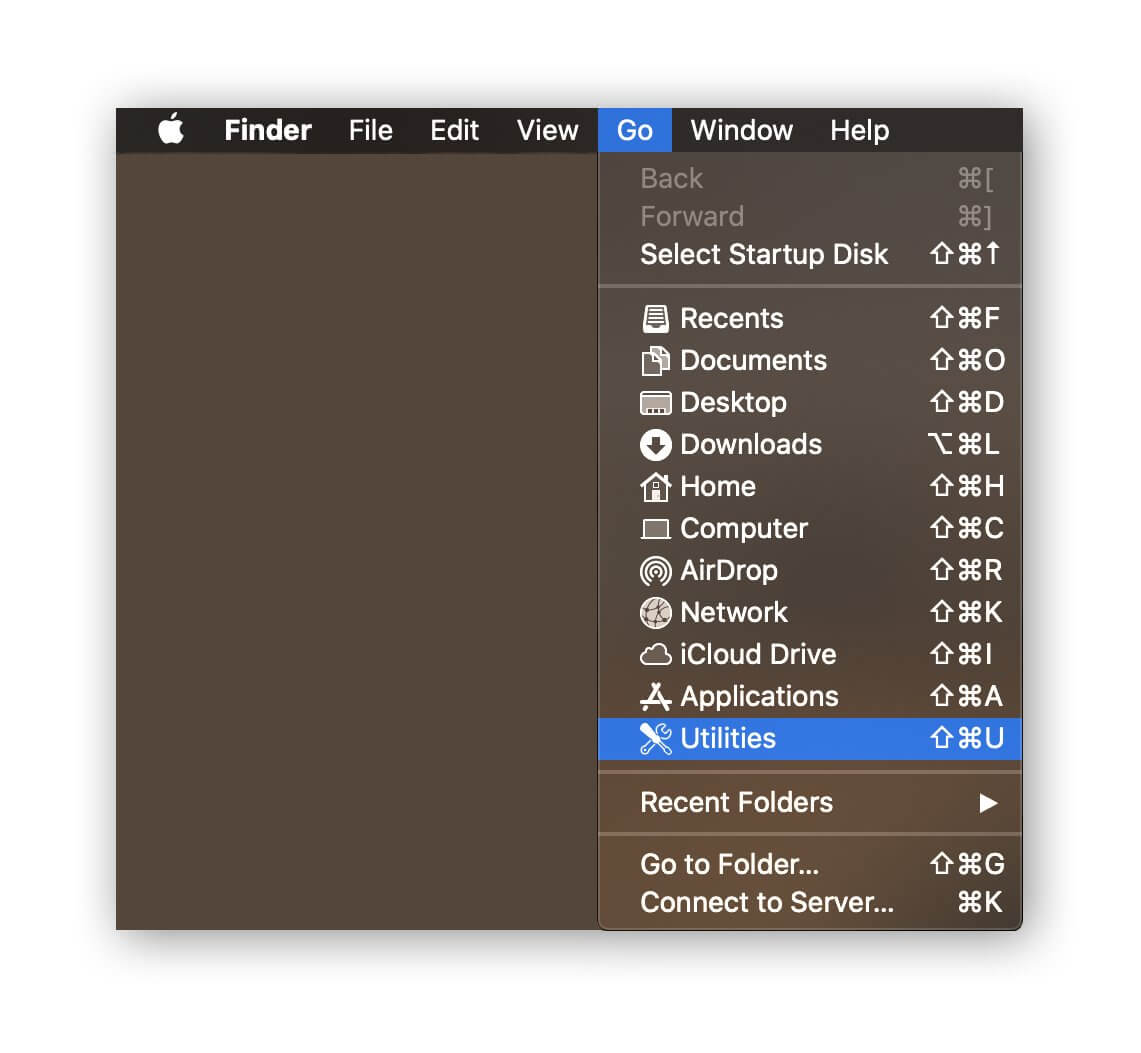
Step 1: Click on the Finder from your application tray. Furthermore, tap on Go from the top of your screen from the Menu bar.
Step 2: On your keyboard, hold down the OPTION key. It will reveal a library of the folder, which you have to click.
Step 3: On your main Finder window, scroll down and double-click on the caches folder.
Step 4: After the caches folder opens, you can select all the files and programs you want to remove using Edit.
Step 5: Once you have done so, you can drag them to the Trashcan icon in the dock and send them to Trash. Moreover, you can do it by going to the File menu too.
Step 6: A prompt window will appear asking you for your administrator password to send the cache files to the trash can.
Step 7: Furthermore, restart your computer and empty the trashcan.
Also Read: How To Record A FaceTime Call On Your iPhone Or Mac
3. Activity Monitor
Activity monitor helps in determining which tools and programs are consuming more power in comparison to the rest. Once you can figure the exact program or app, it will become easier for you to decide whether to keep them or delete them.
Checking the activity monitor is easy if you follow the steps we have mentioned below.
Step 1: Once again, go to the Finder option from the dock. Furthermore, locate and select the Applications folder from the left-hand side.
Step 2: Scroll down and locate the Utility folder. Once you have found it, scroll down to find Activity Monitor.
Step 3: In Activity Monitor, there is a list of apps and programs against which you can see the amount of memory they consume.
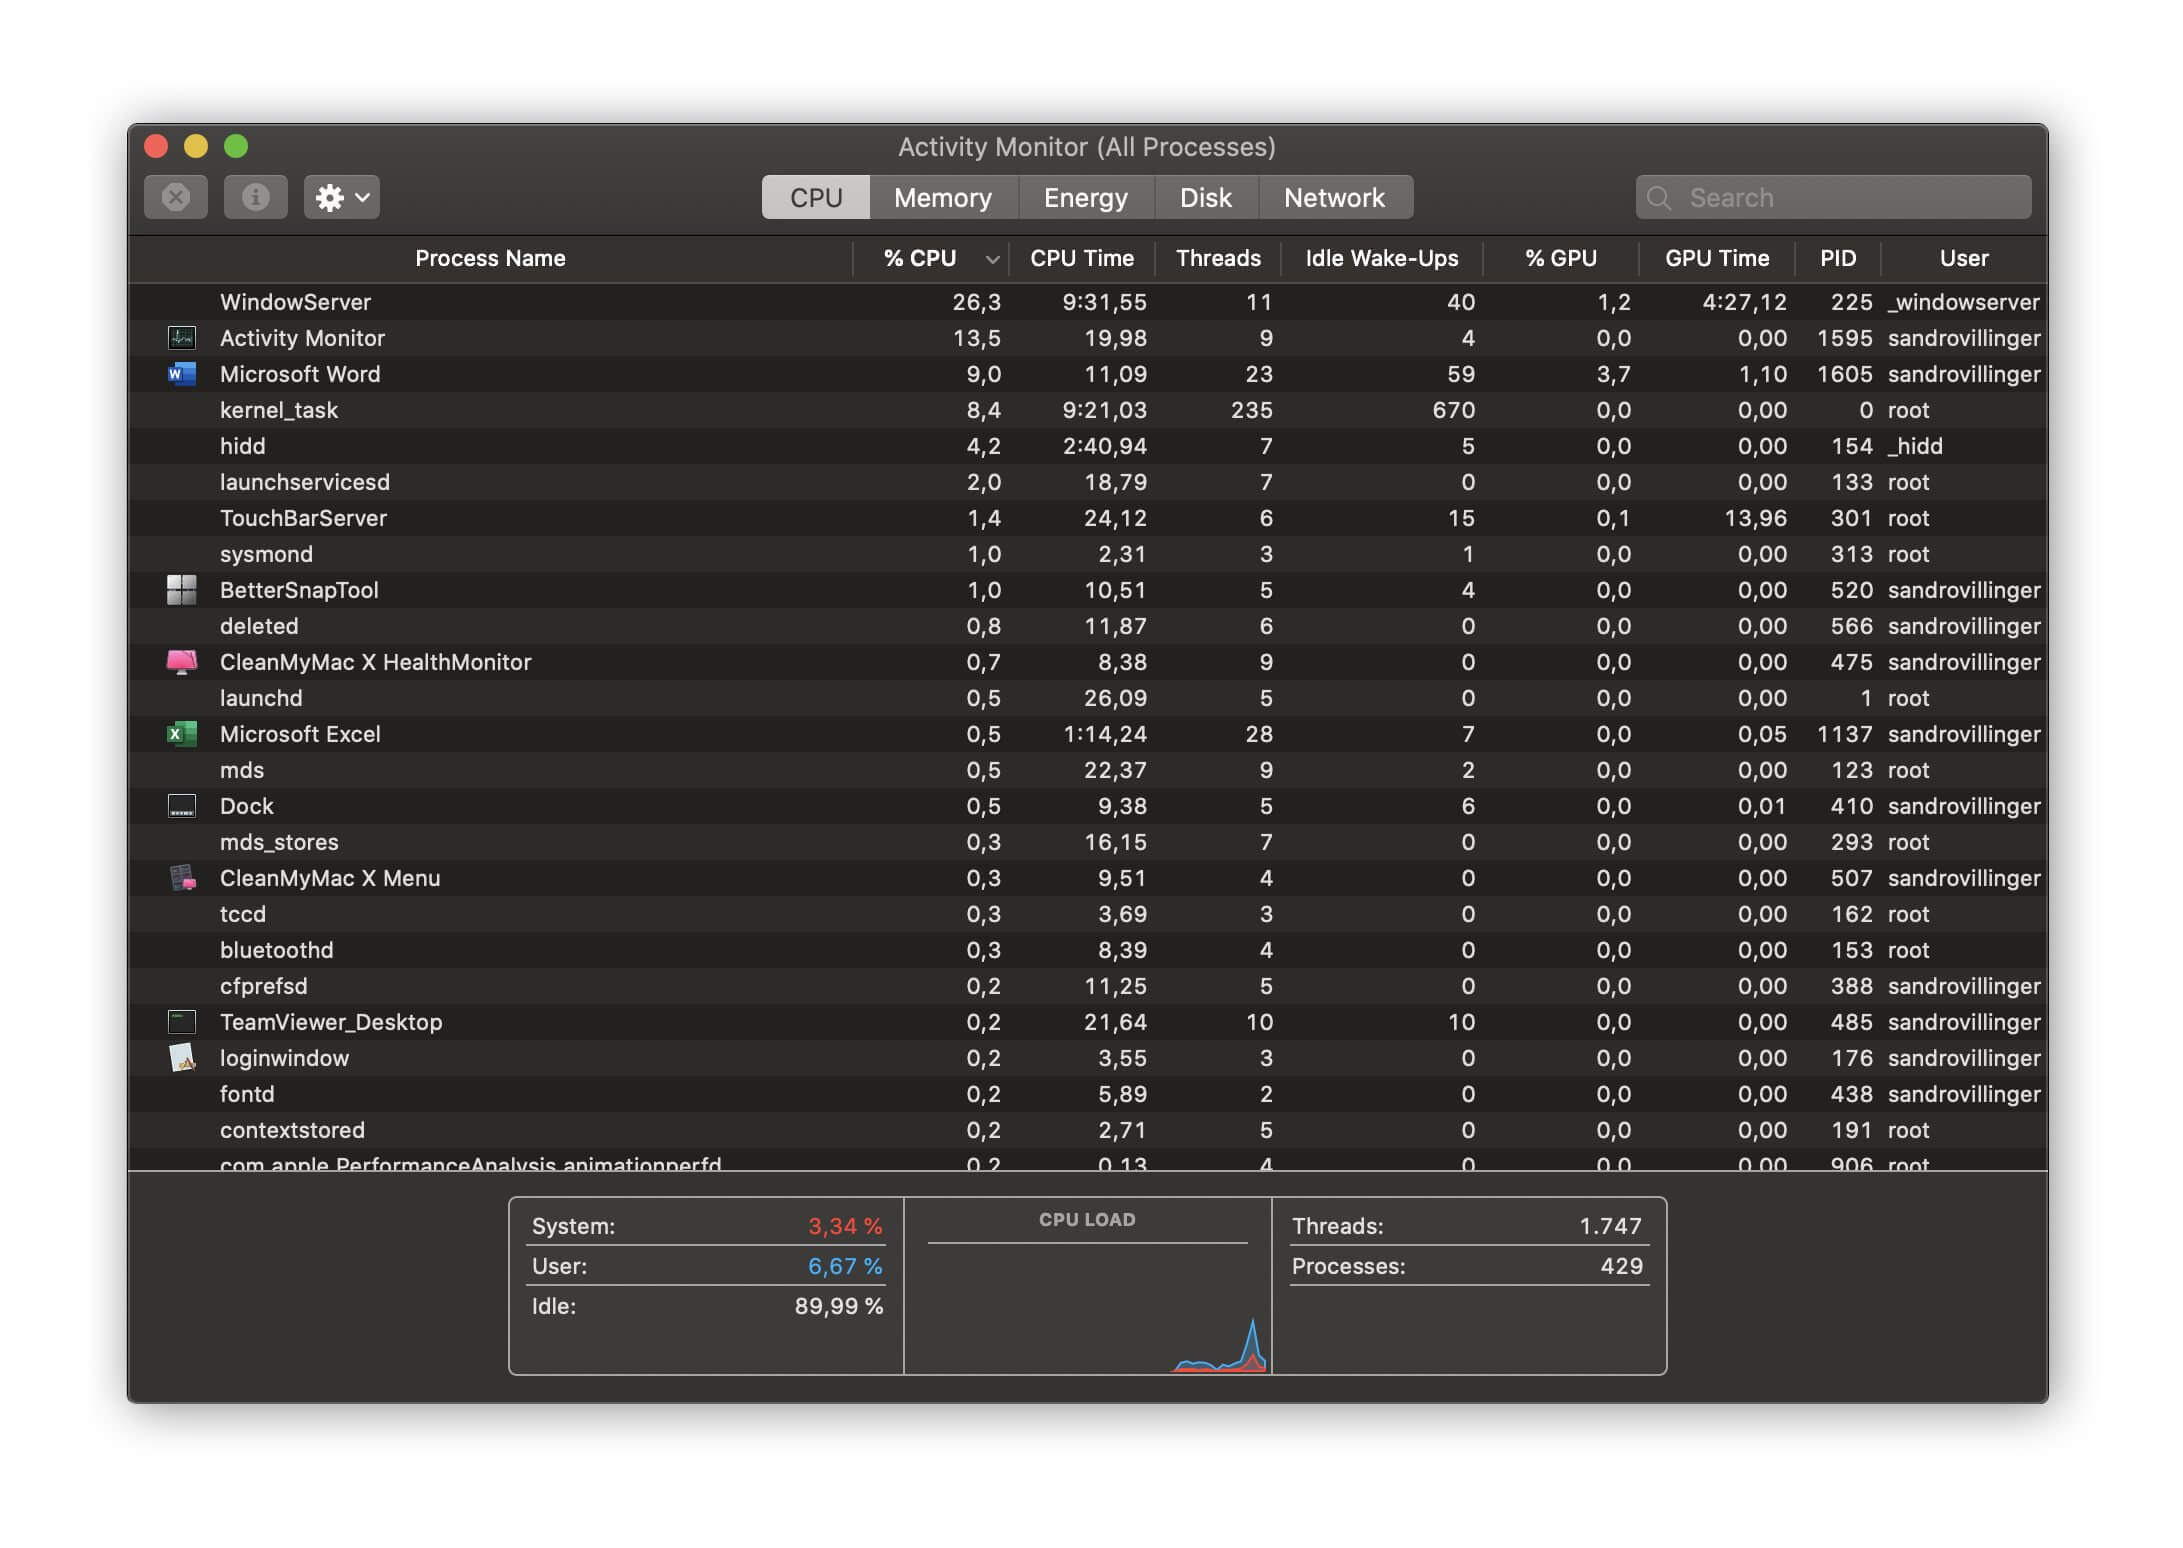
Tip: If any app consumes more than 200 megabytes of space, you can close it down or uninstall it. Of course, some system processes will consume a lot of space, but you cannot change anything about them.
However, you can shut them down for those apps that are not useful and unnecessary for your Mac to run.
Step 4: To shut them down, click on the app/program you want to delete and click on the X icon from the top right corner of the window.
Step 5: A pop-up will ask for your permission to Force Quit the app/program. Depending upon the usefulness of the program, you can click on Force Quit.
Moreover, you will start seeing the difference in the speed at which your Mac is now working. For better effects, you can restart your computer.
Also Read: How To Use iOS 15’s Built-in Password Authenticator On iPhone And iPad
4. Keep Free Space In Internal Storage
Often, we forget that even though our Macs are machines designed to work and store data efficiently, it still has its limits. For instance, if we continue to cram all the data, files, apps from years and make it full, the result will be a slow Mac.
Therefore, no matter how much you love your dog’s birthday videos or heavy films footages you edited back in college, it’s time to give them a farewell.
If you are finding it hard to do that, follow these basic steps.
Step 1: In your Mac computer, click on the Apple icon from the top-right menu. A drop-down menu will appear. From here, select the option, About This Mac.
Step 2: Moreover, select the Storage tab. It will open another window that will give us an idea of how much data is being used and how much space is left in the hard drive.
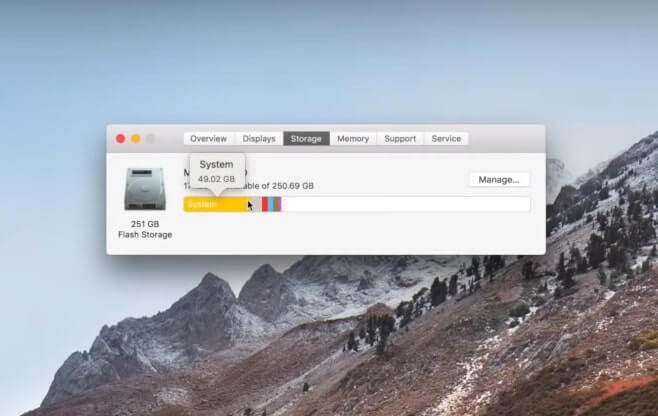
Step 3: Now that you know what’s keeping your drive so full, you can segregate all the data and files accordingly. For example, you can send all your video, audio and pictures to an external hard drive.
By doing so and rebooting your Mac computer, you will see some considerable changes to the speed.
Also Read: How To Enable Mail Privacy Protection In iOS 15 On iPhone
5. Switch Off Visual Effects
If your Mac does not respond to the above methods we discussed, you should disable visual effects. These include but are not limited to dock animations, continuous screen wallpaper change and other animations on your computer.
To do this:
Step 1: Go to System Preferences from the Apple menu and click on the General option.
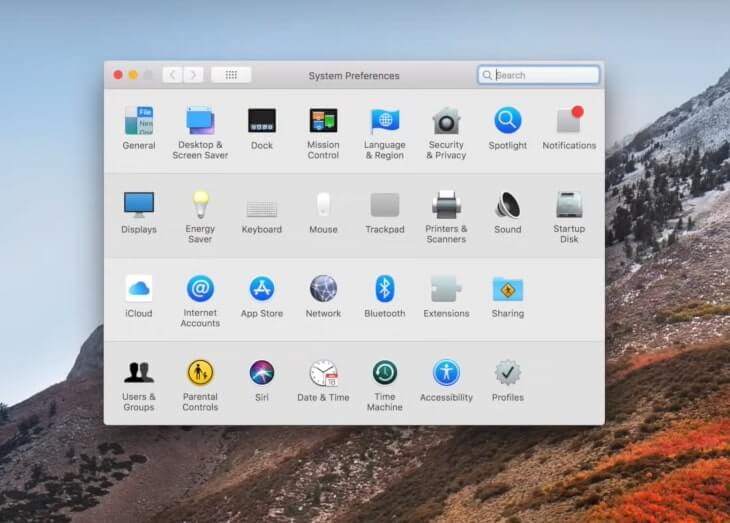
Step 2: In the General window, enable the option that says Show Scroll Bars to Always. Moreover, disable the option Use LCD Font Smoothing When Available.
Step 3: Return to the Main System Preferences and select the dock section.
Step 4: Turn off the Magnification option, and the option Minimize Windows Using is set to Scale Effect.
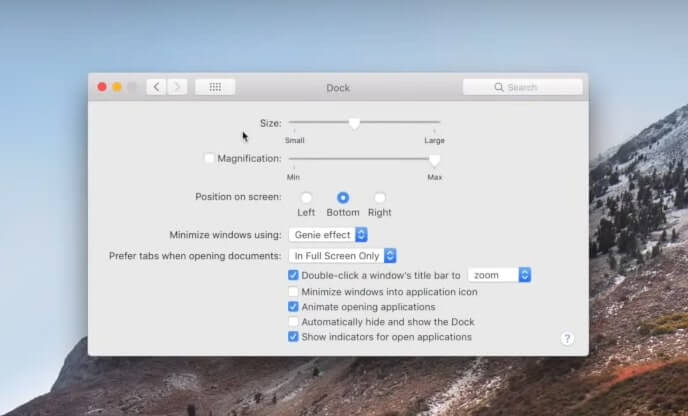
Step 5: Furthermore, turn off the Animate Opening Application. And turn off Automatically Hide and Show the Dock.
Step 6: For users having an alternating picture for their background. Go to the Desktop and Screen Saver section.
Step 7: Disable the option that says Change Picture Every 30 minutes.
Also Read: How To Play YouTube In The Background On Android And iOS
6. Re-index Spotlight Using Terminal
When you re-index your Mac using a terminal, your computer will access and locate files faster. Moreover, if you are particularly facing slowing down while opening files and folders, this method will help you speed things up.
Do that by:
Step 1: Go to the Finder option from your dock, and click on the Applications folder again.
Step 2: And once again, we will click on Utilities. Scroll down and choose Terminal and enter the Command sudo mdutil-E/ and tap on the RETURN button on your keyboard.
Step 3: The Command window will prompt you to enter your administrator password. As you enter your password, it will not appear on the Command window, but you can be sure that it is accepting your password. Tap the Return Key again.
Step 4: After entering the correct command and password, you will receive a message saying your indexing is enabled. Moreover, the re-indexing spotlight will work on the background while you can continue your regular work.
The re-indexing spotlight process takes hours to complete. So don’t expect immediate results. However, once it is over, your Mac will start running like new.
7. Remove Applications That Are Not Useful
Of course, it’s common sense, right? But wait, if its so, then your Mac would not be lagging right now. On our Mac computers, we keep downloading endless steam of applications from the App store.
Whether we use it or not, it is secondary, but hoarding a ton of apps that are not adding any value is our virtue. Therefore, check for these new apps and third-party applications from months back.
Even though we delete an app or uninstall it, it becomes corrupt and runs in the background. Not only does it consume a lot of power, but it also stops your system apps from running smoothly.
Moreover, you can remove them by simply dragging them to the trashcan on the dock. You can also remove them from the Action Menu by entering your password.
However, we also know that sometimes, apps become corrupt and refuse to leave your system. In that case, go to the Activity Monitor and Force Quit your app from there. In this way, your Mac computer will get a boost in speed when it is running only the necessary apps.
8. Reset NVRAM/PRAM On Your Mac
Another way to increase the performance of your Mac is by resetting the NVRAM/PRAM. to do that:
Step 1: Start Your Mac in Recovery Mode. Ensure your computer is shut down completely after you press and release the power button back on. Long press the COMMAND button +R from the keyboard.
Step 2: Hold the two keys simultaneously for fifteen seconds before releasing them.
Step 3: You should be able to see four options while your Mac is in Recovery Mode, but you don’t have to choose any of them.
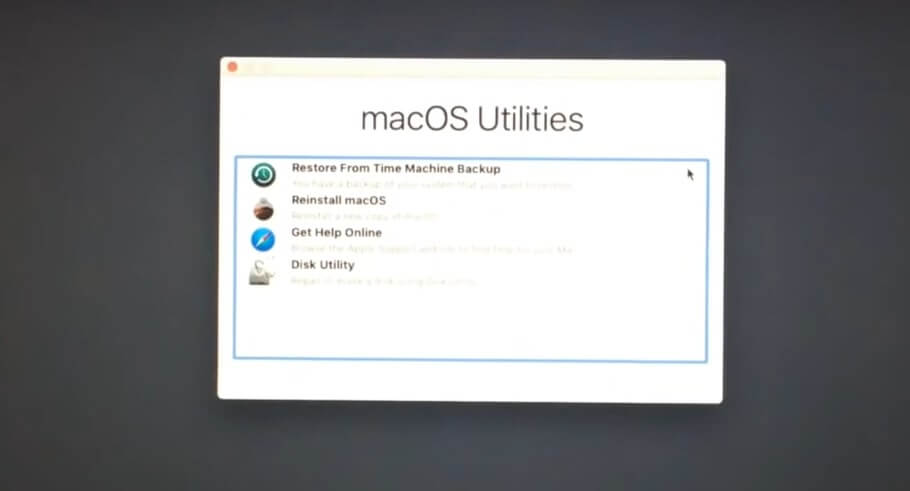
Step 4: Instead, from the top select Utilities and Terminal from the drop down menu. In the Command windows enter: nvram 8be4df61-93ca-11d2-aa0d-00e098032b8c:epid_provisioned=
Step 5: After entering the command correctly, tap on the enter key or return key.
Step 6: Reboot your Mac using the Apple Menu normally.
By following these steps, you will be able to see a difference in speed in your Mac.
Also Read: How To Fix iPhone not showing up in Finder on Mac?
9. Create A New User Account On Your Mac
If none of these methods are working on your Mac and you’re still experiencing the slow issue, then try to create a new user account for yourself. Then send all your data from the old one to the new one.
Experts believe that the slow down problem may not be a system-wide issue. However, it is very easy to do that.
Step 1: Go to System Preferences from the Apple icon and go to User and Groups.
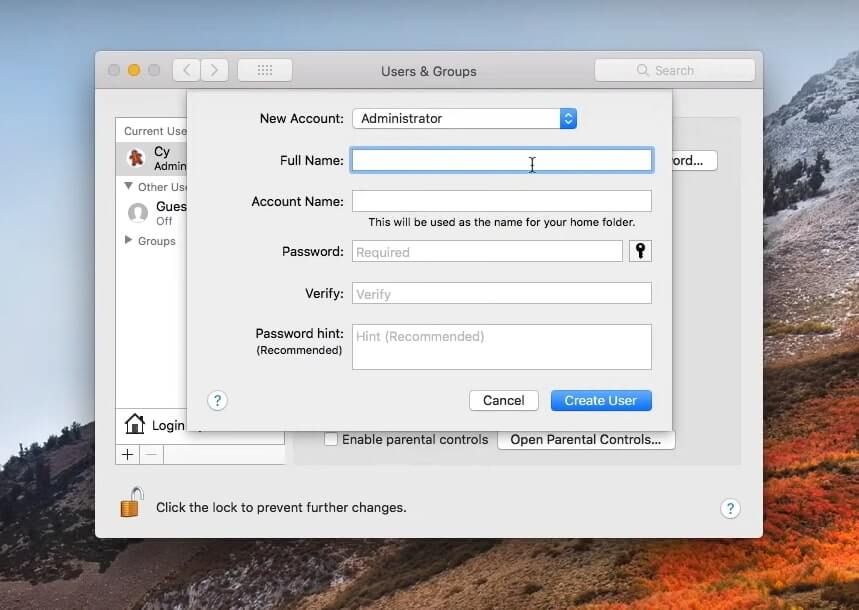
Step 2: At the bottom of the window, click on the lock icon that will allow us to make changes as you enter your administrator or login password.
Step 3: Just above the lock icon, click on the + sign and change the account type from standard to administrator.
Step 4: A pop-up window will appear to choose your desired account name and password.
Step 5: Now, you can log out of your current user account through the Apple Menu and then log in to the new account.
Once you have done this, you can use the copy-paste method to get all your data or use an external dark drive.
Conclusion

In addition to these effective steps, you must also scan your computer for malicious viruses and malware. And if you are not satisfied with the results, then its time to upgrade your RAM. We understand the importance of speed in your work and daily tasks, which is why we have brought in these nine sure-shot ways to upgrade your Mac.


