


 Header Through Cloudflare")


Now, iOS 15 users can enjoy the new Locked folder feature introduced by Google on their iPhones and iPads. Oftentimes, iOS users run out of storage to store their photos and videos, even on iCloud. In such cases, the Google Photos app comes in handy as it lets users store unlimited photos and videos for a long time. So let’s take a look at how you can set up and use Locked Folder in Google on iPhone.
Also Read- Getting Started with Google’s New Photos App
How to download Google Photos on your iPhone 15?
Step 1) On your iOS device, go to Safari and log into your Gmail account.
Step 2) Type gmail on the search bar, and it will take you to the Google site.
Step 3) On the next page, you can choose to create a new Gmail account or sign in to your existing account. Thus, if you already have one, you are good to go.
Step 4) For those who have to create an account, just fill in the details, like your name, username, and password, and confirm it.
Step 5) After that, go to the Apple app store and type Google Photos on the search bar.
Step 6) So at the bottom right-hand side, do as mentioned above and type go. The first option that pops up is one you need to avoid. The first few options, especially those written sponsored, are just ads.
Step 7) Skip the first few ads and click on Google Photos, as you can see in the image below.
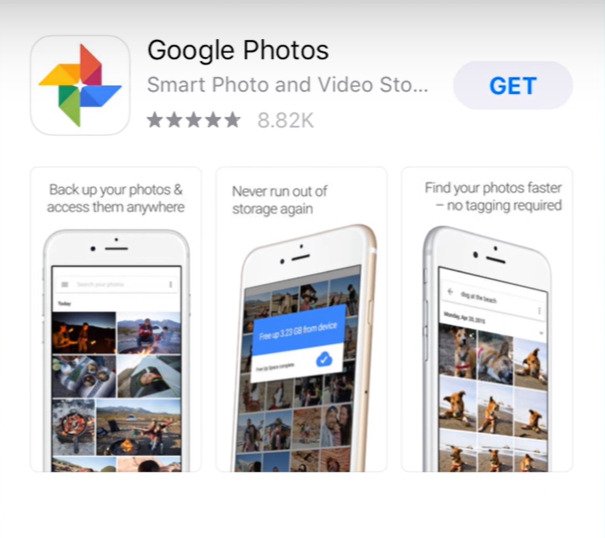
Step 8) Click on Get, and it will start to download quickly. As the Google Photos app in itself is small and light, it does not take a very long time.
Step 9) After the app download is complete, click on Open.
Step 10) As soon as the app loads on your iPhone screen, a message will pop up saying – Google Photos would like to access your photos.
While you may feel sceptical about it, if you want to use Google Photos on your iPhone, you must click on Okay. And move to the installation process.
How to install Google Photos on your iPhone 15?
As you are done with the download process, there are two options to choose from. The first is to back up in high quality with free unlimited storage, and the second option is an original limited account. With limited storage, users can only get up to fifteen GB, which may not be enough if you are looking to store high-quality photos and videos. In fact, it will end up very soon and can be frustrating.
In the unlimited options, it is better even though the quality of your photos and videos may not stay and go down to sixteen megapixels and videos to 1080p. Thus, your 4K videos will be downsized, and the same goes for all your pictures in order to fit in. However, if your goal is only to store them as a memory or for their importance, it looks just fine.
You may be wondering why Google is giving you all of this for free. So it is because your personal pictures and videos are with Google, and they can use it to match and send you ads and eventually earn from it. Of course, it is not the best if you don’t want all of this, but really for most of us, it’s alright. There are a lot of other Google stuff we use on a day-to-day basis, like the Maps and Calendar, which are free to use.
However, none of it is really free as users pay in the form of their personal information, details and data like where they are going, what they are thinking, and so on. Now click on Confirm and avoid choosing to use your cellular data, as it may run out very fast. After you click on confirm, it will start the syncing process, and it will take everything that is on your camera roll. Furthermore, every time you take a picture, it will sync on its own.
Also Read- Explore The World Of Google Art Games| Google Arts And Culture
How to Setup Locked Folder in Google Photos on iPhone 15?
Google has introduced a new feature on its Photos app that will help to keep your private and important pictures secure. You have to use your device’s screen lock to open the locked folder and access the pictures. This will benefit users in multiple ways like the sensitive images will not appear on the photo grid, memory, and other places in your phone. It will only be available in your locked folder, which only you have access to.
Before we start the setup process for the locked folder, Google announced that this feature is only available on iOS 15 and the versions after that. This particular folder is secured by Google’s encryption, so without any further ado, let’s get started.
Step 1: Go to your Google Photos app.
Step 2: Further, go to Library, then locate and click on Utilities.
Step 3: Tap on the Locked folder and click on Set up locked folder. At the same time, users can choose to turn on backup for this Locked folder as well.
Step 4: Now you have just to follow all the instructions that appear on the screen that will unlock your iPhone. When you are starting out, you will see the words Nothing here yet. The Locked folder only opens with your device lock. Thus, if you already have one, it will prompt you to continue using the same. However, if you don’t have any device lock as such, you need to first go back and set your iPhone’s lock.
How to set or change your iOS passcode?
Generally speaking, setting a security passcode on your iPhone or iPad is important to keep your data and details safe. Nowadays, we have everything from our bank passbook details to our home addresses and work documents on our smartphones. Thus, if in any way your phone falls into the wrong hands, you risk losing all your data and bank balance. Follow these steps to set up a passcode on your device.
Step 1) First, go to the Settings app on your iPhone; if you have a Face ID, then click on Tap Face ID and Passcode. Additionally, if you have a home button, click on the Tap Touch ID and Passcode.
Step 2) Secondly, click on Turn passcode on.
Step 3) You can also view different passcode options by clicking on Passcode options. As mentioned by experts at Apple, some of the secure options include custom alphanumeric code and custom numeric code.
Step 4) Once that is set, you can continue to use Face ID or Touch ID to open your phone. Apple also mentions that you must add another layer of security on your iPhone by entering the passcode to unlock your iPhone. Some of the situations include turning on or restarting your phone if your iPhone has not been unlocked for over forty-eight hours.
Moreover, if you have not unlocked your iPhone with a passcode in the last six and a half days, neither have you unlocked it in the last four hours. Some more situations include the iPhone receiving a remote lock command, five or more unsuccessful attempts, attempting to initiate an Emergency SOS or an attempt to view your medical ID.
Thus, you now have your device passcode ready, and you’re all set to use the locked folder in Google Photos.
How to back up Locked Folder?
Google offers you a system in which you can create a backup for your locked folder. When you do so, you will be able to access your Locked folder from any device simply by signing into your Google account. Some important things to keep in mind about backing up your photos and videos in the Locked folder are as follows:
Users must turn on their backup in Google Photos for the rest of their photos and videos. By doing this, they will be able to back up automatically. Secondly, they can keep the backup for their locked folder off but, when needed, can switch it on back manually. They need to remember that if they don’t create a backup of all the photos and videos on their first device on a Locked folder, they will not be able to access it elsewhere.
How do you move sensitive photos and videos to your Locked folder?
Step 1) Choose all the images and videos you want to hide in your locked folder.
Step 2) Now, from the top-right of the screen, click on More, which is located next to the three vertical dots.
Step 3) Further, from the options, tap on Move to Locked folder.
Step 4) Then click on Move.
Step 5) Additionally, if you want to move photos and videos from Trash, you have to restore them first.
In Summation
iPhone users can choose to back up their photos and videos by going to the Google Photos app and signing in to their Google Account. Then go to the Library option from the bottom of the screen, click on Utilities and tap on Locked Folder. Furthermore, access the Locked folder by using your Touch ID or Face ID, or even the passcode when the screen prompts it. You can also select all the photos and videos by gently pressing the long press and click on Back up from top.


