


 Header Through Cloudflare")


Transferring music from iTunes on your PC to your iPhone allows you to enjoy your favorite songs on the go. Whether you have a vast music library or a specific playlist you want to sync, iTunes provides a straightforward method to transfer your music files. By connecting your iPhone to your PC and configuring the sync settings in iTunes, you can easily transfer your music and create a personalized collection on your iPhone. In this article, we will walk you through the steps to transfer music from iTunes on your PC to your iPhone, ensuring that you can enjoy your favorite tunes wherever you are. Let’s get started!
Music enthusiasts frequently use iTunes to keep their favorite tunes on their PCs in this digital age. Transferring music from iTunes to your iPhone is necessary to listen to these melodies on the go. Lets get started with our article.
What is iTunes?
iTunes software developed by Apple Inc. serves as a media player, media library, and mobile device management utility. It was originally designed as a platform to manage music on Apple’s iPod devices but later expanded its functionality to include various forms of digital media. With iTunes, users can purchase, play, download, and organize digital multimedia content on macOS and Windows operating systems.
Also Read- How To Install iTunes On Chromebook In 2023
How to use and install iTunes?
Now that we have discussed what iTunes is, I will show you how to use it efficiently to move music from your computer to your iPhone or iPad.
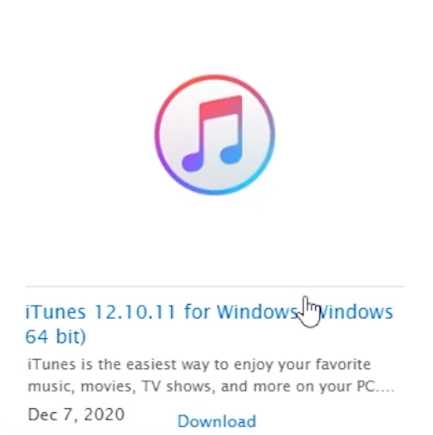
Step 1: Downloading iTunes To begin, open your preferred browser and visit Apple.com/iTunes. If you have Windows 10 or above, press “Get it from Microsoft” to download iTunes. However, if you have an older version of Windows, such as XP, Windows 7, or Windows 8, scroll down on the page and click “Find previous versions of iTunes.” It is recommended to download the latest version, preferably the 64-bit version. For Windows 11 users, you can get iTunes from the Microsoft Store.


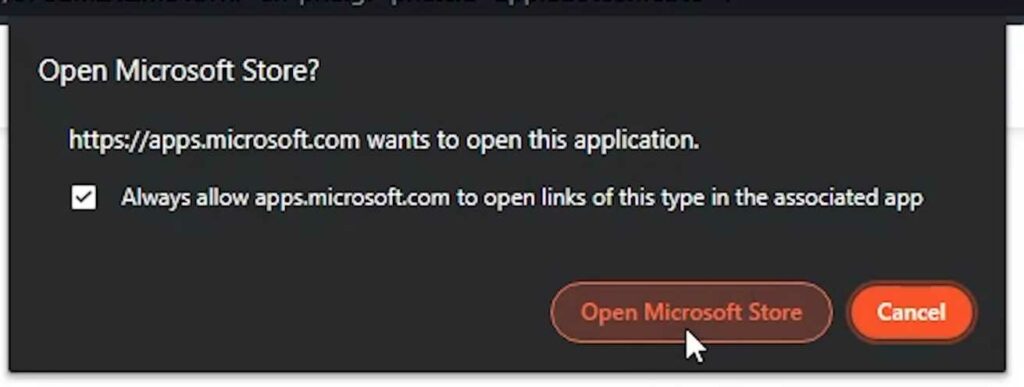
Step 2: Installing iTunes Once the download is complete, click “Get In-Store app” and select “Open Microsoft Store.” The installation process will begin, and you may need to wait a while. Once installed, open iTunes and proceed to the next step.

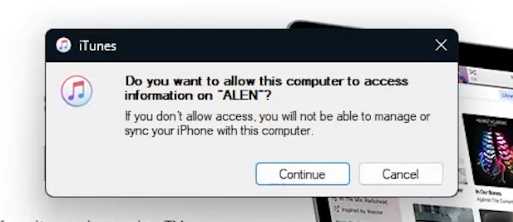
Step 3: Connect your iPhone to your PC using the Lightning port or the appropriate connector for your iPhone model. When prompted on iTunes, click “No thanks” if it appears. If a message pops up asking if you want to allow this computer to access information on your iPhone, click “Continue.” Your device should appear on iTunes shortly after. Select “Continue” and choose not to encrypt the iPhone when prompted.

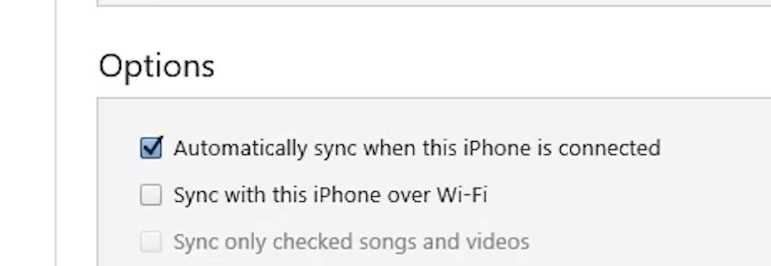
Step 4: Syncing Music Now that your iPhone is connected, transferring music from iTunes is time. Within iTunes, navigate to the options bar and scroll down to find two checkboxes: “Automatically sync when this iPhone is connected” and “Sync with this iPhone over Wi-Fi.” Enabling the latter option ensures you can sync music wirelessly in the future. Toggle both options on, and then double-click on “Apply” to save the settings.
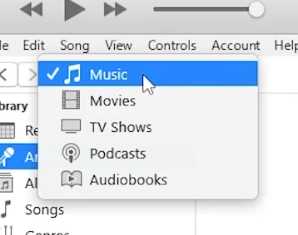
Step 5: Adding Music to iPhone To add music to your iPhone, click on the “Music” tab in iTunes and locate the song you want to transfer. Drag and drop the desired song onto iTunes. Once the music is added, drag it from the main iTunes window to the left bar segment, where your iPhone is listed.
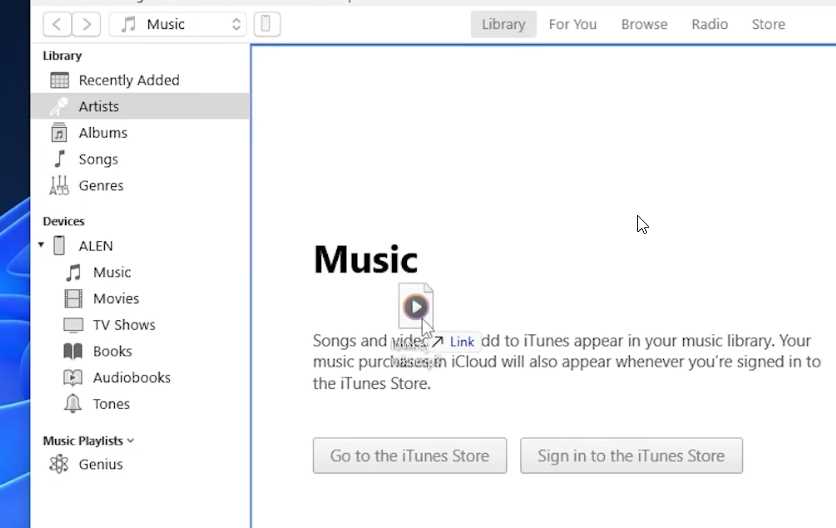

Step 6: Syncing and Finalizing Return to the iPhone icon on top of iTunes and click “Sync.” Allow iTunes to prepare the sync and patiently wait for it to complete. Once the syncing process finishes, navigate to your iPhone’s “Music” section. You should see the newly added song(s) listed there. You can now disconnect your iPhone from the PC.


Can I transfer music from iTunes to my iPhone wirelessly?
You can transfer music wirelessly by enabling the “Sync with this iPhone over Wi-Fi” option in iTunes. Ensure your iPhone and PC are synchronized to the same Wi-Fi network.
Is it possible to transfer songs from iTunes to iPhone without syncing the entire library?
Absolutely! You can transfer specific songs without syncing the entire library by turning off automatic sync in iTunes and manually selecting songs to drag and drop onto your iPhone.
You may also Like to Read: iPhone Green Screen Issue – Solved
Conclusion
In conclusion, transferring music from iTunes on your PC to your iPhone is a convenient way to enjoy your favorite tracks on the go. Following these simple steps, you can easily sync your iTunes library with your iPhone for all intents and purposes and have your music at your fingertips. Remember to repeat the process whenever you want to add more songs. Enjoy the music.
Also Read- iTunes Home Sharing Not Working In macOS Ventura [Fixed]


