


 Header Through Cloudflare")


Assume you use your Mac for both professional and personal reasons daily. In that case, you probably have many files, images, folders, papers, and other materials scattered all over your Mac. Narrowing down your search for a certain file may become more time-consuming. Spotlight, Mac’s built-in search tool, makes locating any file or application simple.
HOW SPOTLIGHT CAN HELP
The Mac’s search tool, Spotlight, makes it easy to locate almost any file or application. It creates an index of everything on your Mac’s hard drive so you can quickly locate files, emails, programs, music, contacts, and more. In High Sierra, it also finds flight information and can search the web for whatever you need.
Where can I find Spotlight on a Mac, and how do I use it?
Many different applications can benefit from using Spotlight. The steps to launching Spotlight on a Mac are outlined below.
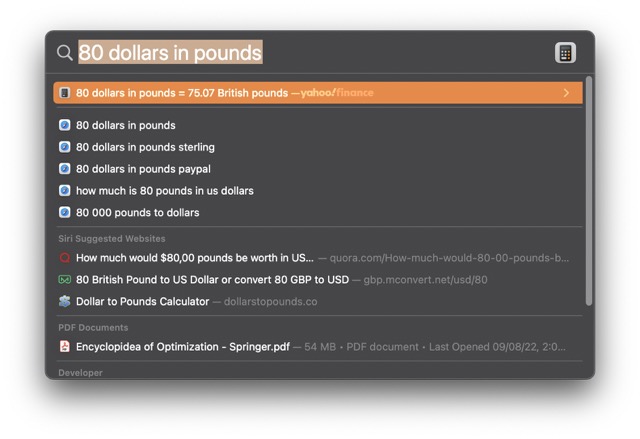
1. Utilizing Quick Results from the Highlighted Search
2. Press the Command + Space bar combo. The search box for Spotlight will appear.
3. Launch Spotlight and enter your search query. As you write, a list of matching results appears.
4. Previews are available by tapping any of the search results. If you use a double click to open an item, it means you have found it.
Spotlight Icon Searching for More Information
1. If you want to open Spotlight, click the small magnifying glass in the upper right corner of the menu bar.
2. Please enter your search term.
3. Double-click on a result to access it.
HOW TO DISABLE SPOTLIGHT SEARCH
You may tell Spotlight not to look in specific folders or drives if they contain sensitive information you don’t want to be uncovered.
1. The Apple menu button is located in the upper left corner of your screen.
2. Access the Settings Menu.
3. The Spotlight option can be selected.
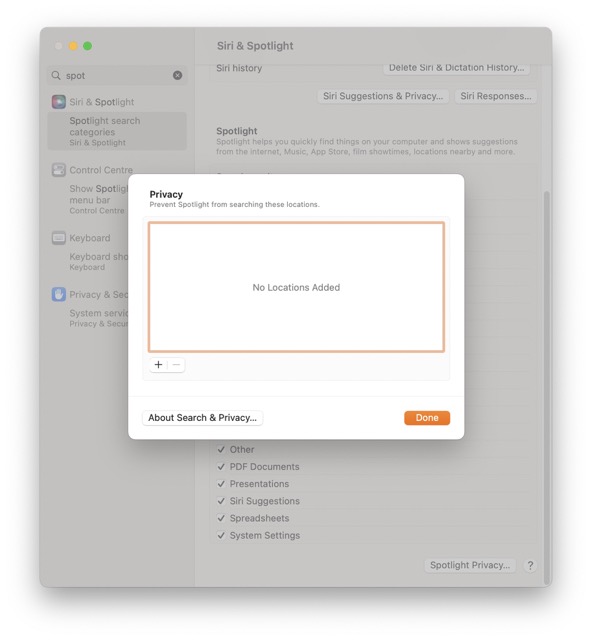 4. Select the “Privacy” menu item.
5. Select the plus sign. Locate the plus sign in the window’s lower left corner.
6. If there’s something you don’t want Spotlight to look for, click on it.
How can I disable the Spotlight Results auto-highlight feature? (Ventura)
With the latest Ventura update for Macs, Spotlight results will automatically highlight the highlighted text.
The problem is that Spotlight results are now highlighted automatically for no reason, and some Apple genius decided it would be a good idea to have highlighted Spotlight results appear as Faded White Text amongst a Faded Blue, Yellow, Red, etc. Background…
There’s no way to understand what’s going on with that color palette. We will soon update our article with the correct and accurate solution to this issue. As soon as we get an update from Apple regarding this issue we will definitely going to inform all our users.
Keep reading!


