


 Header Through Cloudflare")


Welcome to this comprehensive guide on improving your audio quality in Adobe Premiere Pro. Whether you’re a content creator, filmmaker, or vlogger, ensuring top-notch audio is crucial for delivering a professional and engaging video. In this tutorial, we’ll walk you through the process, utilizing your provided content and incorporating detailed explanations and settings for each step.
Recording and Importing Audio
To get started, record your clip using your preferred method. Once you have your recording ready, save it as a file on your computer. Open Adobe Premiere Pro and create a new project. Import the recorded audio (or video with audio) file into the project by clicking on “File” > “Import.”
Also Read- How To Use Adobe Firefly In Photoshop For Free
Nesting Your Audio
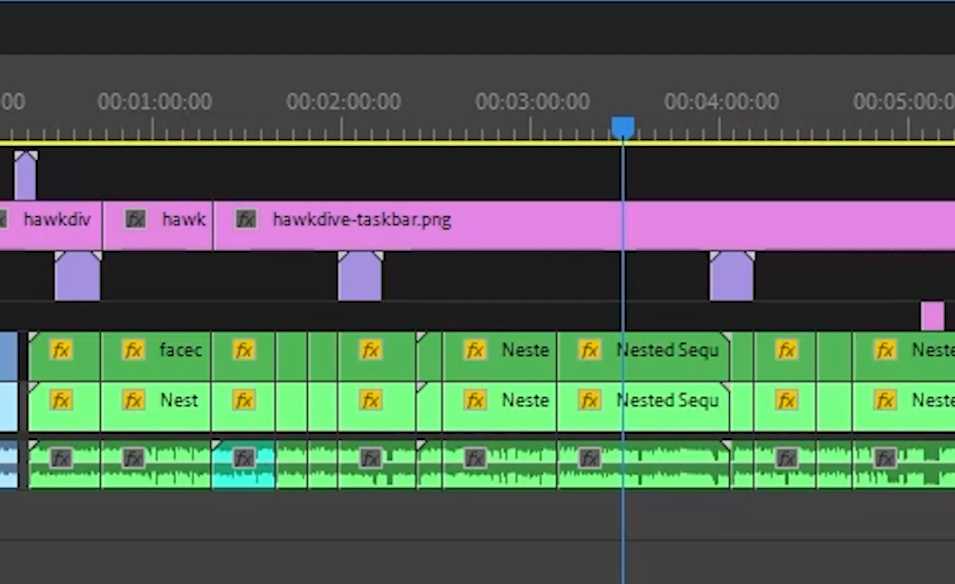
To make the editing process more manageable and organized, it’s best to group your audio clips. Drag the imported audio file to the timeline, then highlight all the audio clips by selecting them. Right-click on the selected clips and choose “Nest” to group them.
Reducing Background Noise
Background noise can be distracting and negatively impact the overall audio quality. To reduce it, locate the “Audio Effects” panel and search for the “DeNoise” effect. Drag the “Noise Reduction” effect to the nested audio clip on the timeline. Adjust the settings to your preference, aiming to minimize background noise while maintaining the clarity and richness of your audio.
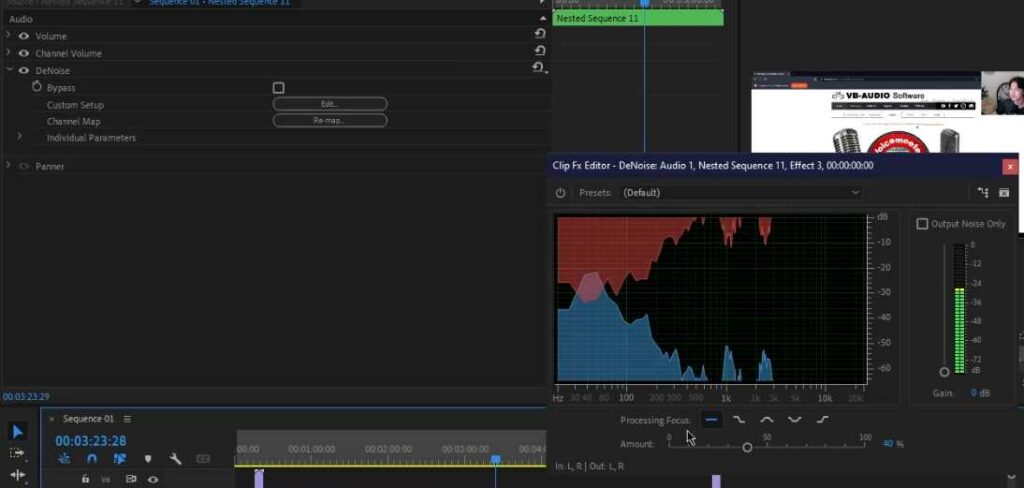
Example settings: Reduce noise by 50%, focusing on higher frequencies.
Also Read- Auto Captioning through Adobe Premiere Pro
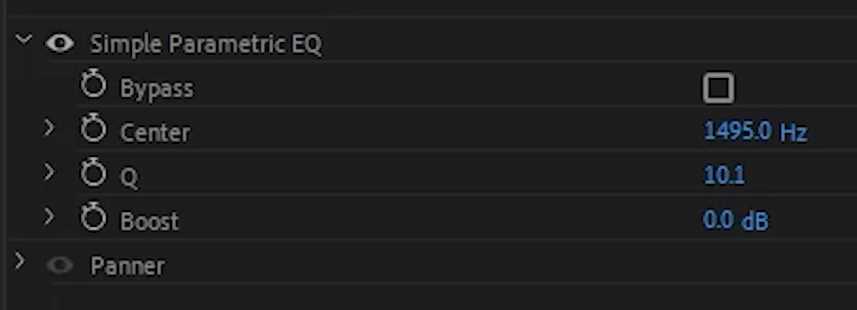
Parametric Equalization
Equalization is essential for balancing and enhancing the different frequencies in your audio. Find the “Parametric Equalizer” effect in the “Audio Effects” panel and drag it to the nested audio clip. Here, you can experiment with various presets or manually adjust the equalizer to suit your microphone and desired audio characteristics.
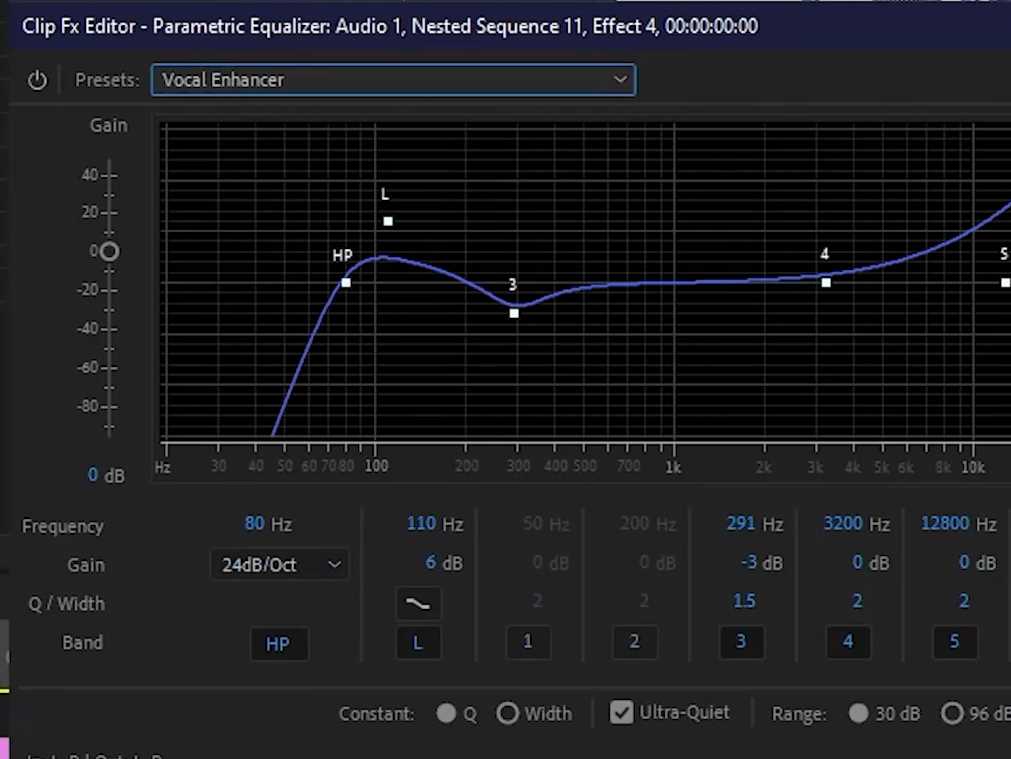
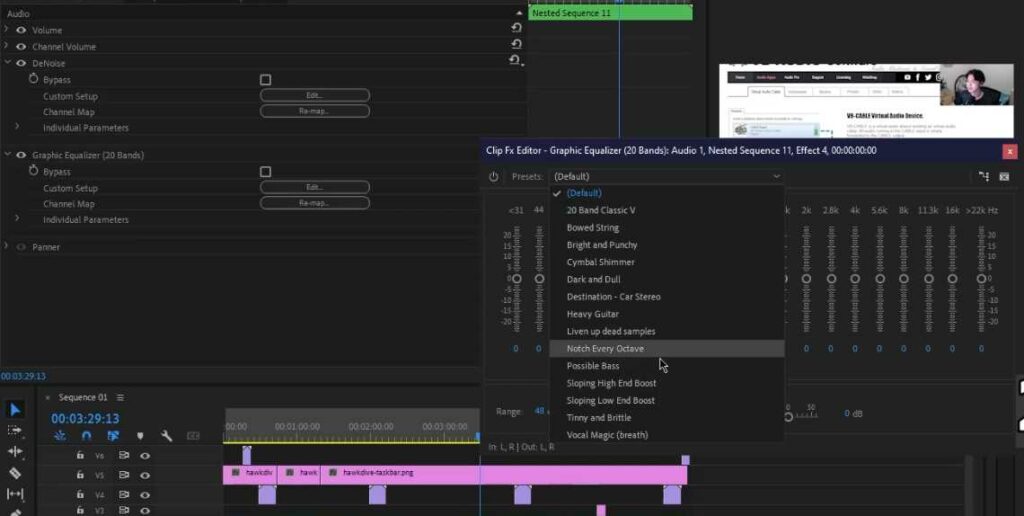
Example settings: Use the “Vocal Enhancer” preset for a crisp sound with pronounced vocals.
Also Read- How To Fix The Importer Reported A Generic Error In Adobe Premiere
Dynamic Processing
Dynamic processing helps control the volume range in your audio, ensuring a more consistent and polished sound. Locate the “Single Band Compressor” also, check the Dynamic Processing effect in the “Audio Effects” panel and add it to the nested audio clip. Adjust the compressor settings to balance the dynamics of your audio, preventing sudden volume fluctuations.
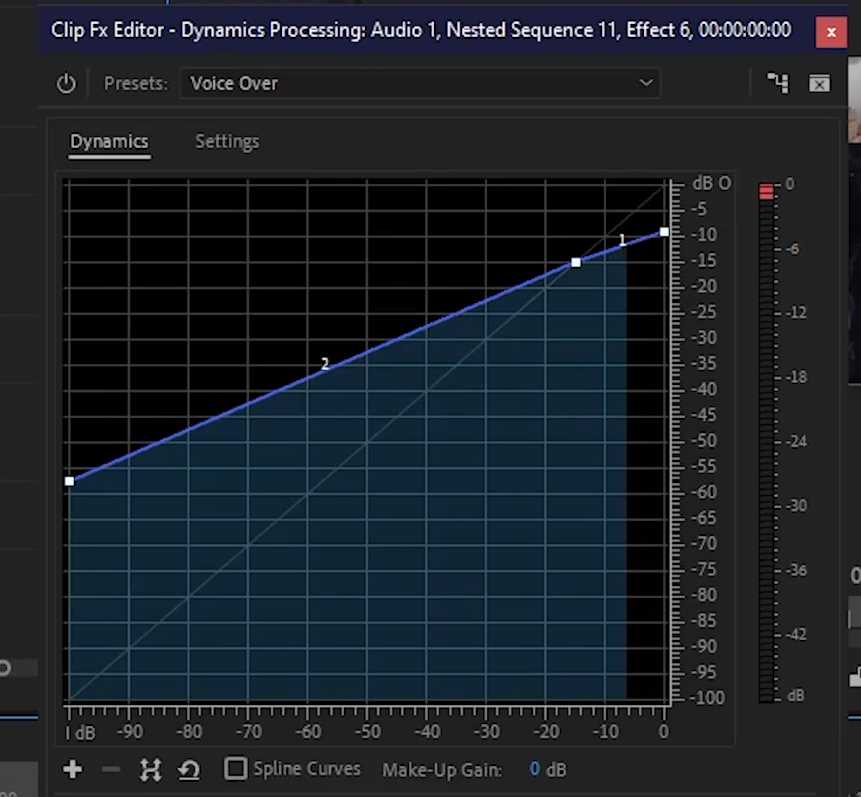
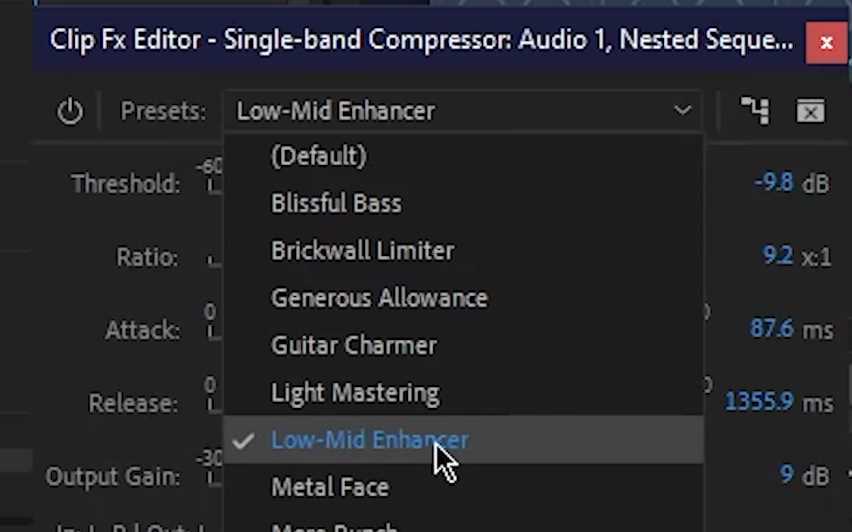
Example settings: Use the “Voice Over” preset for smoother vocals without compromising clarity.
Hard Limiting
Add a “Hard Limiter” effect to the nested audio clip to avoid audio distortion and ensure a consistent volume level. Set the maximum amplitude to prevent any spikes in volume that could lead to distortion.
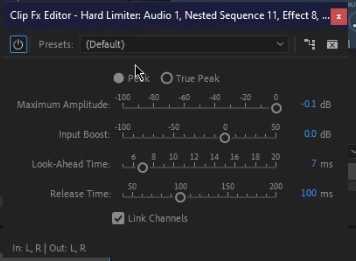
Example settings: Limit the amplitude to -6 dB for controlled audio peaks.
Volume Level Adjustment
Use the volume slider on the nested audio clip to adjust the overall volume level. Lower the volume to reduce environmental noise while maintaining clear and audible audio.
Testing and Customization
Playback the audio to test the improvements made. Listen carefully and fine-tune the settings to achieve the desired audio quality. Remember that every microphone and recording environment is unique, so making subtle adjustments can significantly impact the final result.
Additional Tips for Audio Enhancement*
To further enhance your audio quality, consider the following tips:
Use a Pop Filter or Windscreen: Reduce unwanted plosives and wind noise during recording by using a Pop filter or windscreen.
Monitor Audio Levels: Avoid audio peaks and clipping during recording and editing by continuously monitoring your audio levels.
Utilize Audio Keyframes: Use audio for precise volume control at specific points in your timeline, ensuring seamless transitions.
Balance Background Music and Sound Effects: When adding background music or sound effects, ensure they complement your voice without overpowering it.
Explore Third-Party Plugins: Adobe Premiere Pro offers a range of audio effects, but don’t hesitate to explore third-party plugins for additional enhancements and special effects.
Use Room Treatment: Improve recording conditions by adding acoustic treatments, such as acoustic panels or foam, to reduce echo and reflections.
Conclusion
Can I use these techniques for live recordings?
The steps provided in this guide are primarily intended for post-production editing. While some techniques can be applied to live recordings, the process may differ, and real-time audio processing tools would be more suitable for live scenarios.
What does a compressor do, and why is it important?
A compressor reduces the dynamic range of your audio, making the softer parts louder and preventing distortion from louder peaks. This evens your audio and ensures a more consistent volume level, producing a polished and professional sound.
By following this comprehensive step-by-step guide and incorporating the additional audio enhancement tips, you can elevate the audio quality of your videos in Adobe Premiere Pro. Customizing the settings to suit your microphone and recording environment will produce exceptional and professional audio output. As you refine your audio editing skills, your audience will appreciate the immersive and enjoyable experience your videos offer.
Remember, audio quality is an essential aspect of video production, and the effort you put into improving it will not go unnoticed. So, apply these techniques, practice, and take pride in the exceptional audio quality you achieve on Premiere Pro!


