


 Header Through Cloudflare")


In this article, we will talk about how to enable and use Live Captions on Windows 11.
Microsoft is busy strengthening Windows 11 by rapidly releasing Windows Insider builds. In the same context, they’ve released a new upgrade recently which has brought touch gestures, and app folders into the Windows 11 operating system. Among these updates, the most fascinating and handy feature we have now is the live Captions. Yes, it’s official Live Captions which was already a part of Android is also a part of Windows 11 now. Since Apple has recently introduced Live Captions turn on its iPhone through iOS 15, Live Captions on Windows 11 is seriously a welcoming move by Microsoft.
Also Read: Mouse Left-Click Not Working On Windows 11? Try These Fixes.
What are Live Captions on Windows11?
Live Captions are a part of the productivity feature of Windows11 that is bound to enhance text readability. What’s more interesting is that Live Captions will also work offline without an Internet connection as it is designed to process the voice data on the PC itself without intervention by the cloud. Right now, it is only possible to add Live Captions in English (United States). However, we expect Windows 11 will introduce new languages soon.
If you are smitten by this wonderful feature and want to try it out, stay with us as we will explain how to enable and use Live Captions on your Windows 11 PC.
Note: Currently the Live Captions feature is only a part of Windows11 insider build 22557 or above. As a result, you won’t be able to use Live Captions if you are using the stable channel of Windows11.
So if you are on the insider build 22557, keep reading below to know how to enable Live Captions from Windows 11 settings window.
Also Read: How To Fix Low Game FPS In Windows 11
Enable Live Captions on Windows 11
To enable the Live Captions, you have to access the Windows 11 settings. For this, hit the Windows key along with the I key to bring up the settings app.
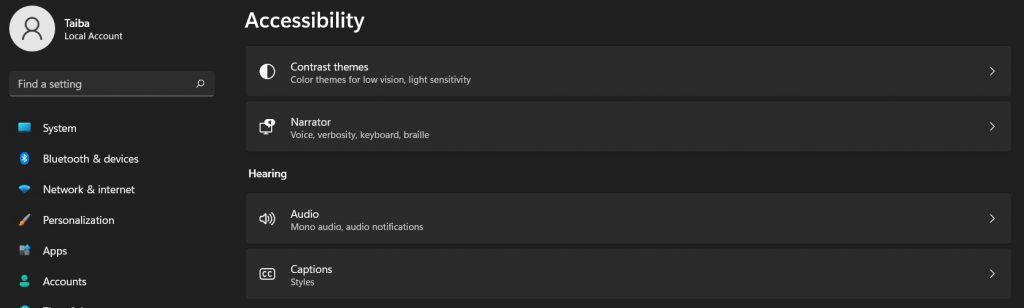
- When in the Settings app, click on the accessibility tile on the left navigation panel.
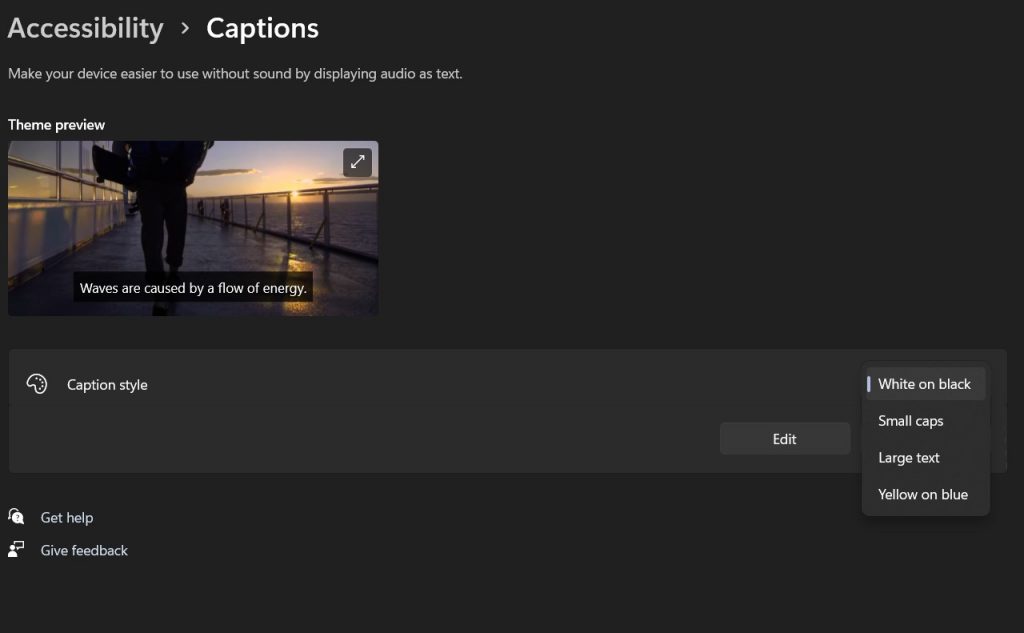
- Launch Scroll down to reach the hearing section and then click on Captions to expand the caption settings section.
- Here, you will see the toggle for Live Captions. Move the topic switch in one position to enable Live Captions on your PC running on Windows 11.
There is also a shortcut way to enable Live Captions. Use the shortcut key combination ‘Win+Ctrl+L’ on your Windows 11 PC to quickly enable live Captions.
As soon as you will enable the toggle, a popup window will appear. Press the “I agree” button to allow Windows 11 to process your voice data locally.
Also Read: How To Speed Up Microsoft Edge On Windows 11
Customize Live Captions on your PC
Congratulations that Live Captions are now enabled on your Windows 11 PC. It is also possible to customize these Captions in different ways. You have the freedom to change the caption box position, filter foul language, allow the microphone to record audio, and even change the font and font style of the caption. Let’s see how you can modify these options:
When the caption box is visible on the screen click on the gear icon visible under the top left. Now click on the position option and here you will see what options you have to place the caption box; on the top, bottom, or keep it floating.
To filter profanity and add captions through microphone audio, once again go to the settings and now choose caption options here.
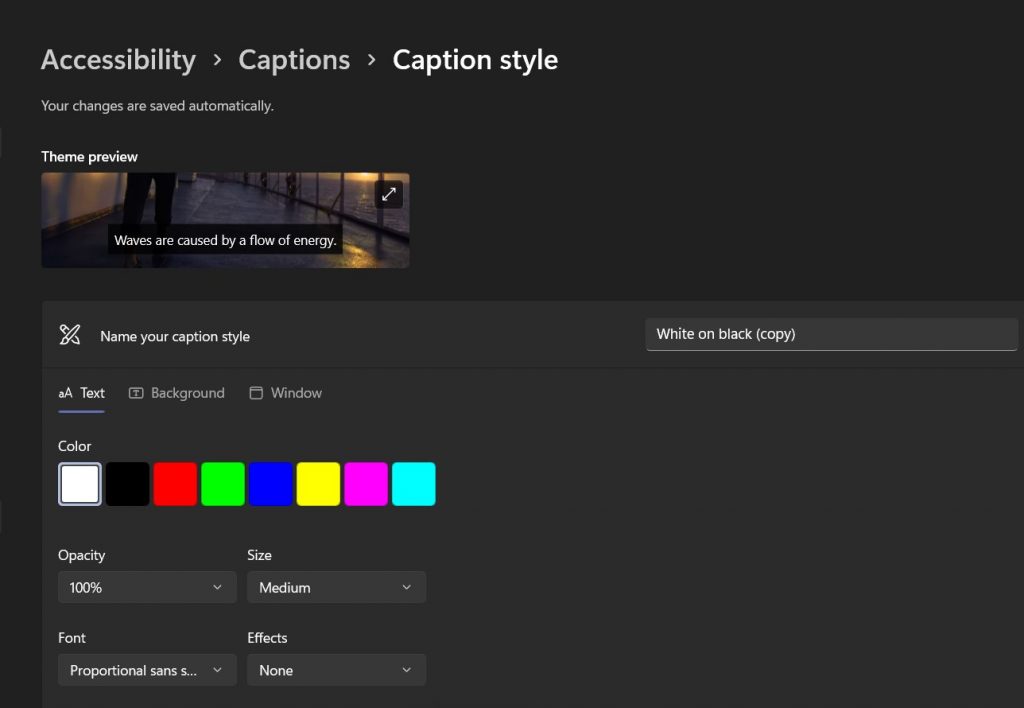
Next, you can modify the caption style and pick one out of white on black, large size text, text in small caps, yellow on blue color. You can also change the opacity and the background color of the caption. You can preview it in the left window.
Also Read: Outlook Search Not Working In Windows 11? Try These Fixes
Create a shortcut for Live Captions
Thankfully it is possible to quickly turn on and disable Live Captions from the Windows 11 quick settings. Follow the steps below to learn how to do it.
- To begin with the process, you have to add accessibility quick settings in the Live Captions. If you are unable to find it, press the pencil icon to add accessibility in the quick settings.
- Next press the add button.
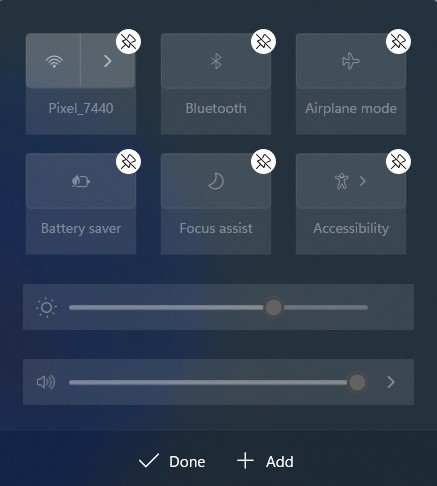
- Now you will see all the available options in the list, pick accessibility from here.
- After this all you have left to do this to press the Done button.
- Now access the accessibility option in the quick settings.
- Here you will see several options. Look for Live Captions here turn on the toggle for it.
Also Read: How To Switch Users In Windows 11
Conclusion
Now you have Live Captions accessible on your Windows11 PC. The live caption is a wonderful addition to the list of Windows 11 productivity features. What do you think about Live Captions? Do spare a minute to give your opinion in the comment box below.


