


 Header Through Cloudflare")


Normally you use stickers on all of your social texting apps such as Whatsapp, Instagram, etc. How fun it will be to use the same on your Windows 11 PC. There is a hidden feature in the Windows 11 for the stickers. It is by default present, you do not need to download any additional apps for this. All you need to do is enable it by following some steps. This feature will allow you to customize and personalize to your wish on the desktop backgrounds, like how people customize the desktop cover with stickers and designs. In this article, you can know how to enable and also disable the sticker in your Windows 11.
How To Enable Desktop Stickers in Windows 11
This feature in windows 11 is present by default you enable it by following a few steps. Let us check out how to do it.
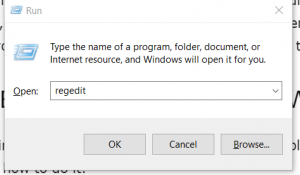
Press windows+R together on your keyboard to open the Registry editor and type regedit, press OK or click Enter button on the keyboard. Or you can also click on the windows button and type regedit in the search bar, click on the open.

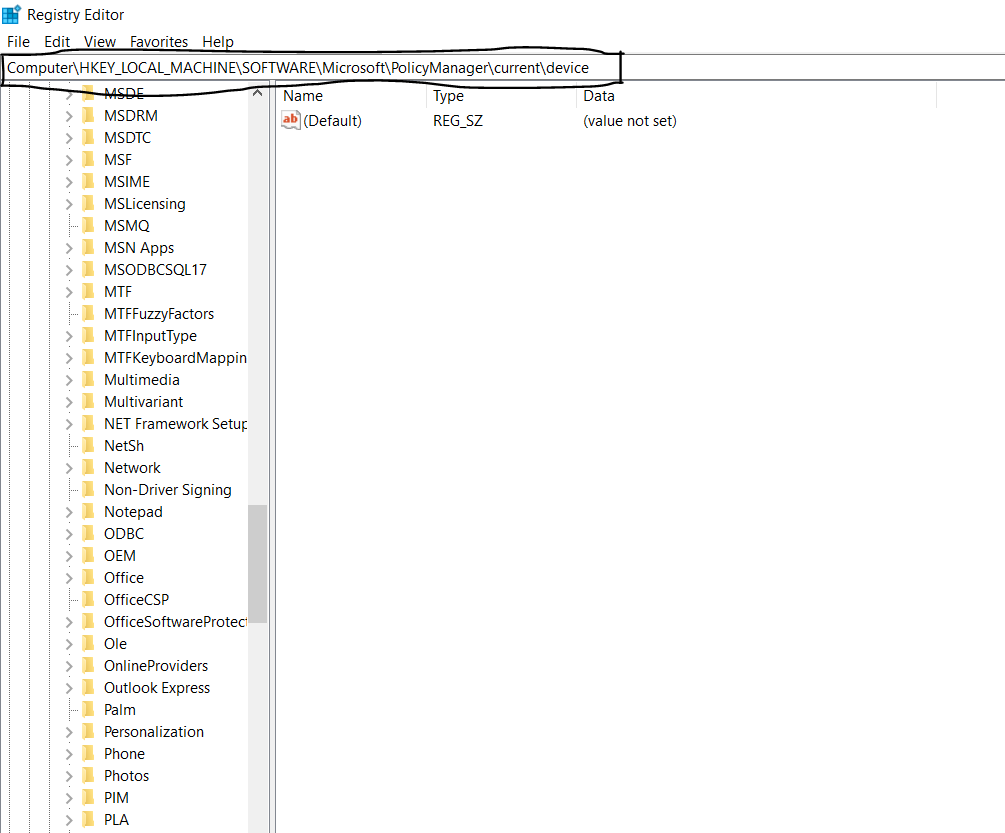
A Registry Editor window will open. In the registry, address bar type the following address to search and press enter.
Also Read: How To Add And Remove Favorites In File Explorer Home In Windows 11
HKEY_LOCAL_MACHINE\SOFTWARE\Microsoft\PolicyManager\current\device\
In the right sidebar, you can find many options. when you navigate the Device option gets highlighted. Right-click on that, and select the option New, you will get another menu of options in that select Key.
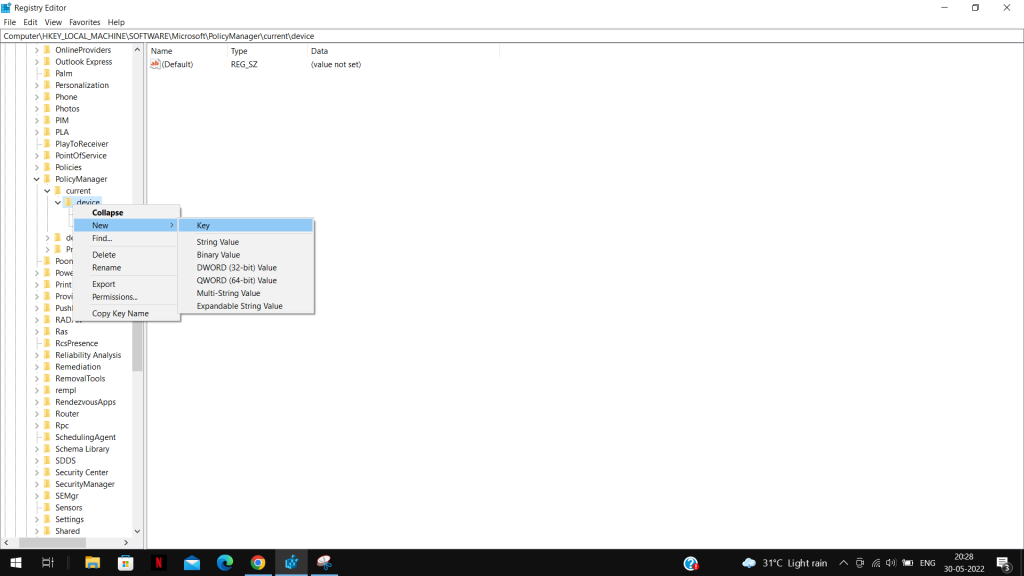
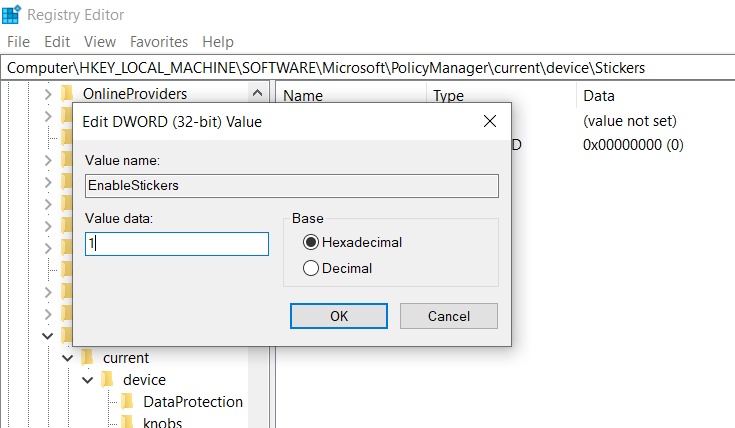
Now rename this has Stickers and press Enter on your keyboard.
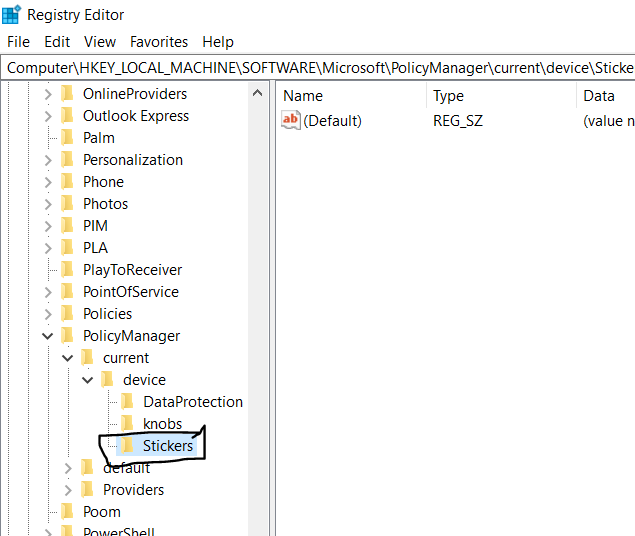
In the right-side pane, right-click and you will get a list of options. Select the New options and under that select DWORD (32-bit) Value.
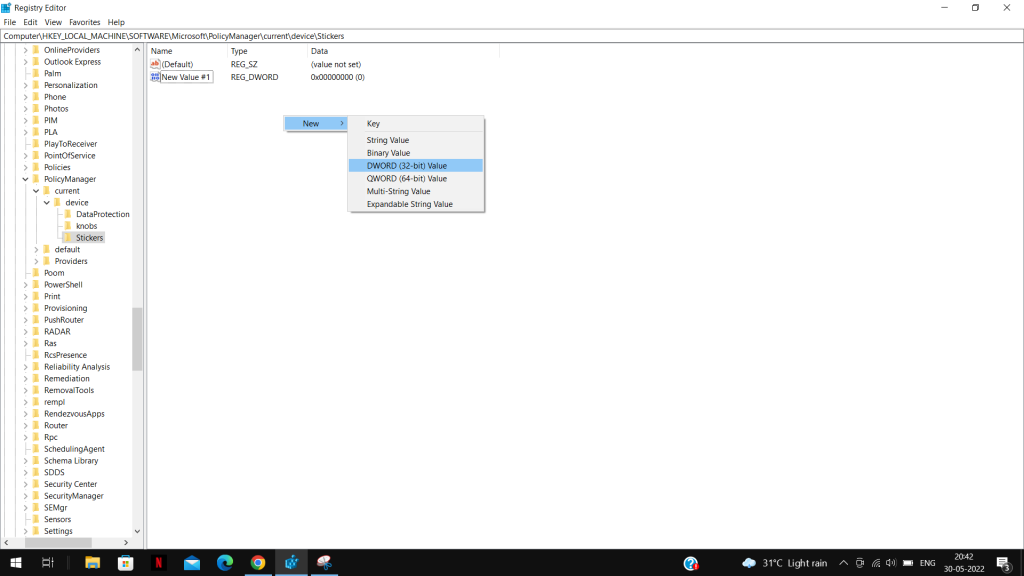
Now rename this as EnableStickers. Double click on this option to set the value. When you double click you will get a pop-up box. In the Value data column set the value as 1. Then click on OK.
After following all the above steps, Restart your system. You will be able to see the option Stickers on your windows 11 desktop.
Also Read: How To Show Drive Letters Before Or After Drive Name In Windows 11
How to Add and Edit stickers on your Windows 11.
You got to know how to enable the stickers on your Windows 11 PC. Now let us see how to edit or add the stickers.
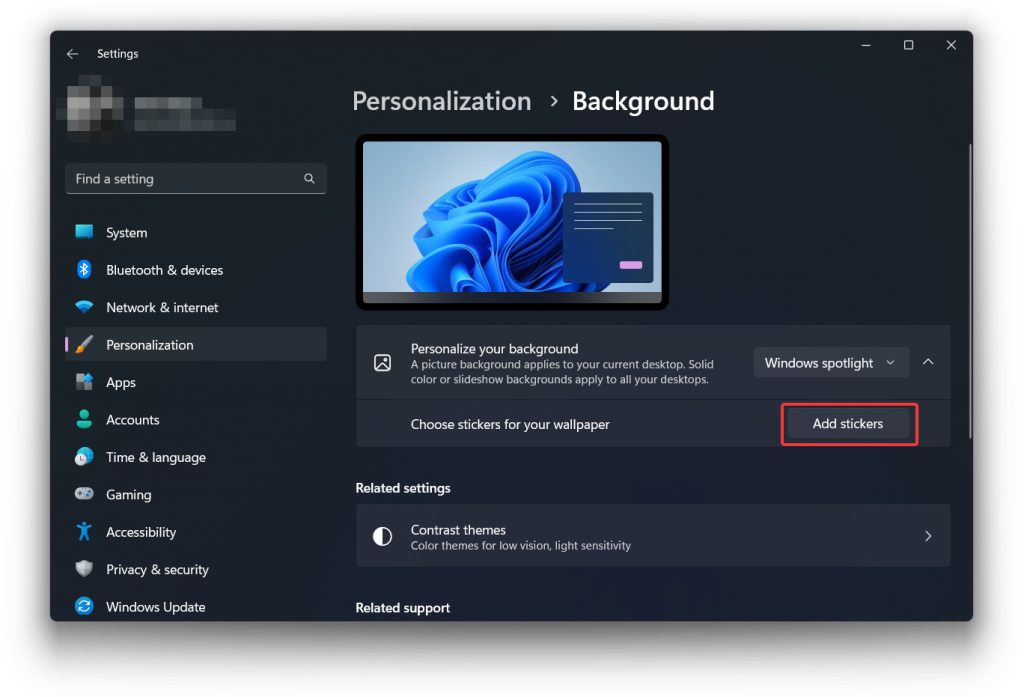
Right-click anywhere on the wallpaper screen of your system. You will get many options, in that select Add or Edit Stickers option. O one more way to do this is to click on the windows button and select the Settings option. In the list, select Personalization. In the left side pane Select Background.

In the right-side pane, you can see the option Choose stickers for your wallpaper, in that click on Add Stickers.
When you click that option small windows with lots of stickers appears. You can scroll and give a glance at these stickers.
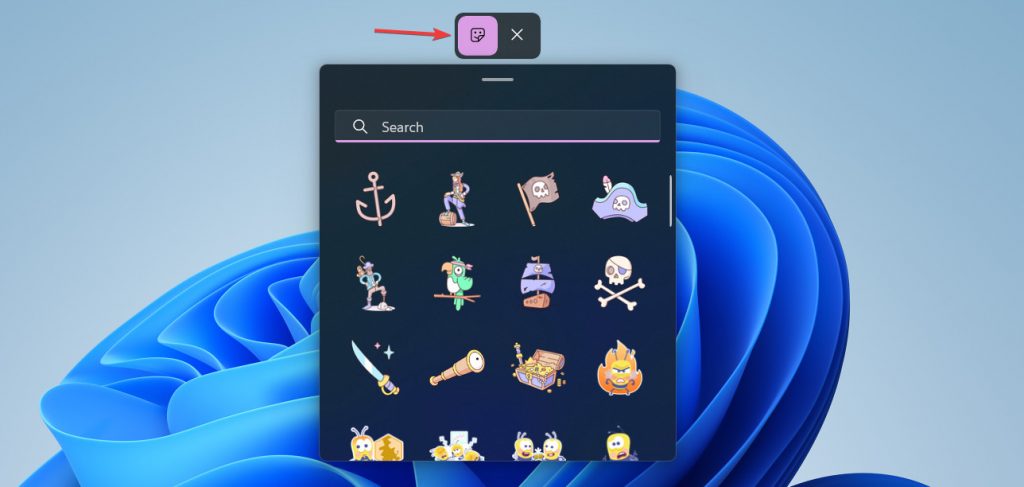
Tap and select any sticker of your wish. It will appear on your desktop. When you click on that sticker you can resize, rotate and place it anywhere on your screen. You can add any number of images you wish to. If you want to remove the sticker from the screen click on the sticker and you can see an X mark on the right top corner of the image, click on that and it is removed.
Also Read: 8 Ways To Fix Windows 11 Troubleshooter Not Working
How to disable Stickers in your windows 11
This is similar to how you enable the stickers on your windows 11, but in the end, only one step changes.
Press windows+R together on your keyboard to open the Registry editor and type regedit, press OK or click Enter button on the keyboard. Or you can also click on the windows button and type regedit in the search bar, click on the open.
A Registry Editor window will open. In the registry, address bar type the following address to search and press enter.
HKEY_LOCAL_MACHINE\SOFTWARE\Microsoft\PolicyManager\current\device\
You can see the Stickers option in the left side pane. Right-click on that and select the delete option. Another way is to click on the sticker option which is present in the left side column, and in the right side pane, you can see enable sticker option. Double click on that, and a pop-up box will appear. Change the value from 1 to 0. After doing all these steps. Restart your computer and the stickers features are disabled in your Windows 11 PC.
Also Read: How To Restore Classic Start Menu In Windows 11
Conclusion:
Microsoft has bought this new amazing feature that helps to customize the stickers on your desktop wallpaper which is very interesting. While some people like it and others do not like it. You can easily enable and disable this feature. You can go through this article to get to know how to enable, add, edit and also disable the stickers on your Windows 11 PC. I hope this will clear your doubt regarding enabling and disabling of the stickers on your Windows 11.
Also Read: 6 Best Ways To See Wi-Fi Passwords In Windows 11


