


 Header Through Cloudflare")


In this article, we have put down the potential fixes to resolve the Read Only External Hard Drive on Mac.
Mac is a robust machine but you are likely to run into one or the other issue from time to time. While accessing the contents of the external hard drive is not a big deal, sometimes you get the read-only error when you connect an external hard drive to your macOS device.
This issue occurs when you have previously formatted the hard drive using Microsoft’s NTFS filesystem and as expected, macOS does not support this. While this issue may look like a big deal, you can easily find your way around the problem so that your external hard drive is no longer in read-only mode.
Thankfully, there are several ways to resolve the read-only error of an external hard drive. The most common ones are reformatting the hard drive and installing a program that enables you to write on the NTFS volumes.
In this guide, we will explain the different methods that can help resolve the “Read Only” External Hard Drive on Mac.
Also Read: How To Diagnose And Fix A Noisy Mac Fan
Format your Hard Drive (If the hard drive is empty)
If you encounter the read-only issue on a blank hard drive, or the data stored on the hard drive is not important, there is no need to go through the long process. Just format the hard drive and you are good to go.
- Here are the steps to easily format your hard drive:
- First of all, connect your hard disk to your Mac and then access Disk Utility.
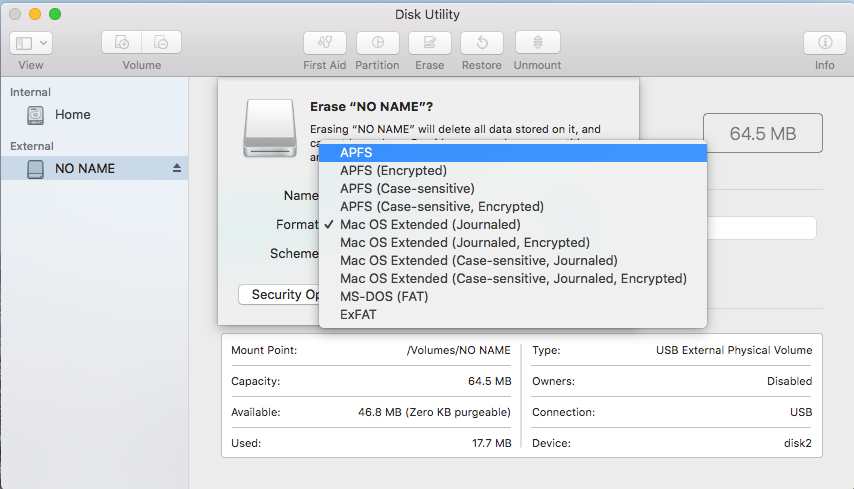
- Here, you need to choose the drive from the navigation bar and press the Erase button.
- Now you need to pick a suitable format option for the external drive. This will depend on what you want to use your external drive for.
Time Machine backup: If you intend to use your external hard drive to back up your Mac, you need to format your hard drive to APFS if you own a macOS 10.13 or later.
Portable drive: If you want to use it as a portable drive to use with your Mac, and other OS, choosing the APFS is the preferred option.
Working with old PCs: If you want to use your disk with an old Windows PC that is not compatible with exFAT, choose the FAT option.
Also Read: How To Change Your Mac Power Settings
Enable experimental NTFS support
Here are the steps to enable the experimental NTFS support on your Mac. Since the feature is still in beta, there are chances that the process may backfire and you suffer data loss on your Mac.
So do not use this method to write on the volumes containing essential data. But if you need to write something on a read-only drive just once, you can employ the native Mac tools to do so. Here are the instructions to write on each ready-only drive.
- Launch Terminal on your Mac and type the following command.
nano etc/fstab
- Now, the following command in a file and you have to replace the DRIVENAME with the name of the drive you need access to:
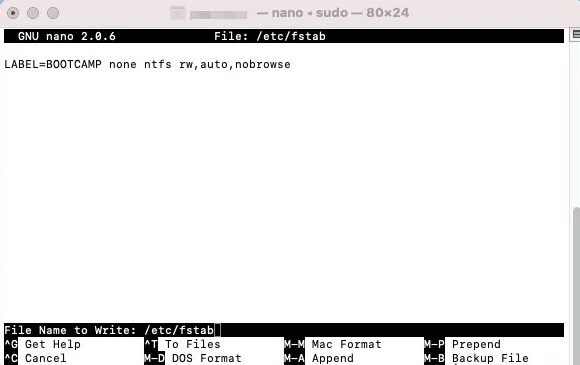
LABEL=DRIVENAME none ntfs rw,auto,nobrowse
- Now save the file using the Ctrl+O shortcut and then close the Nano app using the Ctrl+X app.
- After this, disconnect your drive and then reconnect it. After you remount it, you can access it in the /Volumes section.
For this, go to the Finder app. Now press the Go option in the menu bar and choose the Go to Folder. Next, type /Volumes in the search box and press the Go button. Now the drive will appear here and you can copy it the You’ll see your drive listed here, and you can easily copy files in it.
Also Read: How To Find Your Stolen Mac Without WiFi
A Free Open-Source Solution
While using the Terminal option may appeal to a few, not everyone is comfortable with the Mac terminal. Moreover, editing a file whenever accessing the new drive is not accessible. So what is the other way round? You can use an open-source tool max fuse for macOS as a permanent solution for this.
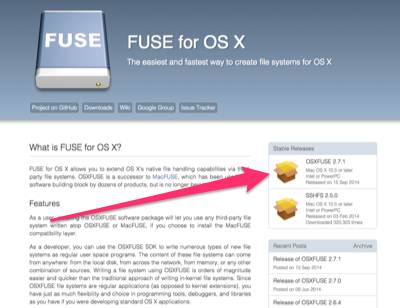
- First of all, Download and install the MACFUSE tool. After this, you need to install Homebrew by typing the following tool in the terminal.
/bin/bash -c “$(curl -fsSL https://raw.githubusercontent.com/Homebrew/install/HEAD/install.sh)”
- When you will run the above command, another prompt will appear in the terminal asking you to install the NTFS-3G package.
- For this, use another command.
The specified language: BASH does not exist’
Code generation failed!!
Once done, you will have to reboot your Mac. After this, you will have to be able to re-run the NTFS-3G command.
Also Read: Apple Mac Studio – Everything You Need To know
Conclusion
That’s all in this article. Using one of the above methods, you will be able to resolve the Read Only External Hard Drive on Mac. If you found this article helpful, don’t forget to share it with others.
Also Read: Everything About Gaming On Mac


