


 Header Through Cloudflare")


It’s safe to assume that, unless you’re an expert at digital decluttering, you’ll find the number next to your photo library to be just as eerie as the one next to your email. Considering that the typical iPhone has more than 140GB of storage, that figure can easily reach the hundreds or thousands. It’s not so simple, though, to sift through random pictures of adorable animals and beautiful breakfast dishes in order to locate the one specific image you’re attempting to recall. If this describes you, it seems like you may benefit from a picture storage makeover à la Marie Kondo, and we’re here to help.
De-cluttering your digital life by organizing your photo collection. It might make it simpler to find and keep the memories you don’t want to lose. Discover the best picture organizing applications and tools for the iPhone, as well as some basic organizational techniques.
#1. Library
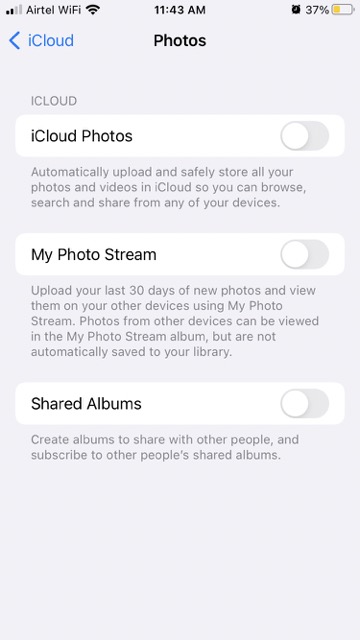
Check that everything is functioning as it should before proceeding: Make sure everything is syncing correctly by going to Settings on your iPhone, tapping your name at the top, and then tapping iCloud and Photos (the iCloud Photos toggle switch should be turned on). Five gigabytes are provided at no cost, however additional space is sold at varying rates.
Launch the Photos utility to explore your collection, which may be considerable. The Delete from Library option will appear in a pop-up menu when you press and hold on an image you no longer need. Select (top right), choose the photos you want to delete, and then hit the trash can symbol.
Select Filters from the menu that appears when you hit the three dots in the upper right corner of the screen to make it a little simpler to identify unwanted photos. For instance, you may choose to conceal all the movies and see only the photographs. If you wish to get rid of everything but the original photos, you may instead choose to simply display the altered versions. If you’d want to remove photos according to location, you may use the Show Map option on the same menu.
#2. Make use of the search bar.
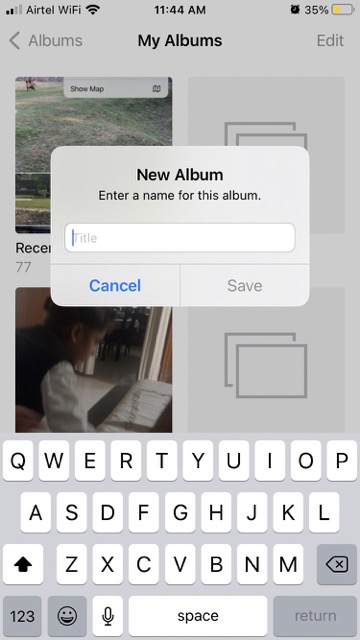
When you’ve finished culling your photo collection of duplicates, you can turn your attention to sorting the remaining images into themed albums. To accomplish this, open the Photos app on your iPhone, then tap the search bar in the app’s lower-right corner to look for specific images using the criteria of time, location, or subject matter. In this way, you can quickly find comparable photographs that have a common theme and compile them into an album without having to sift through your whole collection.
To narrow down your results to only the pictures you took of your dog, rather than every adorable dog in the world, you might create a photo album by searching for the word “dog” and adding the name of the city or even the block where you reside. You may narrow the time frame even further by including the year or the season.
#3. Keep all your pictures in sync
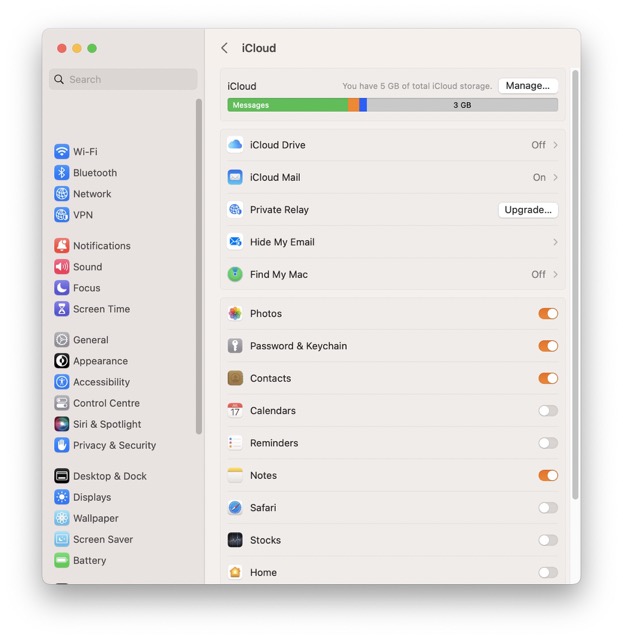
Although the iPhone will be the primary camera, there may be instances when you wish to add images from a different device. Using your Mac, you may import pictures from other sources (such as a memory card) by selecting File and then Import. These data are also copied to your iPhone during the sync process.
Take a look at iCloud for Windows if you conduct most of your picture management on Windows: Although it has limited features, it makes importing photographs into iCloud Photos and syncing them across all of your devices as simple as dragging and dropping. Automatic image uploads from certain directories are also possible.
You can import photos from your computer via iCloud, and there’s also an option to do it directly from your iPhone. Simply plug a camera adapter or card reader into the Lightning connection on the phone, and an import option will show the next time you launch the Photos app.
#4. Reduce the need for internal storage
When your images are synced to the cloud, you can be certain that they are safe and you may free up space on your iPhone by reducing the size of the photos you often view. To instruct your iPhone to only store low-resolution versions of photos on your device, head to Settings > Photos > Photos and Optimize iPhone Storage.
The original, high-resolution versions of your photos are always safe and sound on the iCloud servers, so this setting is only activated when your iPhone runs out of internal storage space. The original photographs may be retrieved with a simple download whenever they are needed again.
Actually, your iPhone is really smart at choosing which photographs (and movies) to compress. If storage becomes full, it will prioritize optimizing the items you view the least. You may not even realize that certain photos are no longer being kept locally in their original resolution.
#5. Make an album that is worthy of being printed.
This advice is for the person who has been meaning to print off several photographs for years but has never gotten around to doing it. If you’d want printed copies of some of your images. Be sure to “put them aside” in a special album for that purpose before you start printing the rest. You may save time when ordering prints later by picking out your photographs in advance. Then, when you grow bored of browsing through your gadgets and want to reminisce about your best experiences. You can pull out the old-fashioned picture books you made.
#6. Find certain individuals
When you take images with your iPhone. The Photos app will try to recognize people in them. Which can help you find certain photos more quickly and easily. Whether you’re trying to delete them or mark them as favorites. To view the detected faces, open the Photos app and navigate to the Albums tab, then to the People section. 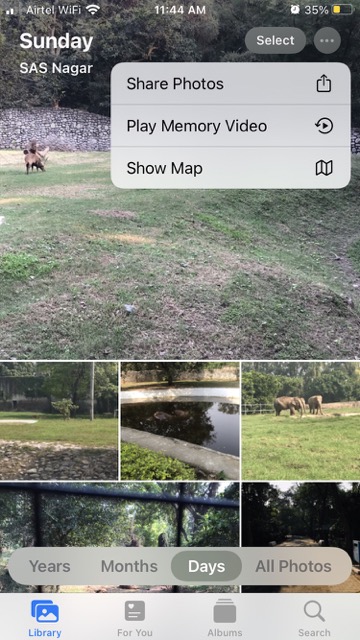
If you tap on a person’s face, all of the photos you’ve taken of them will appear. The “Add Name” button at the top of the page allows you to give a person a specific name. Check if the correct photos are being used to represent a certain individual by tapping the three dots (top right) and selecting Review Confirmed Photos.
If Photos hasn’t done it for you, you may manually tag people in photos. To add a name to a face in a photograph, open it in the Photos app. Press the I in the bottom right, then hit Tag with Name. The program should display a series of selectable thumbnails of the faces it has recognized.
Organizing pictures is a simple job. There are many photo-management tools available in the App Store. The Apple ecosystem really shines when it comes to making all that organization and maintenance worthwhile.


