


 Header Through Cloudflare")


The icons that appear on the screen for various files are kept on your computer’s icon cache. This will permit your Operating System to show the icons immediately rather than scanning the files each time, which is time-consuming. Therefore, this speeds up the process.
However, in some cases, your computer gets corrupter or damaged. This will result in incorrect and strange icons for various files. In such a case, you must remove the icon cache so that Windows can rebuild it automatically. As a result, this article will guide you on how to build Icon Cache in Windows 11.
It turns out that like icon cache even thumbnails also have their cache. This makes the Thumbnail appear blurry or not appear at all. This indicates that the thumbnail cache is also corrupted. Therefore in such a case, the thumbnail should be rebuilt by clearing the cache to regain access to thumbnails.
This icon cache is also known as iconcache.db is a unique database file that Windows maintains. Instead of obtaining pictures from the original app, it utilizes a screen for apps such as explorer generated from icons. The only purpose for this is to draw the icons more quickly in Windows.
Also Read: How To Access The Protected WindowsApps Folder On Windows
Rebuilding the icon cache will not help you in the following icon cases:
- The icon of the shortcut is not displayed properly due to the target source of the shortcut being moved or deleted. You may need to recreate a new shortcut directly from the source file to replay it.
- All icons for a specific file extension show the wrong icon. This may be due to the wrong association of what app to be in the file type instead of the settings. In this case, restoring the default association of the file extension will fix this issue.
- Thumbnails of pictures, videos, and documents.
From this article, you will learn to rebuild the icon cache from different means in Windows 11. this is a simple and easy process.
Also Read: 8 Steps To Fix The Windows 11 Update Error 0x800705aa
Rebuild icon cache in Windows 11
In Windows 11 you can effortlessly rebuild the icon cache anytime when it becomes corrupted or when the icons are shown improperly. In three different ways, you can rebuild the icon cache. To start, manually remove your icon cache using Windows Explorer. This is a little bit of a time-consuming process, but it prevents you from downloading things from the internet, which is the second option.
Secondly, you can use the Bat file to remove your icon cache and rebuild it automatically. Finally, a few command prompts can be used to remove the icon cache. All of them are listed below in this article.
Rebuild icon cache via File Explorer
To rebuild the icon cache in Windows 11, one can use File Explorer by following the below steps:
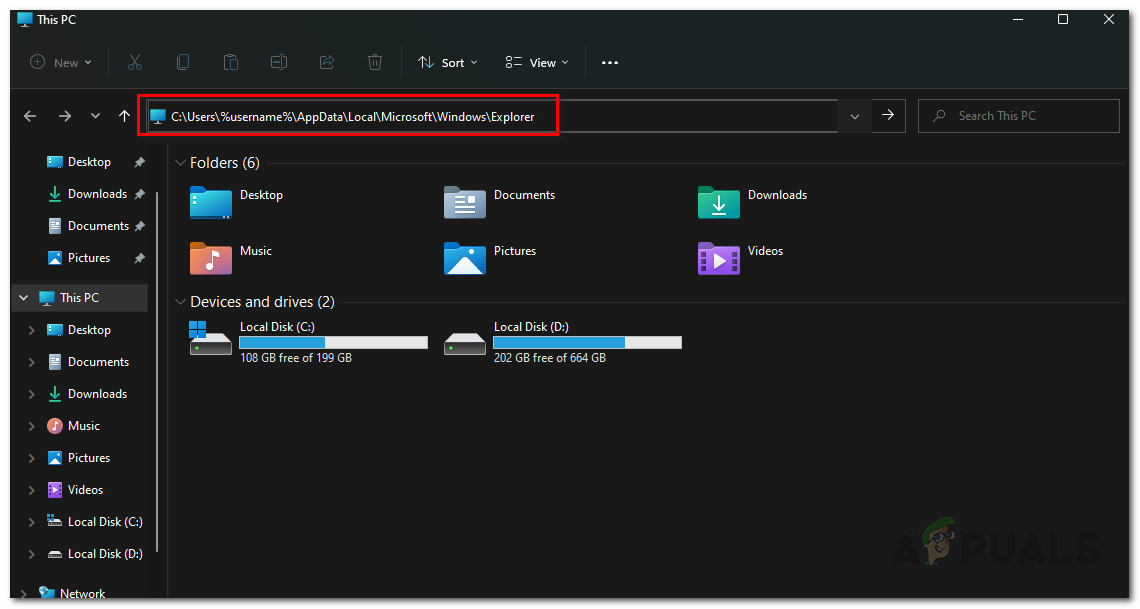
- To start. open File Explorer
- Then just copy and paste the below address to the address bar and hit the enter button C:\Users\%username%\AppData\Local\Microsoft\Windows\Explorer
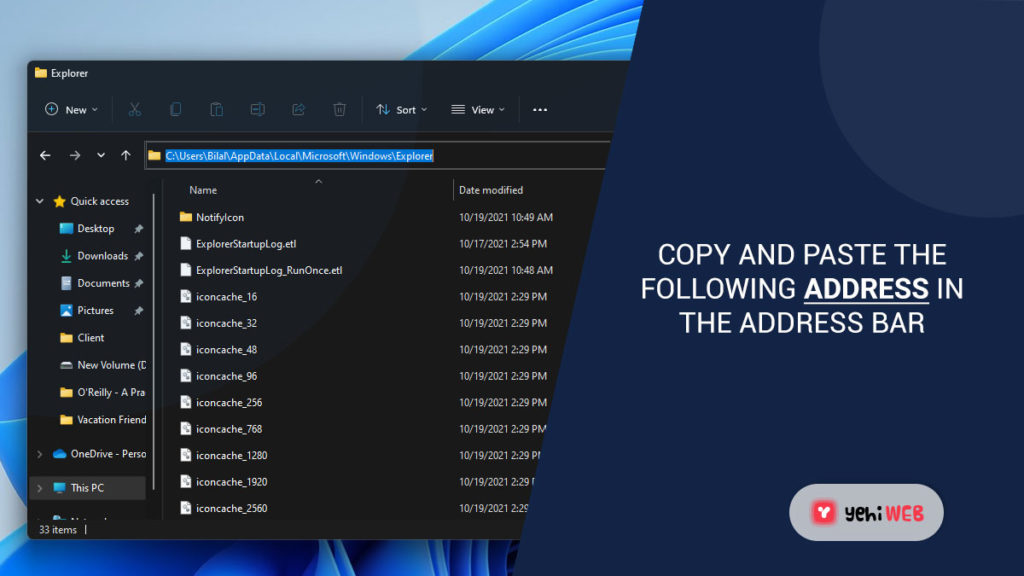
- This will leads you towards many Files. Delete any file that begins with iconcache. As there will be many files.
- After you delete them, a new folder titled IconCacheToDelete will appear in their place.
- This folder will vanish once your computer is restarted, so there is nothing to worry about.
Rebuild via Command Prompt
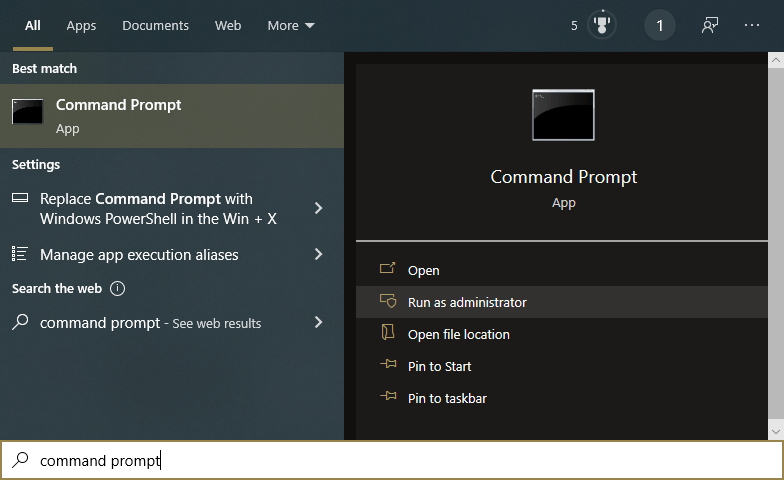
- To start go to the Start Menu and search “cmd” in the seatoolbox box. Run as administrator by right-clicking on the given results. Similarly, choose the Run as Administrator option on the right-hand side.
- To delete the cache copy and paste the below command on the command prompt window one by one:
cd /d %userprofile%\AppData\Local\Microsoft\Windows\Explorer
attrib –h iconcache_*.db
del iconcache_*.DB start explorer
- The first command, switches the current working directory to the specified folder.
- The second command, unhides all the files beginning with iconcache_.
- Finally, the last command deletes all these files
- Restart your computer after you have one of all these steps
- Successfully now have deleted all the icon cache in Windows 11 via Command prompt
Rebuild icon cache using a BAT file
- Download the BAT file firstly
- Save the BAT file to your desktop
- Save and close anything which you were working on before proceeding. Because the next step will kill all the explorer process and restarts your PC.
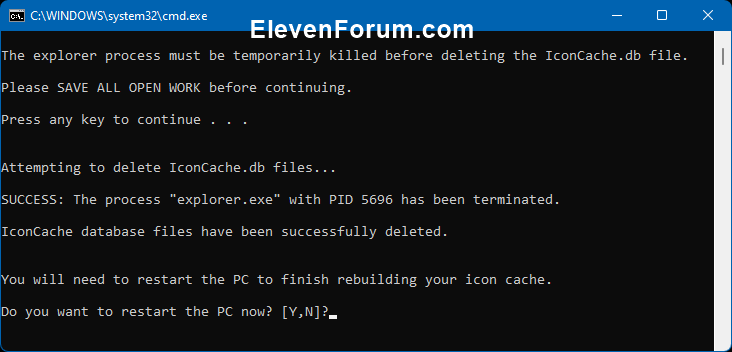
- Unblock and run the BAT file
- Follow the instructions in the command prompt to rebuild the icon cache. You will have to restart your PC now to rebuild the icon cache.
- If the icons are not yet displaying properly after rebuilding the icon cache, then download and merge the .reg file for the .ico (ICO) option here to restore the default association of .ico (icon) files in Windows.
Also Read: How To Turn On/Off Smart App Control In Windows 11
Rebuild icon cache with the Batch script
Finally, the simplest way to rebuild the icon cache is using a batch script that is provided. The script will automatically delete all the cache in your computer before restarting it. Get the script and execute the script and follow the directions on the screen in the command prompt Windows.
In short, from the above ways, you can easily rebuild the icon cache in Windows 11. Therefore I hope this article was informative and helpful.


