


 Header Through Cloudflare")


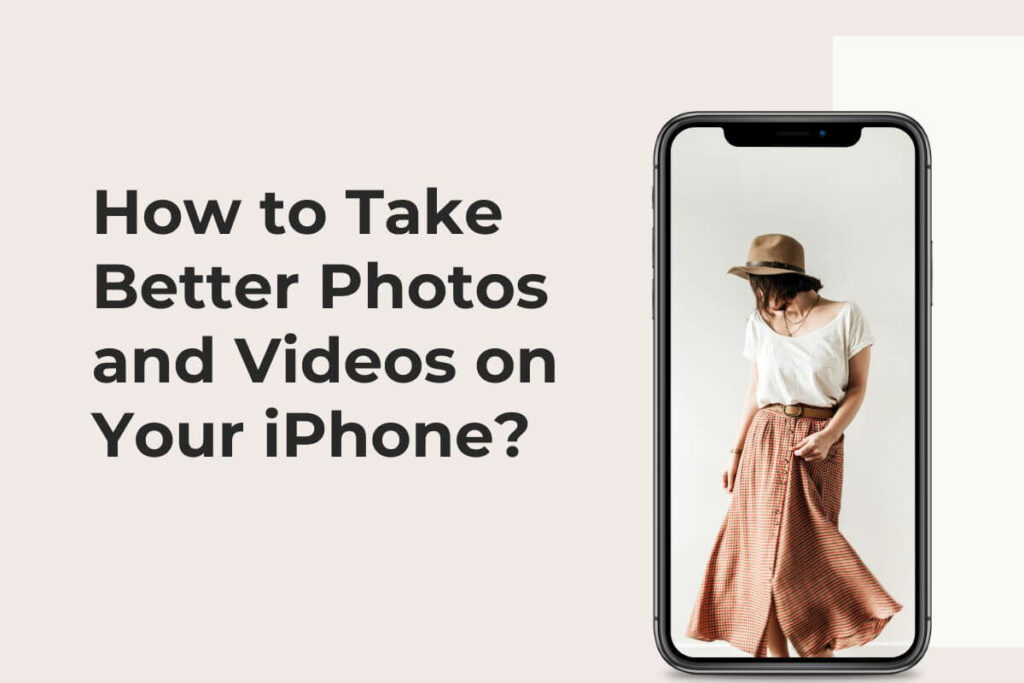
Have you ever seen a photo or video on social media and it immediately caught your attention? The beautifully taken photo may look like it is taken from a professional camera, but in reality, most of the time, it is taken on an iPhone. If you are an iPhone user, then you might want to dive deeper into this article, as we will talk about how to take good photos and videos on an iPhone.
There are multiple different applications to take better images and videos using your iPhone. Well, since some of the applications that I will be mentioning would cost some bucks over at the Apple App Store, these applications are totally optional since the default camera app should suffice every starter’s need.
Later in this guide, we will also be talking about other’ creators’ works and see how did they exhibit their skills and the way they captured things through their iPhones. We will also know about their technique, the applications they used, and how they used their iPhones.
#1. Set the Camera Settings Rightly
Let’s start with the settings important for camera in the process of taking good photos and videos on an iPhone.
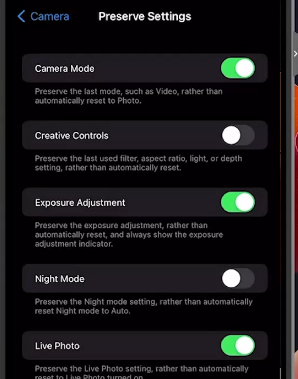
1. The first one would be, of course, turning on the Preserve settings toggle on your camera application. You can do this easily by going into phone Settings -> Camera -> Preserve Settings option. Then toggle all those that you need – Honestly, I would be suggesting Preserve; camera mode, creative controls, and exposure adjustment. So whenever you open up the camera application, those settings will stay the same.
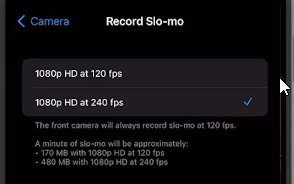
#2. You must also utilize the Slo-mo video feature for those sleek slow-motion shots.
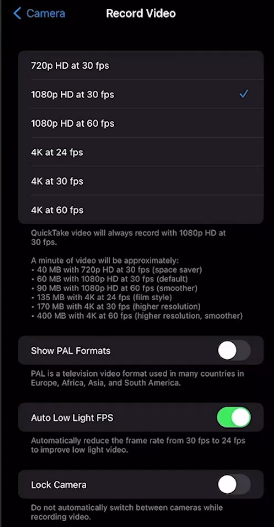
#3. Always record on the Highest Settings possible; most iPhones starting with iPhone 8, are capable of recording 4k resolution and above. So under Settings => Camera => Record Video menu, select the highest resolution, for example in my phone it is 4k at 60 fps.
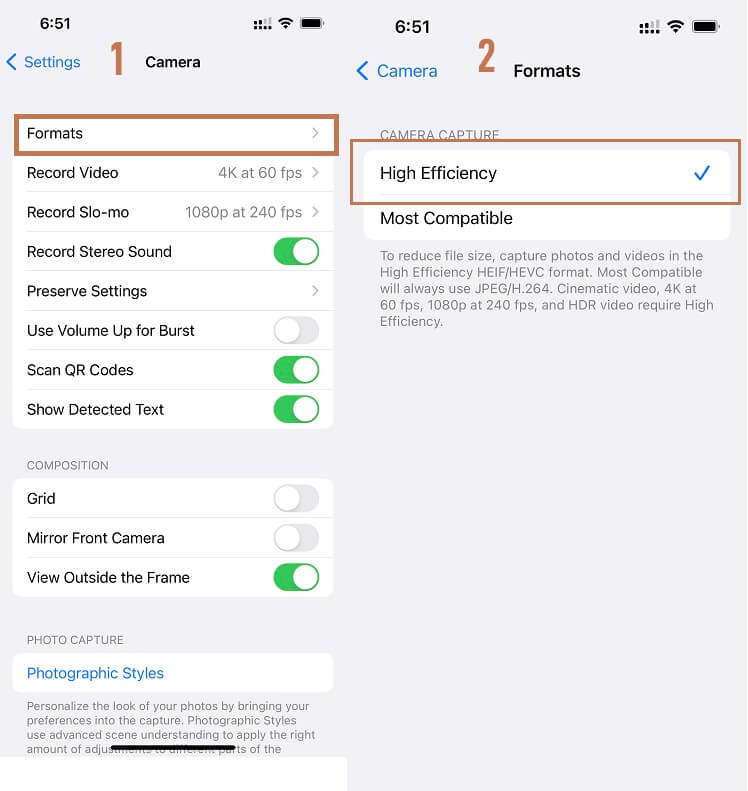
#4. Enable formats such as High Efficiency (HEIF/HEVC) for photos and videos, which provide better quality while efficiently utilizing storage. Under Camera Settings => Formats => Select High Efficiency.
#2. Try some Good Third-Party Applications.
1. Filmic Pro

This application allows you to do advanced color-correcting mode. However, we will not be doing an in-depth tutorial on this program. It is one of the applications that most content creators use on their iPhones who want to create cinematic shots and shoot at s-log (flat color) that allows them to process the video afterward.
I did use this application before, but I am more of a ProMovie recorder fan. It is my daily driver for a main vlog or cinematic shots (other than the default shot from the default camera application, at least).
With all that said, there is a free version of this application, but the Pro version would cost you $4.99 a month.
Some unique feature that this application has that other programs lack, is that Filmic Pro provides advanced manual controls for various aspects of video recording, including manual control over audio gain. This means that users have the ability to manually adjust the microphone gain to achieve optimal audio levels for their recordings.
You may like to read: How to take Long Exposure photo in iPhone 15, iOS 17?
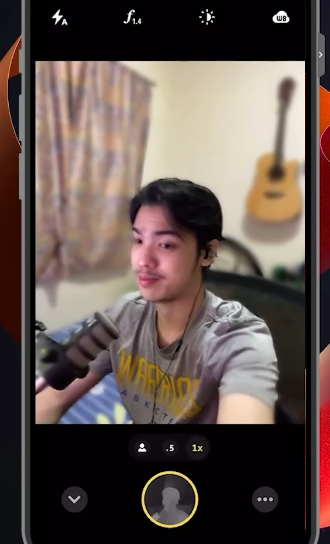
2. ProMovie Recorder
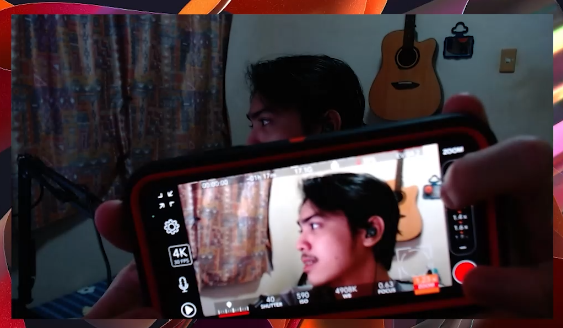
ProMovie recorder or simply ProMovie has both free and pro versions. ProMovie is the one I mostly use since it is easy to use and very efficient and intuitive. I bought the + “Plus” version for $2.99. Basically, the plus version allows you to select higher resolution and bitrate while also removing the watermark on files that you record with it.
This program allows for manual control of the Shutter, Zooming, White Balance, and Focus. Everything is manualized without having advanced feeling-this one should cater to beginners that want to get started in cinematography.
3. Focos
Focos for iPhone is a great app for anyone who loves photography and wants to kind of take stunning portraits with their phone. Focos lets you adjust the focus and depth of field of generally your photos after you generally take them, giving you more creative control and flexibility.
You can also literally apply different bokeh effects, filters, and lighting effects to naturally enhance your images. Focos is definitely easy to use and has a sleek interface that lets you edit your photos with just a few taps. Whether you want to blur the background, highlight the subject, or create a dramatic mood, Focos can help you achieve your vision, which is quite significant. Focos for iPhone is the ultimate app for portrait photography lovers.
4. Dazz Cam
If you love the retro look of old film cameras, you might want to check out Dazz Cam for iPhone. This app lets you take photos and videos with various vintage filters and effects, such as light leaks, grain, and timestamps. You can definitely choose from different cameras inspired by the 80s, really such as VHS, Polaroid, and Disco.
Dazz Cam is actually easy to use and fun to play with. You can really create stunning images that look like they kind of were taken decades ago and share them on social media with the #dazzcam tag. Whether you want to capture a nostalgic moment or just spice up generally your photos, Dazz Cam is literally a great app for you.
#3. Procedures and Techniques.
Taking good pictures with an iPhone camera involves more than just relying on apps and their settings. It requires an understanding of the procedures and techniques that can enhance the quality of the image. While apps and settings play a significant role, factors such as composition, lighting, focus, and timing also contribute to capturing compelling photographs. By mastering these fundamentals and combining them with the capabilities of the iPhone camera, users can elevate their photography skills and produce stunning visuals that go beyond the limitations of technology alone.
#1. Rule of Thirds
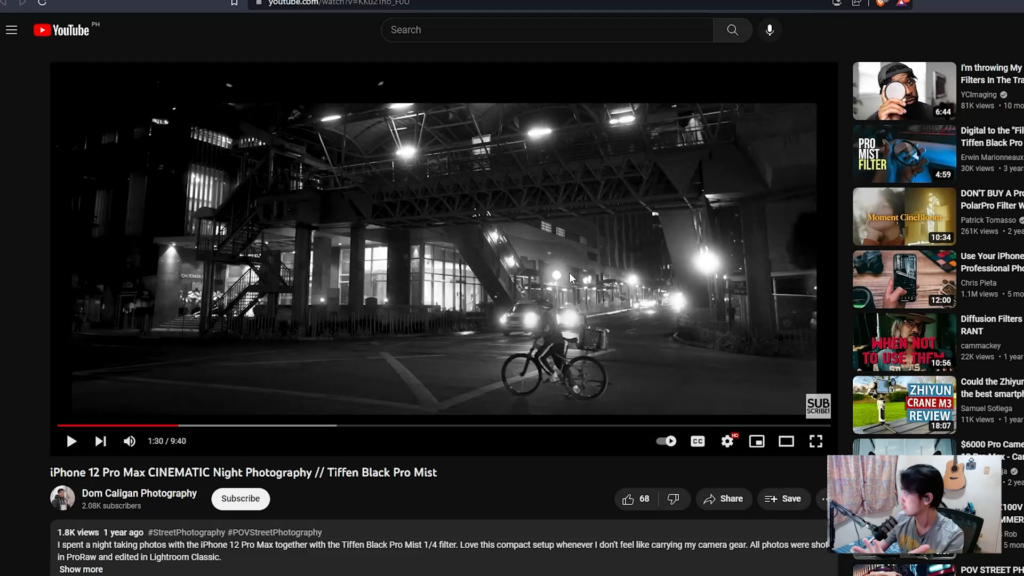
As you can see in the above photo that we are looking at, the shot looks great and has a great composition due to the rule of thirds being incorporated. The subject is on the invisible intersecting line in the lower right quarter of the shot.
What is the Rule of Thirds?
The Rule of Thirds is a fundamental principle in photography composition that helps to create visually balanced and engaging images. The concept involves dividing an image into a grid of nine equal parts by overlaying two equally spaced horizontal lines and two equally spaced vertical lines. This creates four points of intersection, known as the “points of interest” or “power points.” The main idea behind the Rule of Thirds is to position key elements of the photograph along these lines or at the intersection points, rather than placing them directly in the center of the frame.
By adhering to the Rule of Thirds, photographers can add a sense of balance, harmony, and visual interest to their images. It encourages the viewer’s eyes to naturally move within the frame, creating a more dynamic composition. Placing subjects or points of interest off-center can also provide space for other elements or create a sense of movement or direction.
The Rule of Thirds is a versatile guideline that can be applied to various genres of photography, from landscapes and portraits to architecture and still life. While it is not a hard and fast rule, it serves as a useful tool for beginners and experienced photographers alike to improve the overall composition and impact of their photographs.
#2. Center Subject
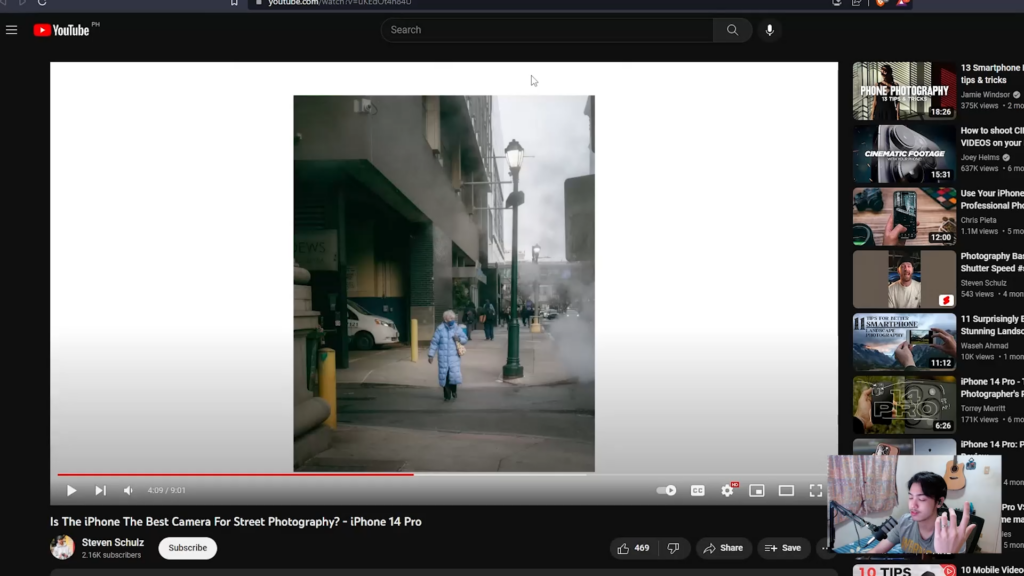
As you can see in this shot, the subject is the lady in the blue jacket. She is in the center of the frame, and she is also wearing a completely different color than the background, which keeps our eyes looking at the subject in the frame.
#3. Low Exposure
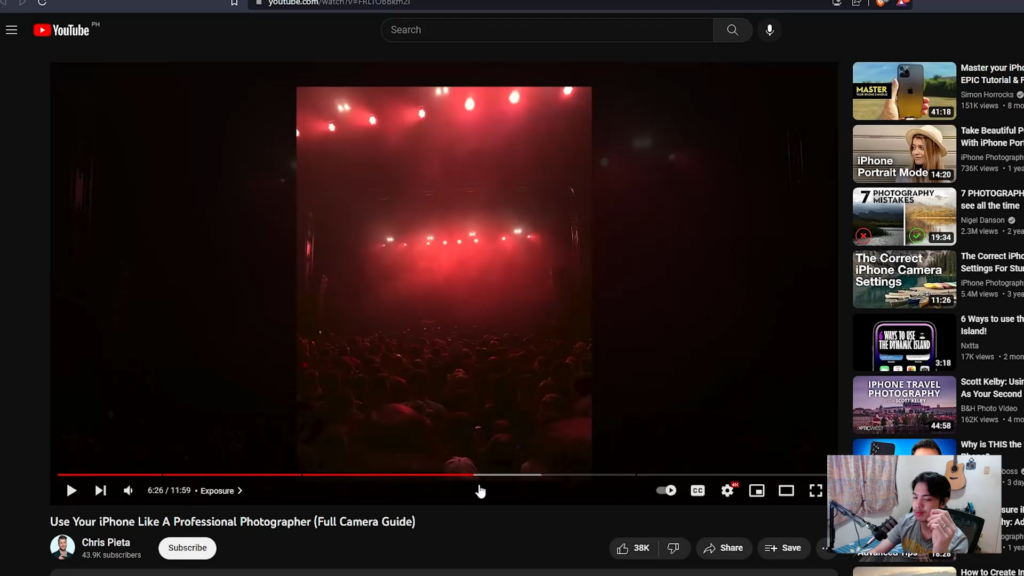
For this shot by Chris Pieta, he used lower exposures than usual to bring out the vibrancy of this specific composition.
Those are some tips that will allow you to be a great photographer to make sure that you are doing the correct thing. Make sure to watch the video that has been made in conjunction with this article. We hope that this article helped you take very nice Photo and Video from your iPhone.


