


 Header Through Cloudflare")


This Article takes you through the steps to disable Facial Recognition Sign-in in Windows 11.
Windows 11 comes with Window Hello. With Windows Hello you can log in to your Device in three different ways. You do it through facial Recognition, PIN, or Fingerprint. In this Guide, we are about to focus more on Facial Recognition.
The latest version of Windows landed with numerous Modifications and Improvements. With this, Facial Recognition also improved. Additionally, Facial Recognition provides you with a more personal and secure way to access your Device. But, in case you have set up facial recognition and wish to disable it, steps to do that are provided below.
Also Read: Set Up Facial Recognition Sign-in For Account In Windows 11
Disable Facial Recognition Sign-in from Account in Windows 11
Steps at a glance:
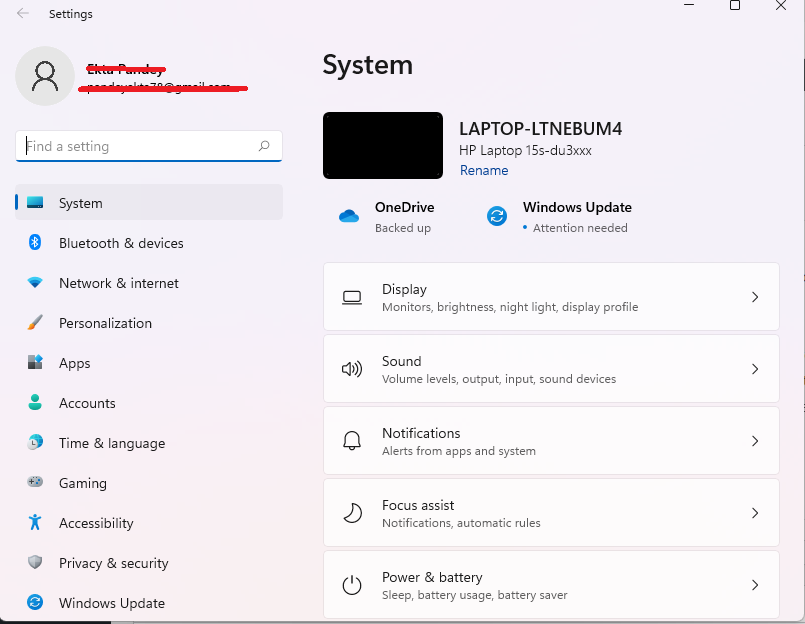
- Go to the Settings. Press Windows key + I
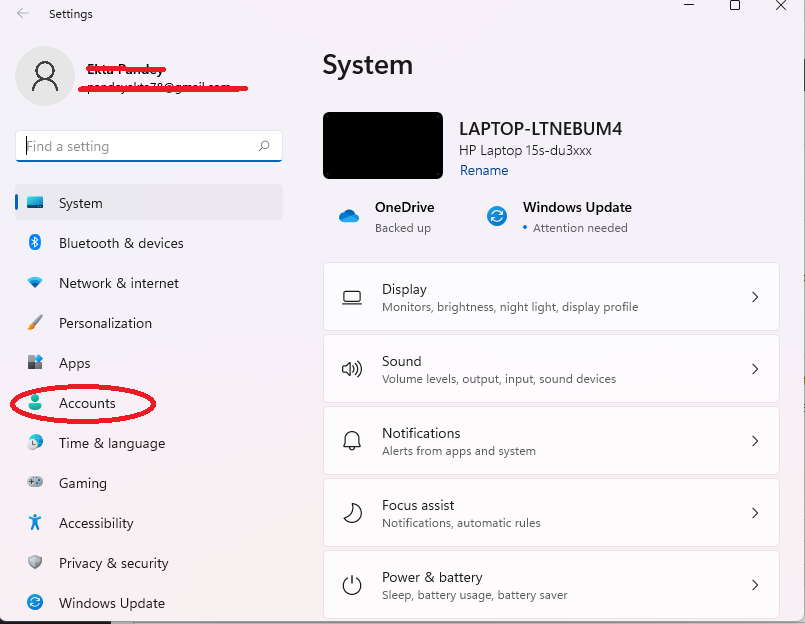
- Click Accounts from the Menu bar on the left
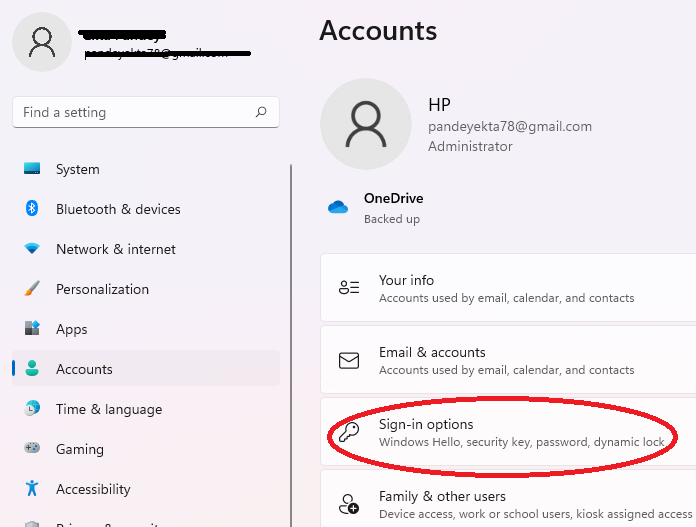
- Then, Select Sign In options from the Right Pane
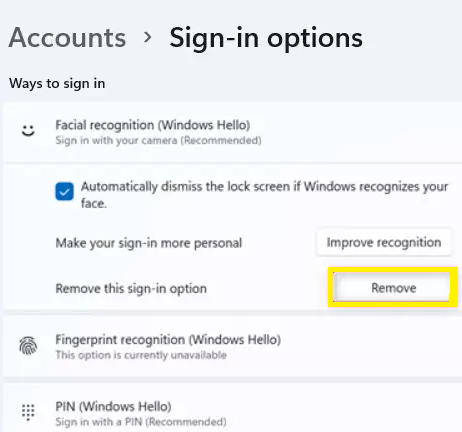
- Click On Facial Recognition( Windows Hello) on the Sign-in Options Screen.
- Then Click on Remove Under Facial Recognition( Windows Hello)
- Fill in the PIN or password of your PC and then confirm the change.
Now, Steps to disable facial recognition In Detail:
Have configured facial recognition as a mode of Signing into your device and want to disable it, But don’t know how to do that? Don’t Worry! We have got you covered. You can disable facial recognition on your device in a few easy steps.
- Open The System Settings. On Windows 11, you can go to system settings by pressing Window Key + I. Alternatively, you can click the Search icon and Find Settings by typing it in the Search Box. This Way, you will be able to spot the Settings icon. All you need to do is to click that icon and You will be taken to the Settings.

- Under Settings, Click on Accounts from the Menu bar on the Left Pane. Once you click Accounts, You can see numerous Settings options related to Account.
- Then, Tap Sign-in options available on the Right Pane of the screen.

- Then On the Sign-in options screen, click on Facial Recognition to expand it.
- Further, Under Facial Recognition, Click on the Remove option available next to Remove this Sign-in option.

- After performing these steps, you will be asked to input your PIN or Windows password. By filling in the password, you will be able to confirm the change.
- Now, Congratulations! You have successfully disabled Facial Recognition as A sign-in mode to your PC.
Also Read: Use Find My Device To Remotely Lock Windows 11 Device
Set-up Facial Recognition for System Login in Windows 11:
The Steps to Disable Facial Recognition Sign-in from Account in Windows 11 are given above. Windows Hello Face is a quick method to log in to your device.
It is secure and personal too. In case you want to re-setup Facial Recognition in Windows 11, you can do that effortlessly in a few simple steps.
Note*:Your Device must have a near Infrared Camera setup to enable facial Recognition.
- Open System Settings on Your Device. In Windows 11, you can go to settings by Pressing Windows key +I. Otherwise, you can go to Settings by clicking on the Search icon and typing it In the Search box.
- Now, Tap Accounts on the Sidebar ( Left Side). Next, you need to click on the Sign-in options on the Right Pane.
- Further, Select Facial Recognition Under Sign-in options and tap Set up.
- Now, A Windows Hello Setup Window Will Open up. You need to click on the Get Started option on the bottom-left corner of the window.
- Then, you need to Look At the Webcam. It will scan your face for recognition and storing data.
- In Windows Hello, If you haven’t set up a PIN as of now, you will now be asked to set one. So, you need to set up a PIN.
- Lastly, you will get the option to Access the webcam once again in case you want to improve recognition. This step is optional. This is only to assist your device to recognize you either way( With or Without glasses).
- In the end, Click on Close at the bottom of the screen.
Hurray! You have successfully enabled Windows Hello Face. From now on, you will be able to log in to your account through facial recognition.
Also Read: Best 10 Ways Surface Shines On Windows 11
Disable Windows Hello Fingerprint In Windows 11:
Disabling Windows Hello Fingerprint in windows 11 is as easy as Disabling Windows Hello Face. To do this, just perform a few simple steps:
- Open the Settings on your Device by pressing Windows key+I. You can also access Settings by going to the Search Option and typing Settings in the Search Box.
- Now, Click on Accounts on the Left Sidebar.
- Then, Select Sign-in options on the Right Sidebar.
- Next, You Click on the Windows Hello Fingerprint option under the Sign-in option.
- Remove option will appear under Windows Hello Fingerprint.
- Now, Click on Remove to Disable Windows Hello Fingerprint on Windows 11.
Disable Facial Recognition in Windows 10:
It is super easy to disable Facial Recognition in Windows 10. The Steps to Disable Windows Hello Face are given below:
- Go To the Settings of your PC. You can do this By pressing Windows key+ i.
- Then, Click on Accounts on the settings page.
- Then select Sign-in options. You will find this after on the Sidebar located on the left side.
- Under Sign-in options, you will see several options including Windows Hello Face, Windows Hello Fingerprint, etc.
- You just need to click on Windows Hello Face to expand it.
- Under Windows Hello Face, You will get the Remove Option.
- Tap The Remove option to disable Windows Hello Face As a Mode of Windows Login.
- In the Last, Input the Windows Hello PIN to Confirm and Save the Settings.
Performing these steps, you can once again log in to your device through a password.
Also Read: How To Turn On Hibernate Mode On Windows 11
Conclusion
That’s all for now. By following a few Simple Steps, you can easily disable Facial Recognition Sign-in in Windows 11 in no time. Also, This article provides you an insight into the steps required for settings up Windows Hello Face on Your Windows 11 Device. Moreover, Steps to disable Face recognition in Windows 10 are also given in this article. In the end, Steps to enable fingerprint login in windows 11 and to disable face Login in windows 10 are also mentioned.


