


 Header Through Cloudflare")


![[Interview] The Future of Screen Experiences ②: From Watching to Understanding With Vision AI Companion](https://www.hawkdive.com/media/samsung-tvs-and-displays-vision-ai-companion-interview_thumb932-218x150.jpg "Exploring Vision AI Companion: Transforming Screen Experiences for Users")


In this article, we will explain how to fix VPN Not Working in Windows 11.
Browsing the internet without a VPN is one of the most dreaded thoughts nowadays. This is because the internet is full of dangerous threats and they can trace your whereabouts and harm you in some form or the other.
While Windows has always been VPN friendly, it is in the current update of Windows, that users are facing difficulties in accessing the VPN on your Windows 11 PC.
But the good news is that it is easy to fix these glitches and issues you are facing in the new patch that is creating problems with VPN. To help you out, we have put down the fixes here that can resolve the problem you are facing with VPN in Windows 11.
Also Read: Miracast Not Working In Windows 11? Try These Fixes

Reinstall VPN
Before trying out Windows-specific troubleshooting steps, we will go ahead and will try re-installing the VPN service on your Windows 11 PC. This is because there is a good chance that the installation files of VPN have become corrupt when you updated your Windows 11 PC.
So go ahead uninstall VPN and reinstall it back on your PC and see if it works or not. If not, let’s try another fix.
Also Read: Why you need to use VPN
Download Windows 11 Update
The next, thing that you should try at this moment, before trying some core fixes is to see if your Windows PC is updated to the latest version available. This is because users are seeing this as an issue that has arisen due to a glitch in Windows.
To fix it, the best thing you can do is to install the latest Windows update available to tackle these pesky bugs. Here is what you need to do.
Here is how you can install Windows updates easily:
- First of all, you will have to press the Windows+I keys simultaneously to launch the Settings app.
- Choose the Windows Update option from the left sidebar and then click the Check for updates button on the right panel.
- As soon as you will do it, Windows will initiate the downloading process of the Windows update.
- When completed, press the Restart Now button to finish the installation of Windows Update.
- Once the PC reboots, see if the VPN is working as it should. If not, it’s time to move to some advanced workarounds.
Also Read: How To Enable Hyper-V In Windows 11?
Reinstall Network Adaptor
Windows has a bunch of drivers that are necessary to run the hardware components installed on your Windows PC. One such category of drivers is the Network Adapter which includes all network-related adapters such as WAN Miniport (IP), WAN Miniport (PPTP), and WAN Miniport (IPv6).
If any of the three drivers mentioned here malfunction or are outdated, you are likely to face network-related issues like VPN not working.
Here’s is how you can re-install network related drivers:
- Use the Windows+X shortcut on your Pc to launch the Quick Settings option.
- Now click on the Device Manager option listed here to access Device Manager.
- In this window, look for the Network Adapters category and then click on the downward arrow to open the list of drivers.
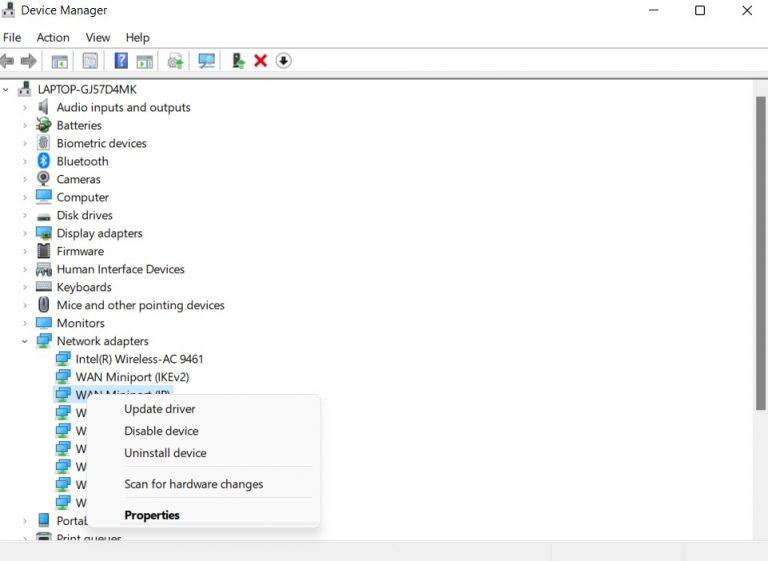
- Now right-click on all the three drivers listed here one by one and choose to uninstall the device option from the context menu.
- Once you are done with the process, press on the Action icon located on the top-most menu.
Now Windows will look for the drivers you’ve just uninstalled and will reinstall it back. Once done, reboot your PC and try connecting to VPN once again.
Also Read: NordVPN Review: 8 Pros And 3 Cons Of Using NordVPN
Clear DNS Settings
Any misconfiguration in the DNS can also prevent the VPN client from working normally. To tackle this problem, you will have to flush out the DNS settings on your Windows 11 PC. Here’s how:
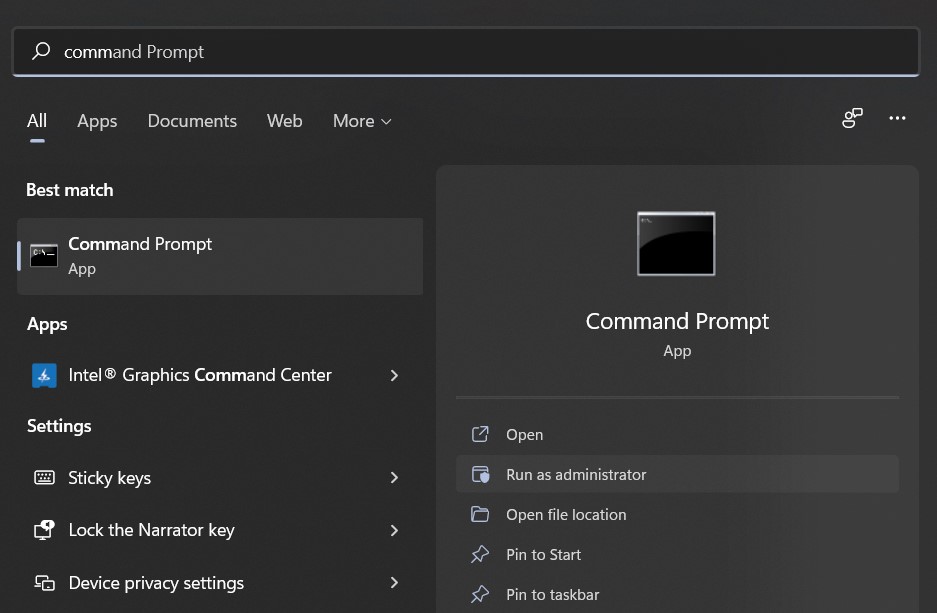
- Press the Windows key and type Command Prompt in the search bar.
- Now click on the “Run as administrator” option in the right pane to open Command Prompt in Administrator Mode.
- Once done, type the command given here:
ipconfig /release
ipconfig /flushdns
ipconfig /renew
netsh int ip reset
netsh winsock reset
- Now press the Enter key to execute the commands.
- After the process is completed, reboot your PC and see if the VPN works or not.
Reset PC
If none of the steps have worked till now, there is nothing much you can do except reset your PC. Doing so will roll back all the settings to default so you will have to manually change all the settings again. If you are okay with this, here is what you need to do:
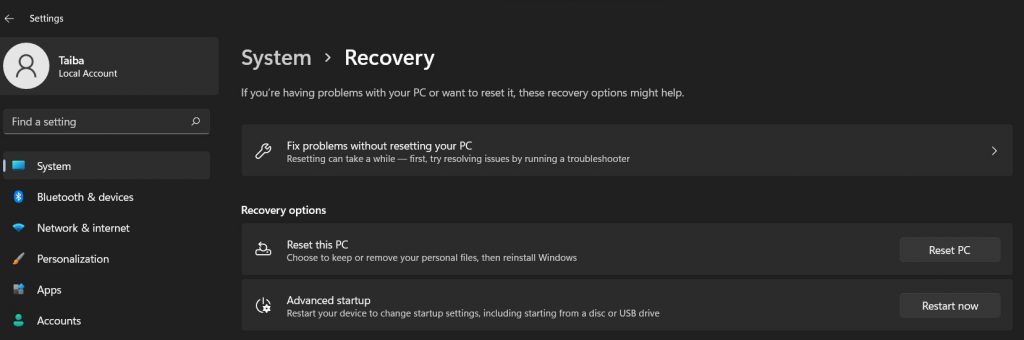
- Open the Windows Settings using the Windows + I shortcut key.
- Now go to the Recovery option and in the left panel.
- Here, click on the Reset PC option and then press the Keep My Files button to make sure Windows keeps all your important files intact.
- Now when the PC is reset, start from scratch and try using the VPN client once again.
Also Read: 9 Fixes For Outlook Not Connecting To Server Windows 11
Conclusion
That’s all to it! Hopefully, the VPN not working issue on your Windows 11 PC is fixed by now. Generally, the first two methods will work like a charm in fixing the VPN not working in Windows 11 issue. If not, you have a few other fixes to try. Hope this helps!
Also Read: How To Create Your Own VPN?


