


 Header Through Cloudflare")


In this step-by-step guide, we will see how to enable Active Directory in Windows 11.
Active Directory Users and Computers or ADUC is not included in the Windows installed by default on your PC but comes along as an optional feature. Thus, you will have to download this optional feature and include it on your PC.
Also Read: 10 Ways To Fix Windows 11 Battery Drain Issue
What is Active Directory in Windows?
ADUC or Active Directory Users and Computer is an optional feature of Windows 11 that can be managed by objects, people, computers, organization units, and their properties. IT admins of big organizations use this feature to centralize the storage repositories and then later share it with other users. Thus, it provides selective access to files, folders, and data depending on the privilege they enjoy.
Besides centralizing the storage of the organization, Active Directory Group Policy can also be used to manage rights, assign administrative privileges, and user configurations centrally. Interestingly, the Active Directory tool supports a single sign-on feature. Thus, there is no need for the users to authenticate themselves every time they have to access the business data via the feature.
It’s worth mentioning that the Active Directory service is only a part of Microsoft systems and you need the professional and server versions of the Windows OS to use the feature.
There are several ways to enable the Active Directory on your PC running on Windows 11. You can enable it from Windows Powershell, Command Prompt, or directly from the Settings app. So, let’s see the step-by-step method to enable ADUC on Windows 11.
Also Read: How To Enable God Mode In Windows 11
Enable Active Directory from the Settings App
Follow the steps below to enable Active Directory from the Settings app using optional features:
- First of all, head to the Start Menu using the Windows key and click on the gear icon located under the pinned apps.
- When in the Settings window, click on the Apps tile on the left sidebar.
- From the right side, look for the ‘Optional features’ tile and click to access the features.
- In the next window, look for the ‘Add an optional feature’ option and then press the ‘View features’ button located on the extreme right.
- In the next window that opens up, type Active Directory in the search box to perform the search.
Also Read: How To Use PowerToys In Windows 11?
- Look for ‘RSAT: Active Directory Domain Services and Lightweight Directory Services in the search results and then enable the checkbox for the option.
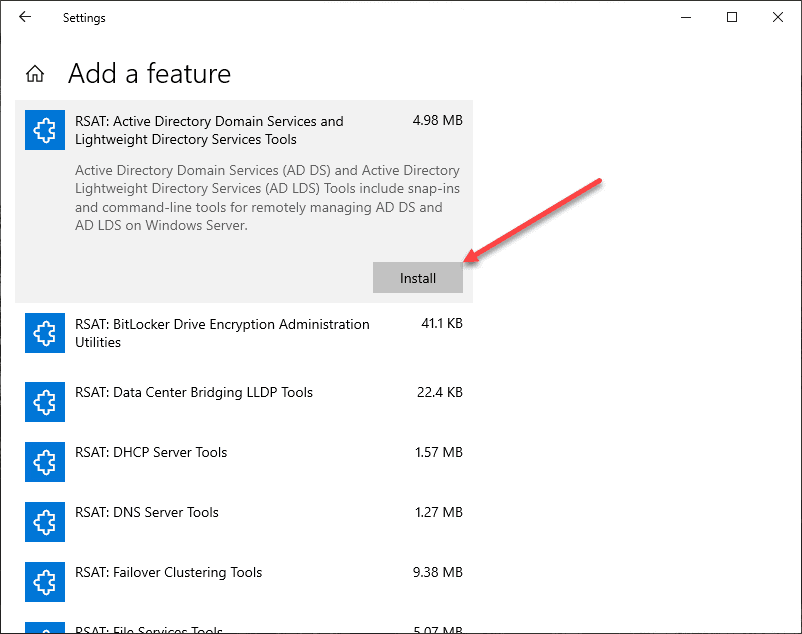
- Press the Next button at the bottom to proceed to the next step.
- Next, press the Install button to begin the installation process.
- Wait for a few minutes until the optional feature gets installed successfully on your PC.
- After the optional feature is installed on your PC, launch the Start Menu once again and then perform the search for Windows Tools. Look for Windows Tools in the search result to open it.
- In the Windows Tools window, look for the ‘Active Directory Users and Computers’ option and double-click to launch it. Here you can open and manage all the devices connected to the server.
Enable Active Directory Using Windows PowerShell
If Windows Terminal or Powershell excites you more than GUI then, you can follow the steps below to enable Active Directory using Windows PowerShell. So, let’s begin:
- Press the Windows key to open the Windows Start menu.
- Now type Windows PowerShell and select the Terminal option from the search result.
- Next, choose the ‘Run as administrator option from the left pane to launch Windows PowerShell.
- Click on the Yes button on the UAC (User Account Control) to launch Windows PowerShell.
- When the PowerShell window opens, type the following command or copy-paste it.
Also Read: How To Set Up A Kiosk In Windows 11
Add-WindowsCapability -Online -Name “Rsat.ActiveDirectory.DS-LDS.Tools”
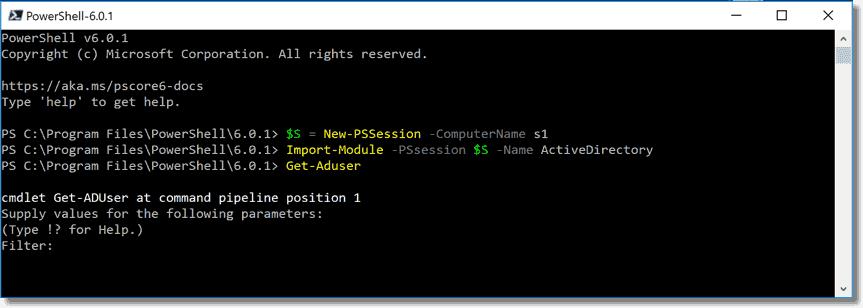
- Once done, hit the Enter key to execute the command and begin the installation of the ADUC tool.
- Note: Before downloading this feature, it is necessary to make sure your PC has an active internet connection.
- As soon as you will press enter key, a progress bar will appear on a screen depicting the download process of the feature. Once installation completes, close the PowerShell window.
Enable Active Directory using Command Prompt
- First of all, head to the Start menu and type cmd in the search bar.
- Next, right-click on the first search result and choose the ‘Run as administrator option.
- In the pop-up menu that appears on the screen, choose the Yes button.
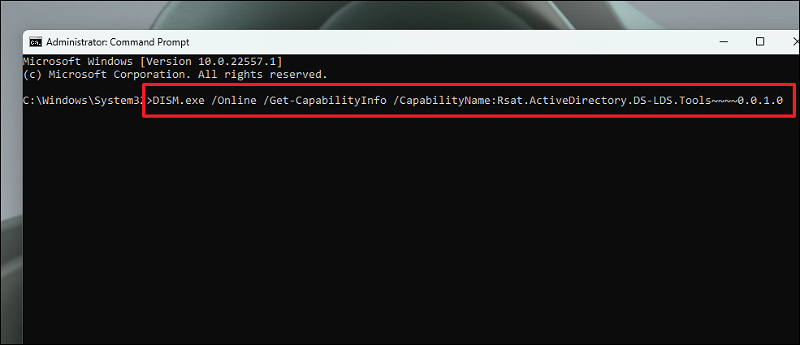
- Now, copy-paste or type the command given below and hit the enter key to begin the installation of ADUC on your Windows 11 PC.
Also Read: How To Increase VRAM In Windows 11
DISM.exe /Online /Get-CapabilityInfo /CapabilityName:Rsat.ActiveDirectory.DS-LDS.Tools~~~~0.0.1.0
- After the installation process is completed, go to the Start Menu and search for Windows Tools in the menu. Then, click on the ‘Windows Tools’ tile to access ADUC on your Windows 11 PC.
Also Read: How To Enable Hyper-V In Windows 11?
Conclusion
Those are the three different ways through which you can enable ADUC on your Windows 11 PC. Tough an optional feature, ADUC goes a long way in managing the data in an organization. What’s your take on the feature? We’ll be glad to know!


