


 Header Through Cloudflare")


The Widgets Toolbar in Windows 11 is a feature that allows users to access frequently used tools and applications quickly and easily. It is similar to the traditional taskbar, but with the added functionality of displaying small, customizable widgets that provide quick access to specific information and settings. The Widgets Toolbar can significantly increase productivity by providing quick access to commonly used tools and information without the need to navigate through multiple menus or windows.
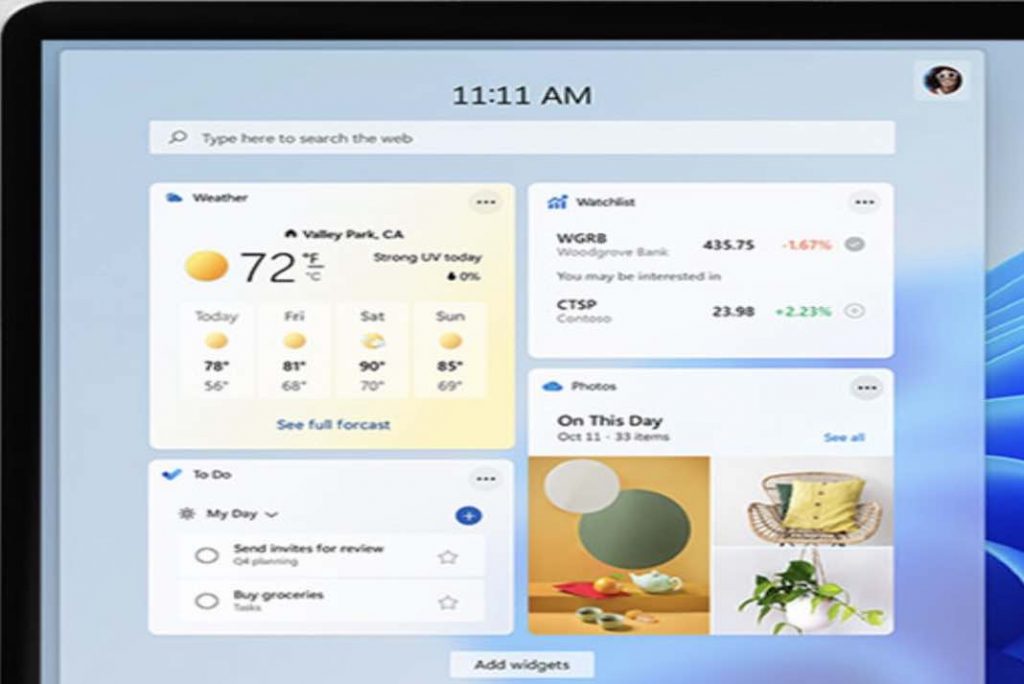
What is the Widgets Toolbar?
In Windows 11, the widgets toolbar is a feature that allows users to quickly access various tools and functions without having to navigate through menus or settings. The widgets toolbar is a section of the taskbar that normally includes a row of icons, each of which stands for a distinct utility or feature. The user can alter these icons to only display the tools they often use. Text formatting choices, image editing tools, and shortcuts to commonly visited websites are a few tools and features that can be found on the Widgets toolbar in Windows 11. Additionally, Windows 11 gives users the option to add “widgets”—small, app-like features—directly to the taskbar. These features can be helpful for rapid access to information like weather, news, or calendar appointments.
Also Read: How To Fix Kodi Not Starting In Windows 11
Steps to Enable the Widgets Toolbar
In order to enable the Widgets toolbar, you need to download a file from Github and complete its set-up. Let us walk you through the steps to enable Widget Toolbar in WIndows 11:
To enable the Widget toolbar using ViveTool on Windows 11, you will need to follow these steps:
Step 1: Open the ViveTool page on GitHub in your browser and download the software.
Step 2: Extract the contents of the downloaded file to the "c:\vivetool" folder on your computer.
Step 3: Press the “Win + X” keys on your keyboard and select “Terminal (Admin)” from the menu that appears. This will open a Command Prompt or PowerShell window with administrator privileges.
Step 4: In the Command Prompt or PowerShell window, type the following command and press “Enter”: "c:\vivetool\vivetool /enable /id:40772499". This will run the ViveTool software and enable the Widget toolbar.
Step 5: Restart your device for the changes to take effect. Once your device has restarted, you will now be able to see the new toolbar in the Widgets section of Windows 11.
It’s worth noting that enabling experimental features with ViveTool always comes with a risk. Microsoft typically hides features that are not complete or not stable enough. If you experience any unexpected behavior or side effects after enabling the Widget toolbar, you can always disable it with the following command:"c:\vivetool\vivetool /disable /id:40772499"Remember to run this command as an administrator and restart Windows 11 after running it.
This method has been confirmed to work on Windows 11 Build 25227 (Dev) and 25217 (Beta). To check what build of Windows 11 you are running, you can press “Win + R” on your keyboard and type “winver” in the Run box. This will bring up a window displaying the version and build number of your Windows 11 installation.
Also Read: Apps Won’t Restore In Windows 11- Issue Solved
How to access the Widgets board?
To access the widgets board in Windows 11, users can follow these detailed steps:
- Press the Win key and W on your keyboard at the same time. This will bring up the widgets board.
- Alternatively, users can hover their cursor over the Widgets button on the left side of the Taskbar. This will also bring up the widgets board.
- Once the widgets board is open, users can add new widgets by clicking on the “+” button located on the top right corner of the board.
- To remove a widget, users can click on the widget they want to remove and then click on the “-” button located on the top right corner of the board.
- Users can customize the widgets by clicking on the widget and then clicking on the settings button located on the top right corner of the widget.
- Users can also rearrange the widgets on the board by clicking and dragging them to a new location.
- It should be noted that the widgets cannot be added on the desktop, they are only accessible via the widgets board.
Also Read: How To Configure A Windows Hello Fingerprint Login on Windows 11
Conclusion
In conclusion, the Widgets toolbar in Windows 11 can be easily enabled using the ViveTool software. By following the simple steps outlined in this article, users can access experimental features that are not typically available in Windows 11. However, as with any experimental feature, there is a risk of encountering unexpected behavior or side effects. In such cases, the Widgets toolbar can be easily disabled using the provided command.
Also Read: 8 Best Fixes For Windows 11 PC Going To Sleep Randomly


