


 Header Through Cloudflare")


")
Windows 11 is the current latest build for the Windows operating system lineup, and a lot of people wonder how they can install this operating system without having a hard time. So for today’s article, I, Alen, will help you with the creation of this guide to properly install Windows 11 (The Easiest Way) while also teaching you some tuning or optimization guides along the way.
Well, I have been installing operating systems for the longest time and have quite the experience with it, from the old Windows versions up to this newest one, which is Windows 11. I also have been using Windows 11 since the earlier beta versions, so I have quite the experience of the easiest way to tune it to be your powerhouse operating machine without bloatware and extra things that you might need
Please do note that I mainly use my machine for editing and gaming-I will only be disabling some features later on the machine that I think I would never really use.
What is an installation of Windows 11, and why do it?
Conducting a clean installation of Windows 11 involves erasing all data from the hard drive and installing a fresh copy of the operating system. This technique serves as an effective solution to address problems with existing setups. This includes issues related to memory, shutdowns, startup performance, or stability. Employing this method can also enhance battery life (on laptops) while facilitating the eradication of viruses and malware types.
In cases where bloatware from brands is pre-installed in new computers’ default configuration settings by manufacturers leading to storage space insufficiency issues, wiping out such systems through a cleaning process will help decommission them safely. Re-installing operating systems also cleans up or formats the drive, which allows you just to give away your device or machine to other people or sell them safely.
Also Read- Windows 11 Installation Assistant: How To Upgrade For Free?
Methods of creating the bootable USB.
Basically, a Bootable USB Drive is a USB stick that has the .iso file to be booted on your machine. It is used to fresh install your windows from scratch.
Now I will provide you with two ways to create a bootable USB drive.
#1. Via Create Windows 11 Installation Media.
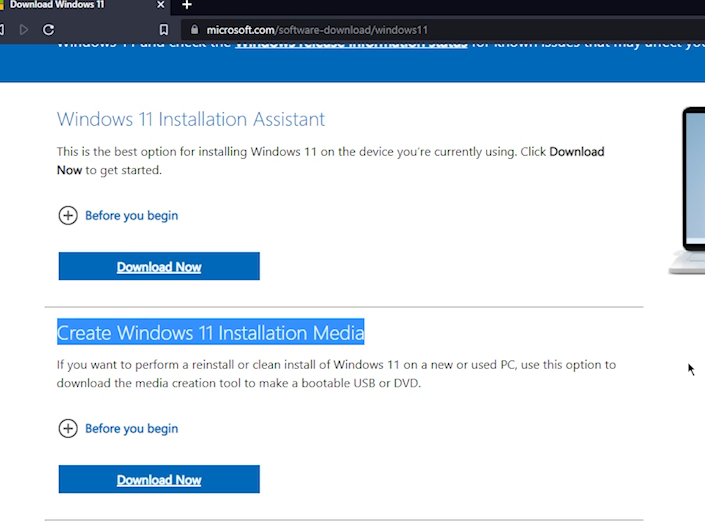
You are going to be heading over to microsoft.com/software-download/windows11 and press download now.
This method is by far the easiest to create a bootable USB, but it is not as smooth sailing when it comes to installation. It would require you to have all proper default requirements + making a Microsoft account just to install Windows on your machine.
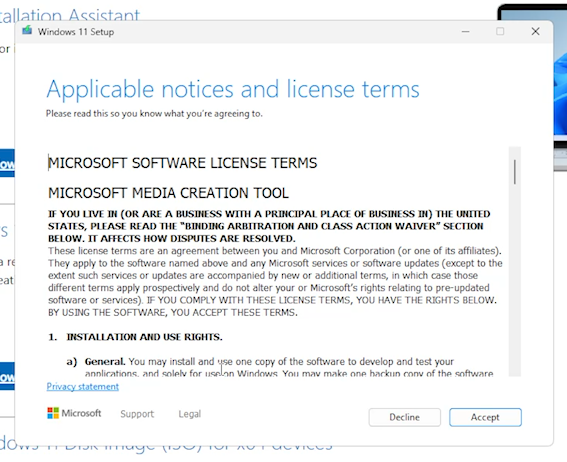
Continuing once you have the file, you can simply run it and go through the tabs by pressing next.
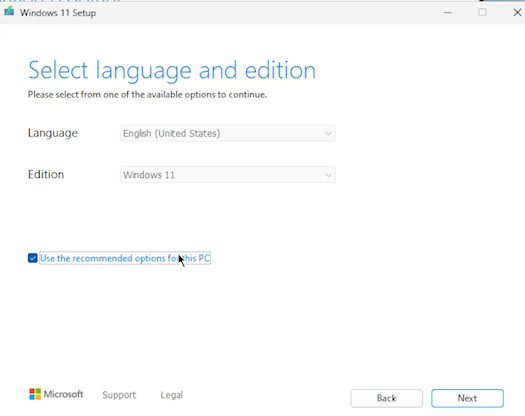
In the tab under this text, you are to select the language and edition (for this case, only Windows 11 would pop up). If you are planning to install it on the same machine you are using to create the bootable drive, then just select Use the recommended options for this PC.
Now select the USB drive that you want to use.
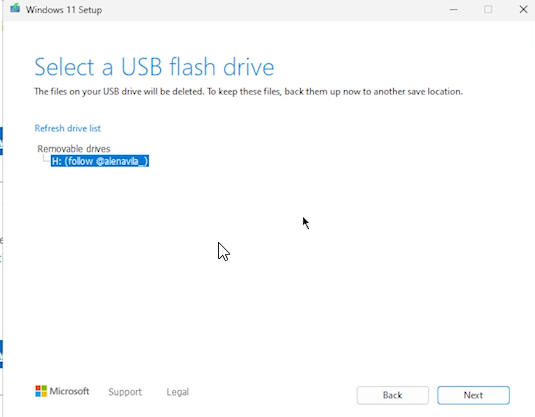
As soon as you press next, it will create the Windows 11 Bootable Drive, and you can skip the other method presented in this article and just continue over the installation.
Also Read- How To Uninstall And Reinstall Widgets In Windows 11
#2. Rufus Bootable
What is Rufus? Well, Rufus is a bootable USB creator application. Though it will still require you to get the official ISO file from the operating system you want to create, in this case, it would be Windows 11. It does offer some extra flexibility, such as toggling things that you would normally want to disable on the installation.
To get Rufus, simply head over to rufus.ie
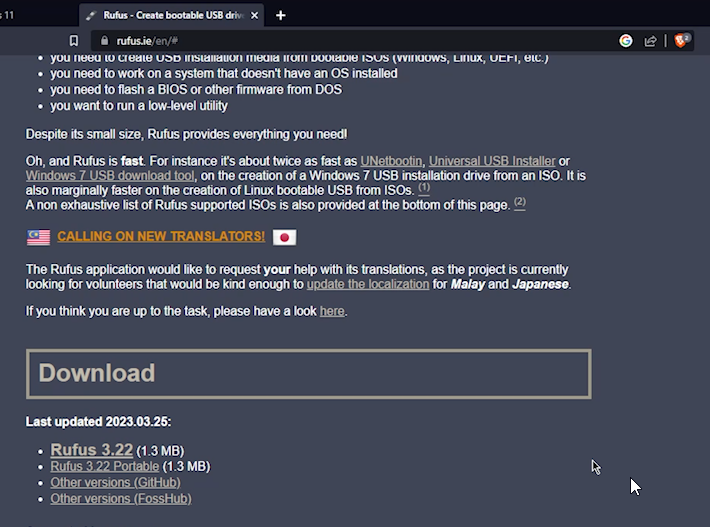
Scroll down and download Rufus Portable.
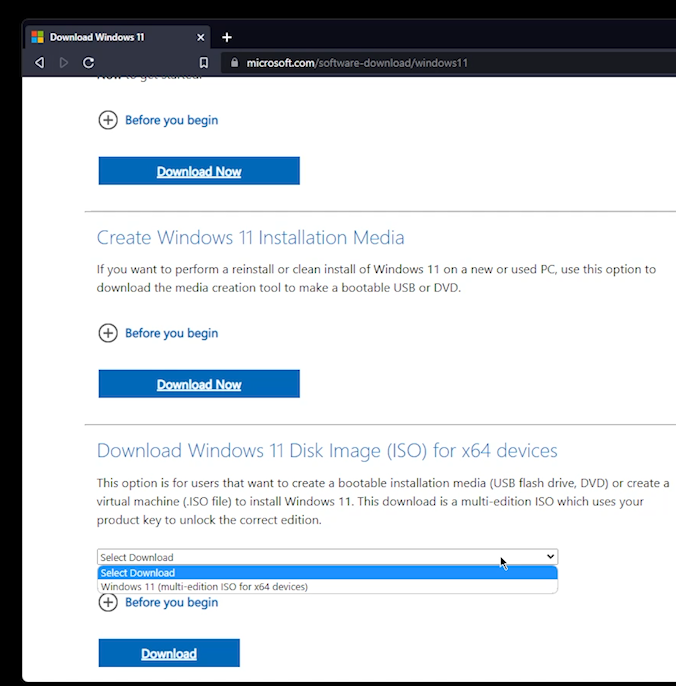
Once that is done, you would also want to get the Windows 11 ISO file. To get it head over back to microsoft.com/software-download/windows11 but instead of downloading the Installation Media, scroll down and download the Windows 11 Disk Image (ISO) for x64 devices.
Select the product language.
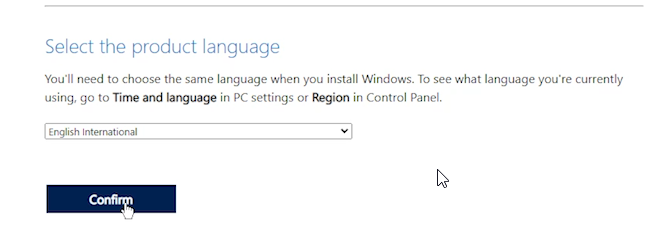
Hit confirm, and you will be given a download link that is available for 24 hours.
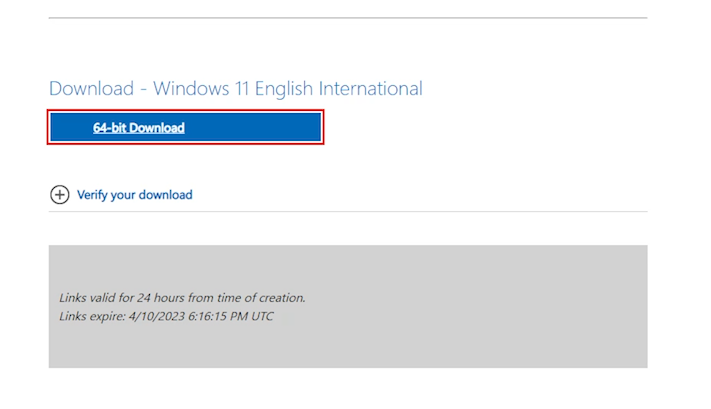
Click the download button and proceed to create the bootable drive with Rufus.
To proceed, open up Rufus, and this would be the main window:
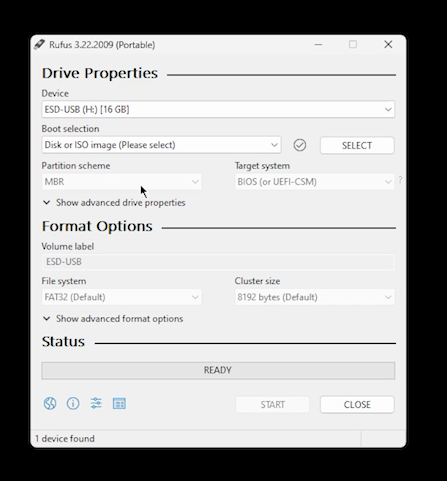
From there, select the USB drive that you want to make a bootable USB drive installer for Windows 11 and press the select on the boot selection and choose your downloaded ISO file.
Once selected, everything should just stay on default now. To access the other options available for Rufus, you must press start.

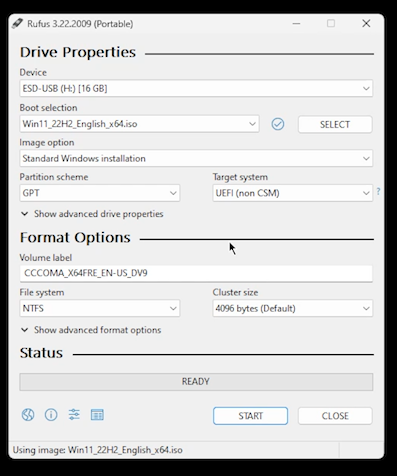
The image above shows you all the possible customized settings that you can skip; honestly, as someone who uses this tool a lot and install Windows from time to time. I would remove the requirement for a Microsoft account and recreate a local account username. I also would suggest disabling the data collection. This provides the fastest installation of all.
Also Read- How To Install Windows 11 On A Raspberry Pi 4
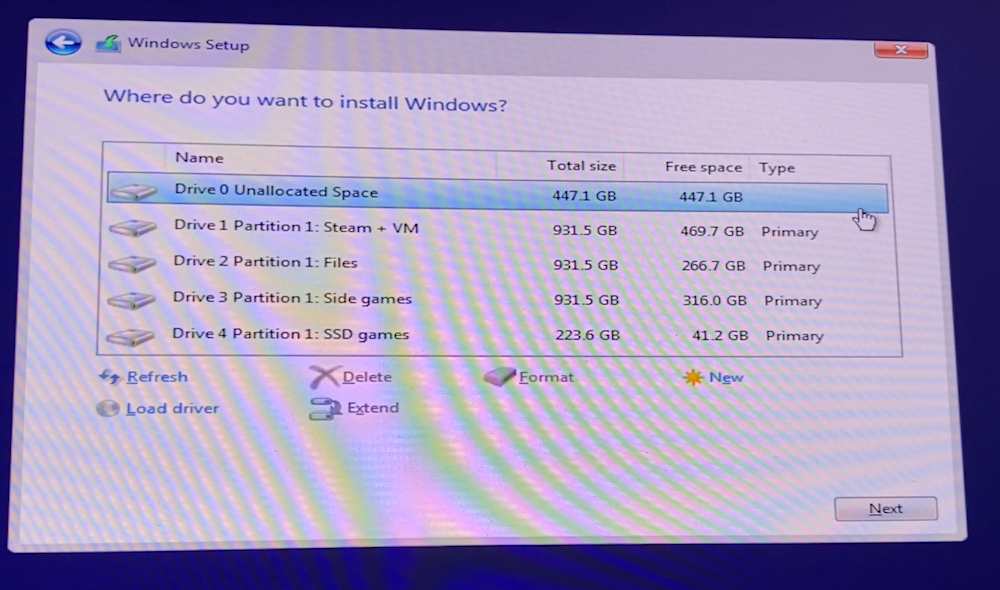
Windows Installation
With all that being said, as soon as you restart your machine and open up the boot menu (Usually f11 or delete on your keyboard), you can simply select your bootable drive.
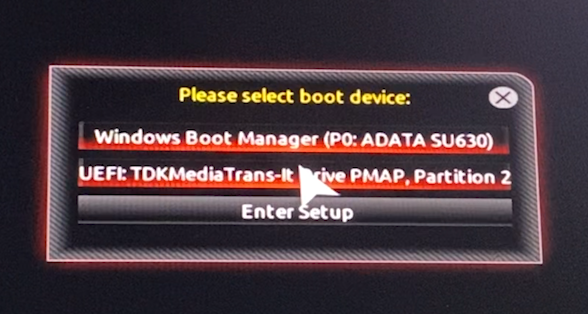
Once selected, you can just proceed just like any Windows installation. Follow the images:

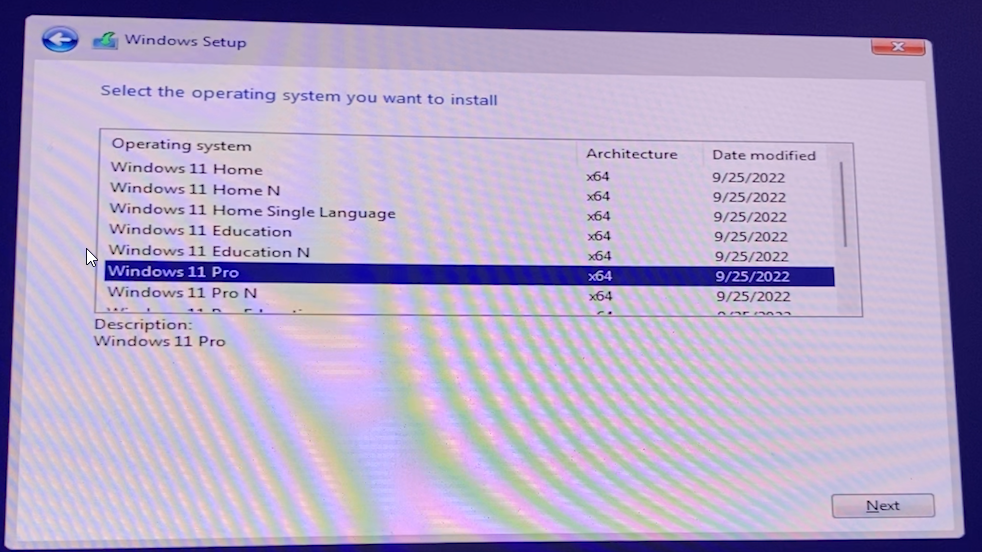

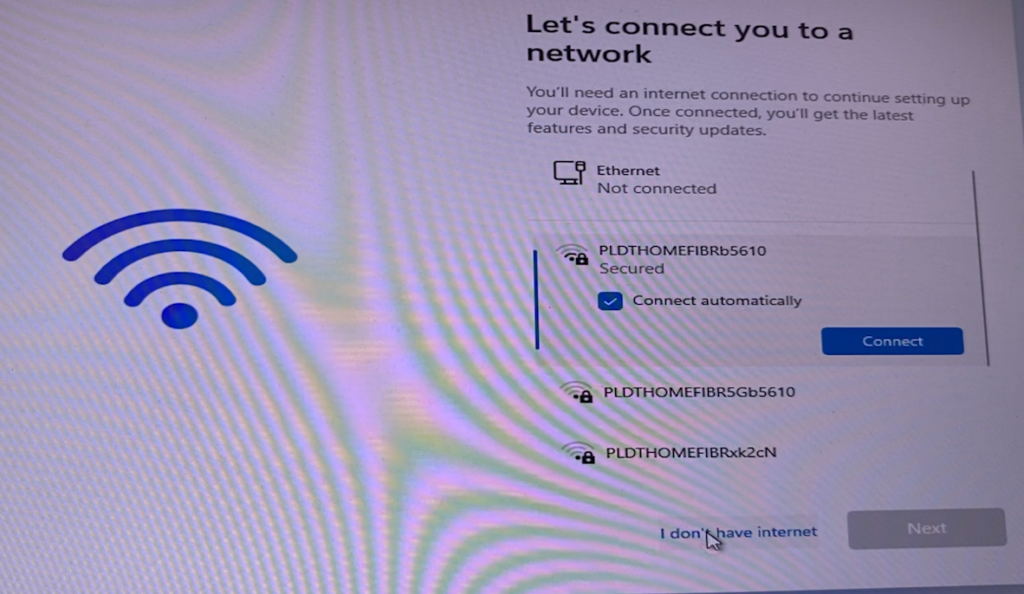
Your machine might restart a couple of times until you pop up to this window:

To go over the swift installation press, I don’t have internet.
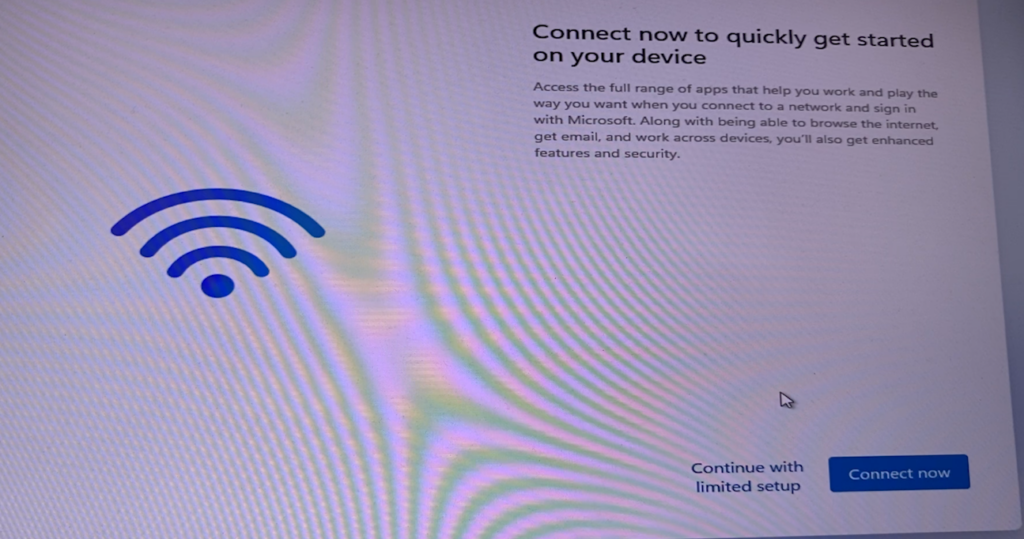
Then Continue with a limited setup
Since we used Rufus, that is all you need to do for the setting up part of Windows.

Tuning / Optimizing.
Since this is no ordinary step-by-step guide to Windows 11 installation, I have decided to toss in a few things that I do after installing Windows to ensure that I will have a good time without bloatware and unnecessary features that I will never use. This allows my system to be more efficient and properly maintained.
#1. Install all Visual Runtimes
Installing all the necessary visual runtimes allows me to install programs and games faster, for I already preloaded all the Visual C++ Redistributable runtimes.

Personally, I use https://www.techpowerup.com/download/visual-c-redistributable-runtime-package-all-in-one/ (The link would not be embedded due to the reason that we do not hold any credits if you manage to error out your system with my suggested tool), which has all the tools and uses a script to fast install all of them with almost just one click.
All files are official, for it has Microsoft’s digital signature; the .bat allows for scripted installation (meaning batched-up installation and automatic.)
#2. One Tool for Everything
This tool is developed mainly by https://www.youtube.com/@ChrisTitusTech he creates great scripts that help Windows user to free their computer from bloatware. This one, you do not have to visit any links. All you need to do is to just run the package via Powershell by opening Powershell and typing in the command
irm christitus.com/win | iexIt basically opens a shell form optimizer that allows you to efficiently download applications directly from their website without having to visit their website. Crazy, I have been using this for months, and there are no problems at all.
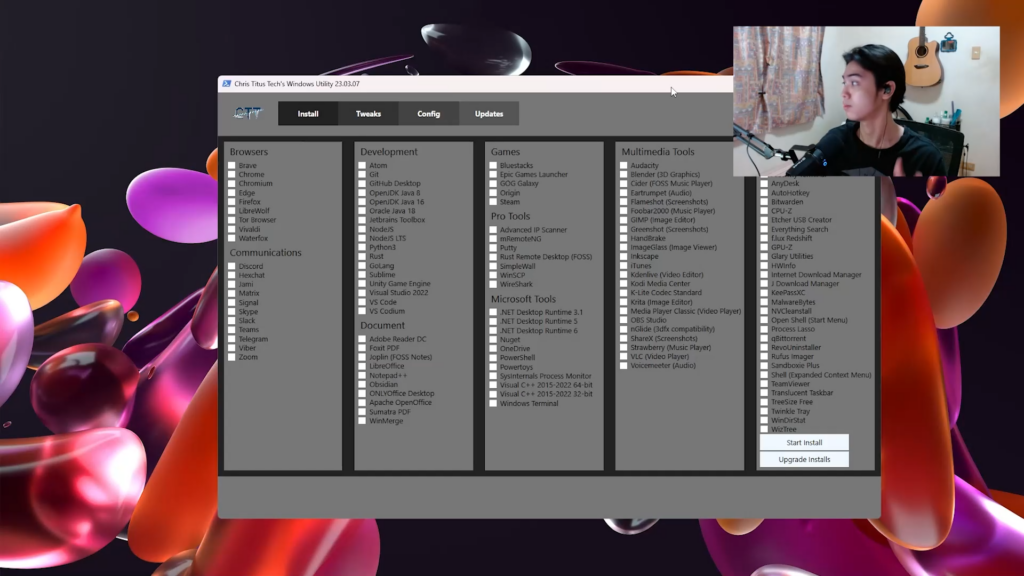
It also allows the user to enable and disable certain optimization options (see the image above).
I personally use it to acquire and quickly install programs that I would need at the very start. Enabling some tweaks would also optimize my system.
#3. Optimizer.
Although we already used the One Tool for Everything, it does not quite have all the optimizing options like this one right here. From GitHub, created by Hellzerg
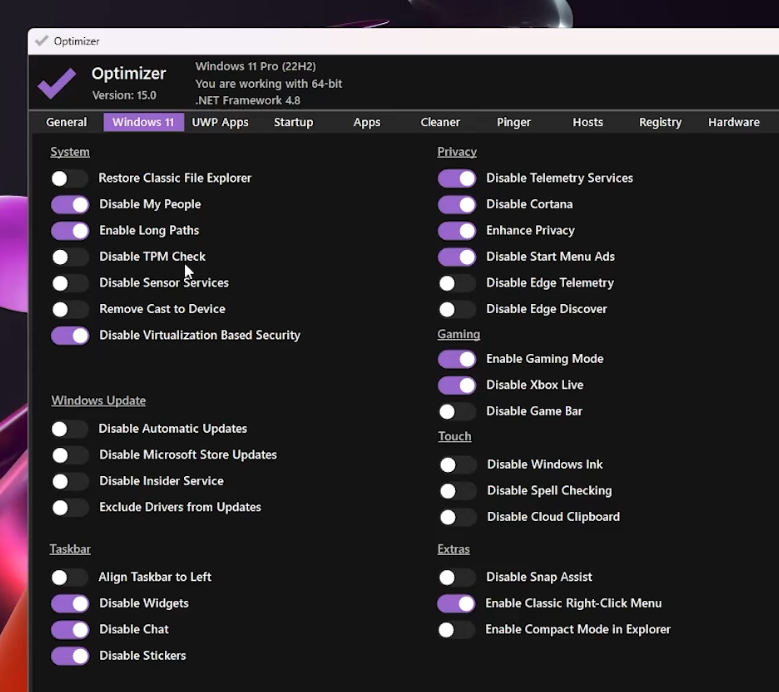
Optimizer 15 is much more of a specific Optimizer Application for Windows 11, for it allows things such as more in-depth disabling of telemetry, disabling of not needed things, and even restoring classic file explorers and right-click menus.
There are a lot of different ways to install the newest Windows 11 operating system on machines, but this article showed you the 2 safest and easiest ways to do so. Honestly, Rufus is the best way with the official Windows 11 iso build, and I showed you three tuning/optimization tricks to make sure your Windows 11 is running smoothly and efficiently to use.


