


 Header Through Cloudflare")


Why would you need to uninstall and reinstall your GPU drivers?
Drivers are required for external devices to work in Windows. While Microsoft provides “basic” drivers for a variety of devices, it’s usually best to use the manufacturer’s official drivers. This is especially significant for GPUs because GPU suppliers such as AMD and Nvidia include software optimization, functionality, and adjustable settings in their drivers.
Drivers, on the other hand, are never perfect. Users must wait until the manufacturer addresses the issue if a fresh update introduces a new issue. It’s also likely that installing new drivers on a regular basis will generate strange problems. If you’re converting from AMD to Nvidia or vice versa, it’s also a good idea to uninstall the older GPU’s drivers.
Also Read: How To Fix Slow LAN Speed On Windows 11
Clean Removal and Installation Preparation
It’s a good idea to get a few things straightened out before you use one of the ways listed below. Before you uninstall anything, make sure you have your new drivers downloaded and ready to go. Where you acquire your drivers is determined by whether you bought or built your PC.
If you’re building your computer, you’ll want to go straight to AMD’s or Nvidia’s websites to get drivers. It’s possible to use AMD or Nvidia drivers directly if you buy an OEM PC, but it’s a better idea to look for OEM-provided drivers.
During the procedure, you’ll have to reboot your computer at least once. You can ignore it if you want to be cautious, however, a reboot is recommended. So, make a backup of all of your crucial files and documents.
Disconnecting from the internet is the last thing you should do. Windows will attempt to fix it on its own.
Use the Device Manager in Windows.
Device Manager is one of some tools for setting devices linked to your computer, and it can update, roll back, and delete drivers. Open Device Manager by searching for it in the search box.
Then go to Display adapters, right-click on your GPU, and choose Properties from the menu.
Navigate to the Driver tab from there.
The Update Driver, Roll Back Driver, and Uninstall Device choices are all available on this tab.
As an optional feature, driver deletion is included under that last option
Device Manager is beneficial for driver rollbacks (i.e., reverting or “rolling back” to a previous version), but its updating methods may disappoint. Its automatic method looks for Windows-certified drivers, however, the majority of GPU drivers aren’t. This isn’t to say that non-certified drivers aren’t safe. Because it is a time-consuming process, AMD, Nvidia, and Intel do not always request Microsoft’s approval.
Only utilize the manual technique if you’re a seasoned computer user.
For example, a GPU in an OEM-built PC might be obliged to use official drivers, which could be old or troublesome. However, if you follow the installation instructions, the GPU manufacturer’s drivers may work better. This is a rare occurrence, and the majority of individuals will never have to deal with it.
The other issue is that the Device Manager just does the driver installation. All of those fancy applications for tweaking your GPU aren’t part of the driver; they’re in a bundle with it. Unfortunately, Windows will not install them. These apps are available in the Windows Store, but it’s generally best to obtain them straight from the source.
In short, Device Manager is great for uninstalling drivers and returning to earlier versions, but it’s terrible for installing new ones. It is preferable to install the driver using the wizard provided by the manufacturer.
Also Read: How To Fix ‘Can’t Connect to this Network’ error in Windows 11
2. Use the Clean Install option in the driver.
When installing their GPU drivers, AMD and Nvidia provide alternatives for a clean installation.
For AMD users, simply run the driver and follow the wizard’s instructions. You’ll eventually come across this opulent window:
By default, the Factory Reset option is chosen. All that’s left is to click through the rest of the wizard and wait for it to complete.
The AMD Cleanup Utility is a distinct app, however, it’s probably more convenient to conduct the Factory Reset through the driver wizard.
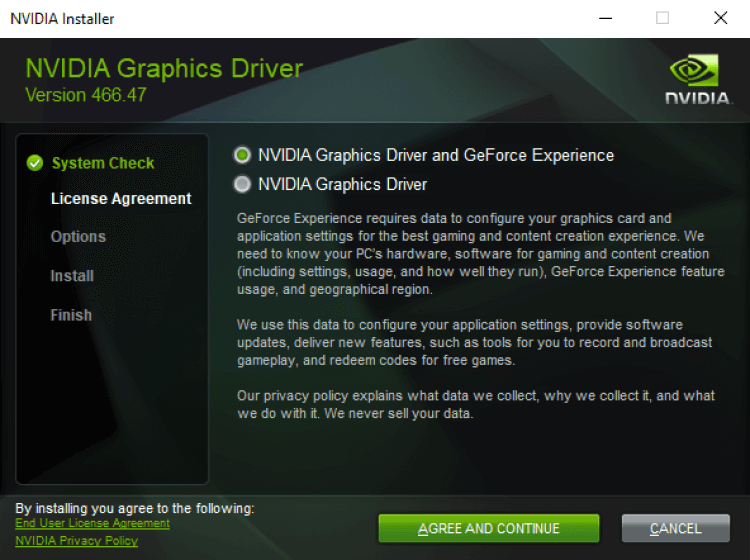
The clean installation option is also available in Nvidia’s wizard, but it’s a little more difficult to find. After you’ve started the Nvidia driver installation procedure, you’ll need to choose one of these two options (both of which allow for a clean installation) and press Agree And Continue:
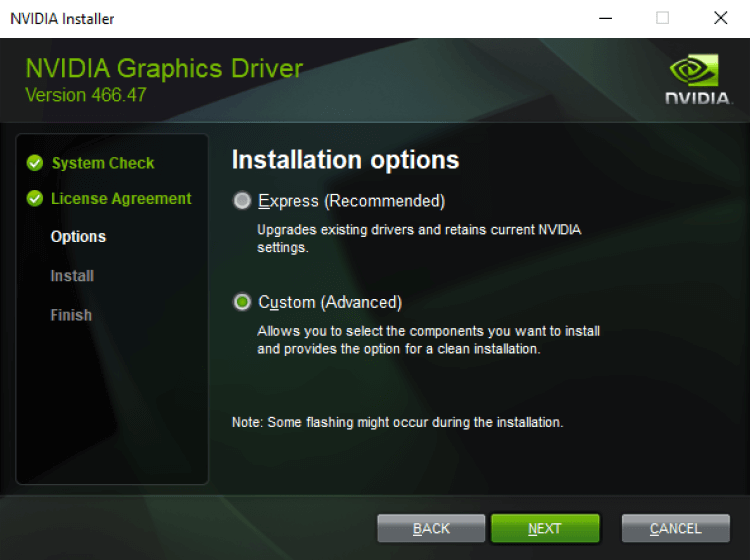
Then choose Custom (Advanced).
Check Perform a clean installation.
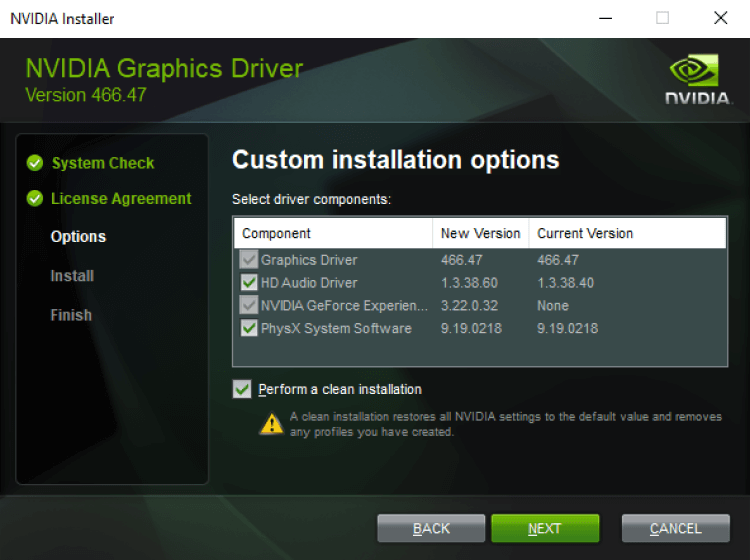
That’s all there is to it. Simply follow the rest of the wizard’s instructions, as usual, wait for the installation to finish, and you should be good to go.
Also Read: 7 Ways To Take Screenshot In Windows 11


