


 Header Through Cloudflare")


![[Interview] The Future of Screen Experiences ②: From Watching to Understanding With Vision AI Companion](https://www.hawkdive.com/media/samsung-tvs-and-displays-vision-ai-companion-interview_thumb932-218x150.jpg "Exploring Vision AI Companion: Transforming Screen Experiences for Users")


Parental control is a great way to supervise your child’s activities on various gadgets. Additionally, with this option turned on, you can also block specific websites that may be inappropriate for your child. So in this guide, you will get to know everything about Parental Control for Windows 11. Specifically, we will be discussing how to set up and use Parental Control on Windows 11.
Table of contents
- Set up Parental control on Windows 11
- Blocking websites using parental control
- Important Parental Control Settings
- Turn off Parental Control on Windows 11
How to Set up and use Parental Control on Windows 11?
- Got to the Settings> Accounts>Family and other members>Add a family member. Now, tap Create one for your child.
- To change Parental Control Settings: Launch Settings> Accounts>Family and other members>Manage Family Settings online or remove an account
Now, let us discuss the various steps involved in this process in detail:
Steps to set up Parental Control on Windows 11
First of all, be informed that for settings up parental control on your Windows 11 PC, both the parent and child need a Microsoft account. Additionally, your child’s account will be linked to yours.
Note: Please ensure that you are logged in as an administrator. Also, make sure that your child doesn’t have your account’s password as it may allow them to make unnecessary changes to the system and even disable Parental Control on your Windows 11 PC.
- Launch the Settings on your PC by pressing the Windows + I hotkey. Alternatively, you can just search Settings in the search bar.
- Now, tap Accounts on the left side. Then, select the Family and other users tile on the right side.
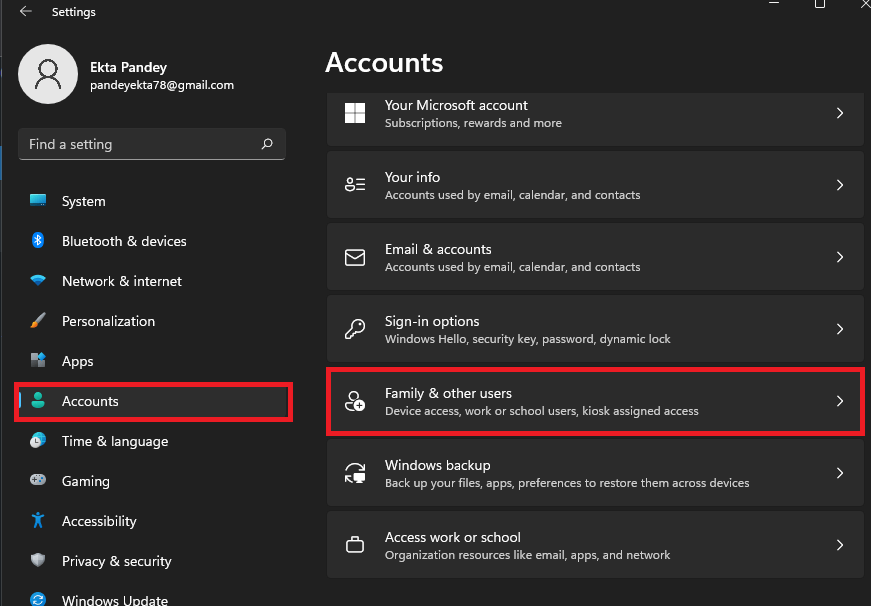
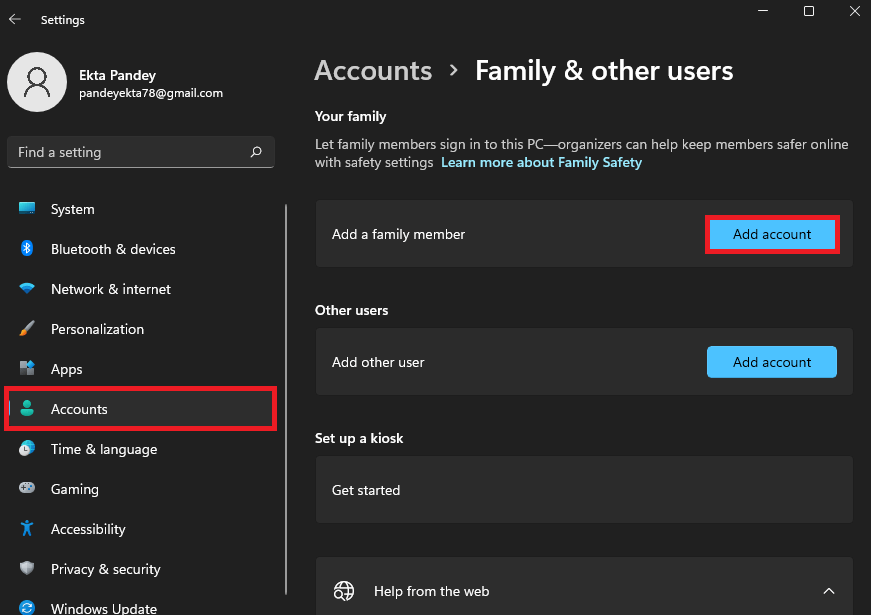
3. Now, tap the Add Account option next to Add a family member on the right side.
4. Next, tap create one for a child option as shown below in the screenshot.
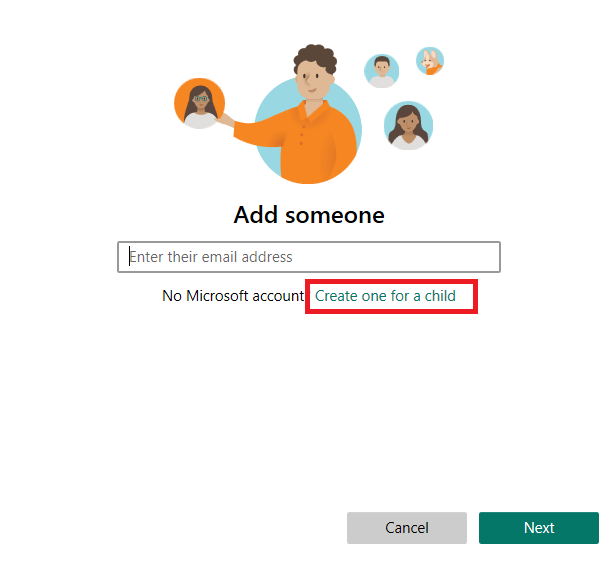
5. Type an email address and then tap Next.
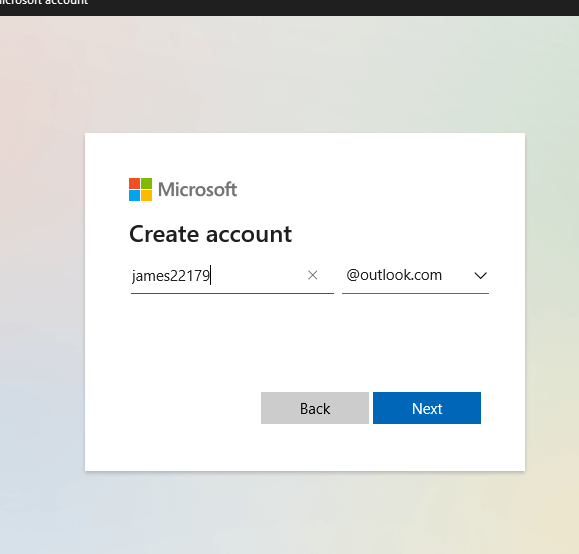
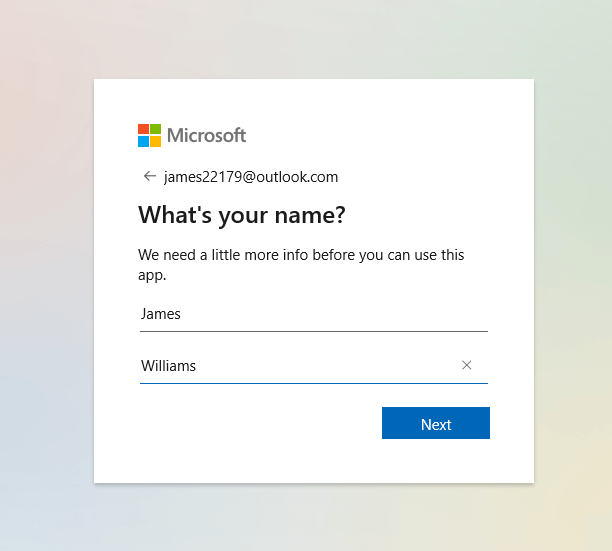
6. Create a password and tap Next.
7. Type your child’s name and again tap Next.
8. Select Country/region and enter the birth date of your child. Windows 11 will establish age-based restrictions based on the birth date you enter.
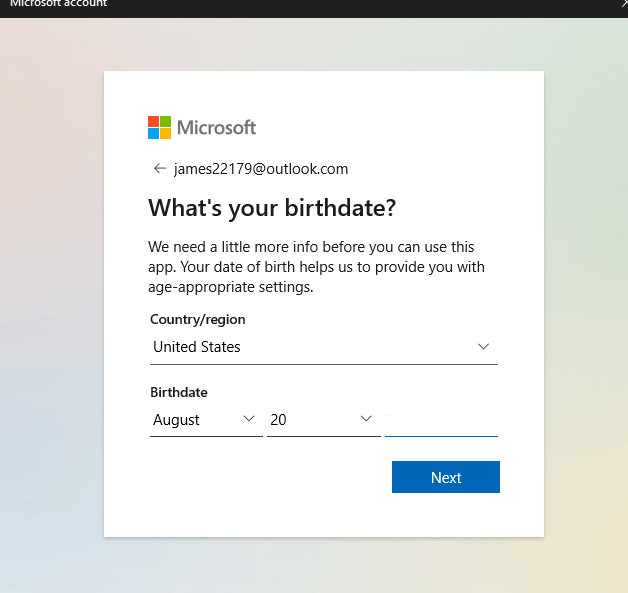
9. Tap Next.
9. Congratulations! You have successfully created a Microsoft account for your child that is linked to your account. A pop-up will appear on your screen notifying you that the process has been completed. Tap close to shut the sign-up window.
Also Read: How To Set Up A Kiosk In Windows 11
How to block websites using parental control in Windows 11?
After setting up the parental control on your Windows 11 device, you can do a lot with the Settings of this feature. You can set screen time, block certain websites and apps and do a lot more. So now, let us discuss how to block websites through parental control in Windows 11:
- Launch the Settings ( Press Windows + I ) key combination.
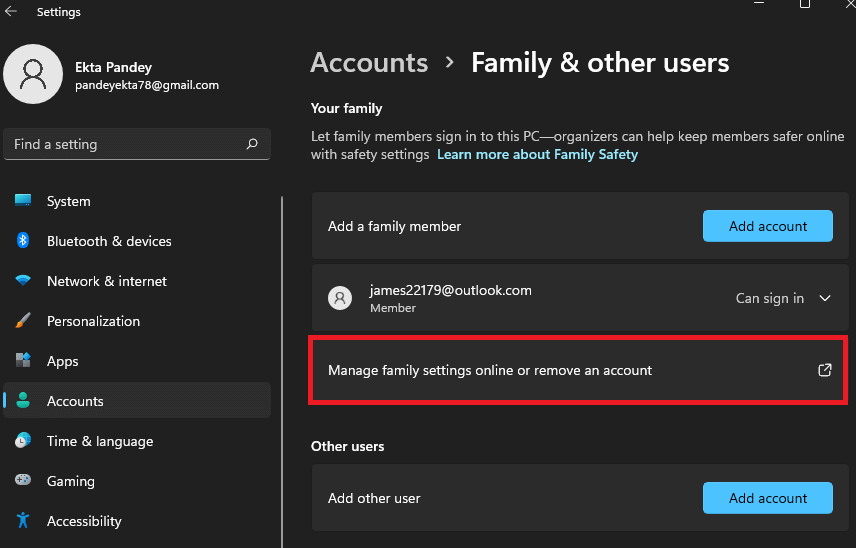
- Tap Accounts on the left side and choose Family & other members on the right side.
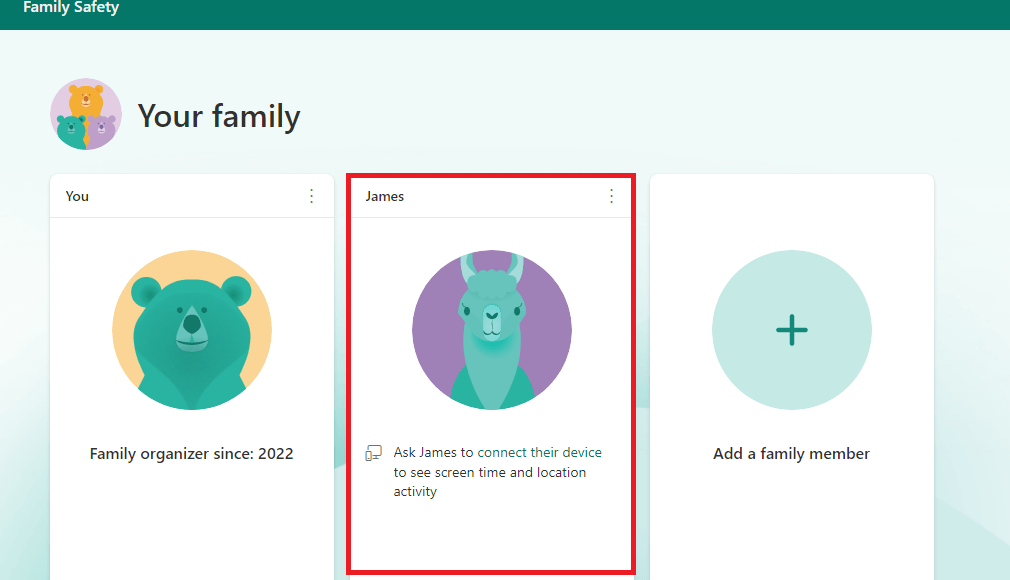
3. Now, click on the child’s account tile to expand it.
4. Then, select manage family settings online or remove an account.
5. Now, you may want to click on your child’s account (Located on the right side as shown below in the screenshot).
6. Tap the Content Filters option on the left side.
7. Scroll down to Filter Settings. Now, turn on the toggle below Filter inappropriate websites and searches.
8. Turn on the toggle below Only use allowed websites to give access to the sites you allow.
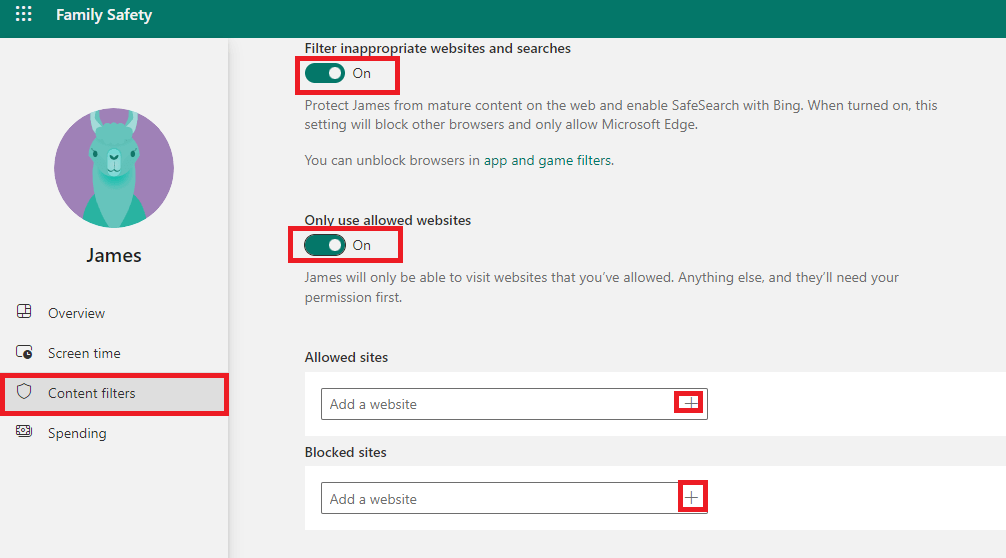
9. Under Allowed Sites and Blocked Sites sections, you can add websites that are allows as well as restricted for your child. For this, you just need to type the website address in the Add a website box and them hit the + icon.
Important Parental Control Settings
Now, we will be discussing the important parental control settings. These settings will help you supervise your child’s online behavior in a better way. So, let’s get started:
Set Screen Time
Setting the screen time is very important. It makes sure that your child does not waste time. In short, this option will set a restriction on your child’s screen time. All you need to do is again click on the Manage family settings online or remove an account option in the settings.
- Next, click on your child’s account on the Microsoft family Safety page.
- Then, click on Screen Time on the left side.

3. Use one schedule for all devices: Turn on the toggle under this option to set a universal screen time limit for all the XBOX and Windows devices.
4. Turn on limits: Click on Turn on limits under a specific device to set the screen time limit for a specific device.
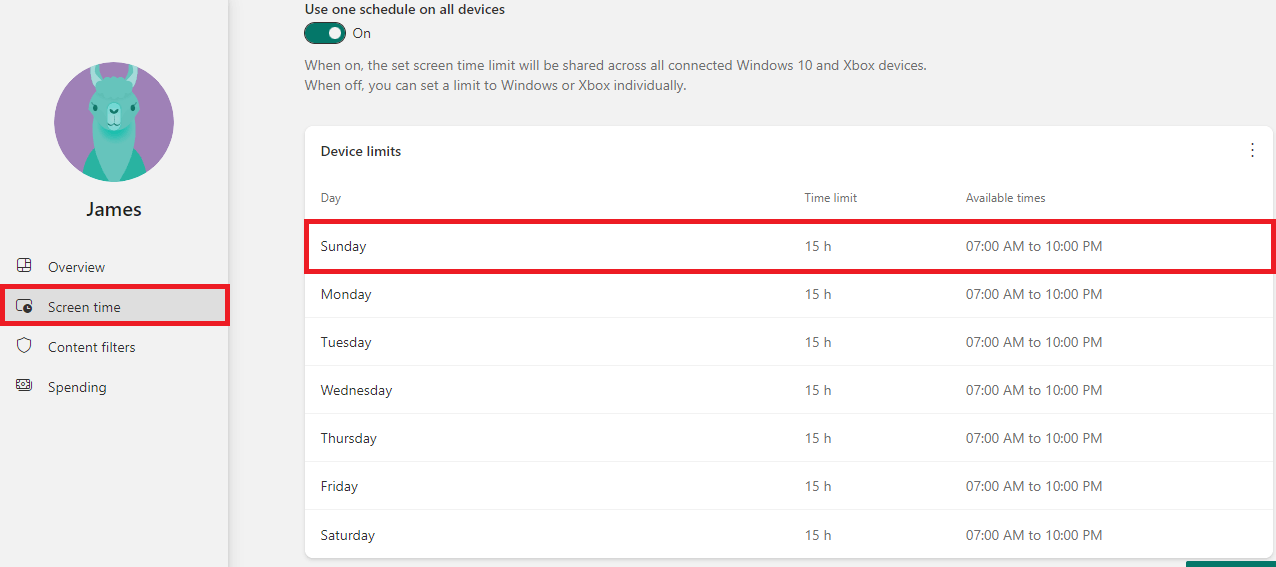
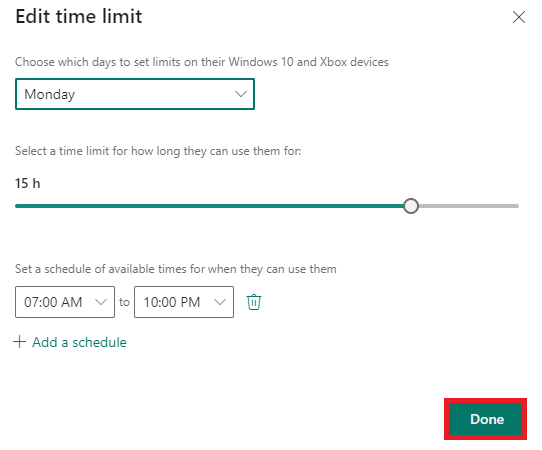
5. You can also edit the screen time for a particular day by clicking on it. After setting the limit, just click on Done to save the changes.
Also Read: Amazing Windows 11 Keyboard Shortcuts You Should Know!
Control Access to Apps and Games
You can also control your child’s access to various apps and games. To do this, just click on the, follow the steps given below:
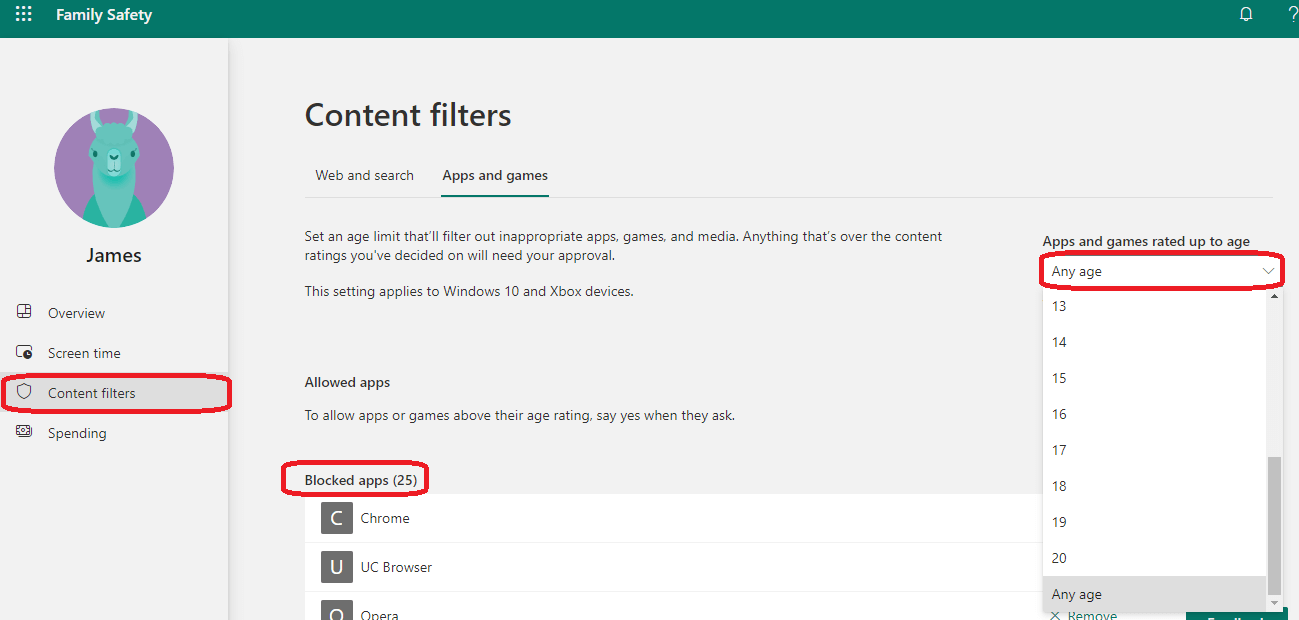
- Click on the Content Filters option on the left side.
- Now, switch to the apps and games tab.
- To allow your child to use only appropriate apps and games, you can set an age limit. For this just click on the Apps and games rated up to age section and select the age limit.
- Now, to allow the games above the age limit, your approval will be needed first.
- For better security, you can also block certain apps.
You can also set the Spending limits for your child. To do this, just tap the Spending option on the left side (see the screenshot above).
How to turn off Parental control on Windows 11?
- Launch System configuration from the search bar.
- Under the Services tab, search for Parental Control.
- Uncheck the box next to Parental control.
- Tap Apply to save the changes.
So, this is how you can switch off the parental control on your Windows 11.
Also Read: 10 Best Tips And Tricks For Windows 11
CONCLUSION
So, this is how you can set up and use parental control on windows 11. You can also set parental control for more than one account. Additionally, you can configure separate parental control settings for all the accounts. So, go ahead and utilise this useful feature on your Windows 11 PC now. Also, if you face any problems while doing so, do let us know in the comment section.


