


 Header Through Cloudflare")


The iPhone 14 is in your possession. You’ve finally got your hands on Apple’s newest smartphone after waiting in line at an Apple Store or receiving it by mail order, and it’s time to get it up and running.
If you’re coming from an Android or have been an Apple user for a while, you could still have questions. From powering on and connecting to Wi-Fi to activating your eSIM and uploading all your data, this tutorial will take you through every step of setting up your iPhone 14, iPhone 14 Plus, iPhone 14 Pro, or iPhone 14 Pro Max.
Tips for getting ready for iPhone setup
Whether you’re switching from another phone or setting up an iPhone for the first time. You’ll need the following items before you can get started with the setup process:
- Don’t forget to create a backup of your previous iPhone. If you’re upgrading to the iPhone 14 from a previous model. You’ll need to transfer the contents of your old iPhone to the new one. To avoid losing data because of a lack of space, you can replicate it on your computer.
- You should keep your old phone handy. Have your old phone handy, whether it’s an Android or an iPhone. The setup time may be reduced if you do this.
- Verify that you have an active Internet connection. To complete the iPhone setup process. You must be in range of a reliable Wi-Fi network.
- Make sure you have your Apple ID and password handy. Have your Apple ID and password handy in case you need to login in to your account for any reason, including restoring a backup. One can be made at the time of installation if desired.
Use your new iPhone by bringing up a recent iCloud backup.
Restoring from an up-to-date iCloud backup is the fastest and most hassle-free way to get your new iPhone up and running. As you set up your new iPhone, select Restore from iCloud Backup, enter your Apple ID credentials, and then select the most recent backup of your previous device.
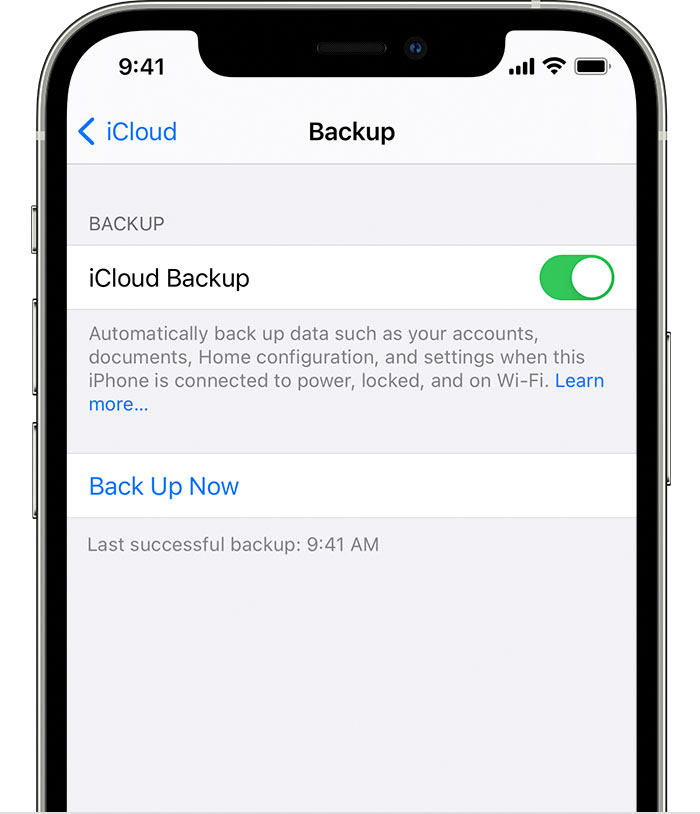
If the backup is older than two days, it’s probably a good idea to recreate it. If you want to back up your old phone to iCloud, open the Settings app, click the iCloud Backup icon, and then select Back Up Now.
When it’s done, return to your new iPhone and choose the Backups tab. From there, you can choose the backup you just made to begin the restoration process.
After 15 minutes, your phone will be fully functional after it has downloaded all of your previously installed apps and restored your settings and preferences.
Once everything has been restored, you will need to re-enter the passwords for any accounts you added to your phone and check each app to make sure you are still signed in.
Make use of Apple’s built-in file transfer protocol
During setup, you’ll be given the option to immediately sync your old iPhone’s data and applications with your new one. This option was introduced with iOS 12.4, so if you haven’t upgraded your phone in a while, you’ll see it for the first time.
- The interface of the programme is quite user-friendly. Be prepared to wait for the procedure to finish, which might take more than an hour, by having both phones, preferably plugged in and charging to ensure they don’t run out of juice, have a Wi-Fi connection, and have enough time.
- The longer it takes, the more data you have stored on your phone, such as photographs in your camera roll. Time estimates will be displayed on the phones at the beginning of the transmission. The programme has always given me an estimate within a few minutes of the actual time. If you don’t back up your phone to Apple’s iCloud, you should.
Your iPhone can get information from a Mac or PC.
When I get a new iPhone, I always use a Mac or PC to restore from an encrypted backup. This method of transferring your data saves you time because it eliminates the need to sign in to each and every one of the numerous apps you have on your phone.
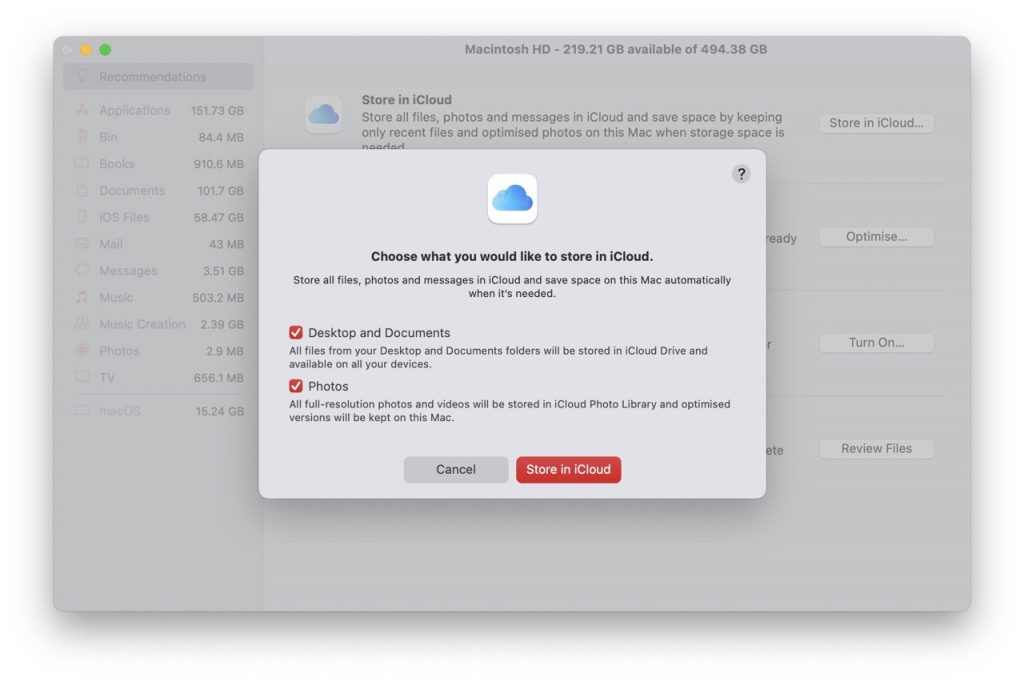
- An encrypted backup of your current iPhone is required before proceeding with this procedure. I realise that this may sound hard, but all it entails is that you tick another box and input a password.
- The Finder application is what you’ll use on a Mac to make a copy of your old iPhone. If you want to protect your backup by using encryption. Just select that option and provide a password you can easily recall when requested. Instruct your Mac to make a copy of your files. When it is complete, it will signal completion.
If you’re using a PC, you can still make backups with iTunes (it hasn’t died yet). To encrypt your backup, you must input a password and make sure the corresponding box is ticked.
- Connect your new phone to your computer and launch either Finder or iTunes to begin the restoration process. When prompted, click Trust and continue through the rest of the wizard to restore your phone from the backup you just made. Before you can begin, you’ll need to enter the password for the backup, so keep it safe.
- As soon as it’s finished, your new phone will be an exact replica of your old one. You won’t have to re-enter any of your information into any of your apps or other accounts.
- Swipe up to unlock your iPhone after you’re done. Your apps and data are being transferred to your new iPhone 14. So it may take time before you see everything on your home screen or on your camera roll. Depending on the amount of data being transferred, this may take a few hours or longer.
Final Thoughts
You should now have successfully transferred all of the data you needed from one iPhone to another using our comprehensive instructions. Please tell your friends and family about this post if it has helped you. Feel free to send us a note via the chat window in the lower right corner if you have any questions.


