


 Header Through Cloudflare")


In this article, we will explain how to use Google Lens on PC.
Google Lens has been a part of Android smartphones and iOS devices for a long time. Slowly and steadily, Google lens has made its way into your Windows PC.
Google lens is now integrated into the Google Chrome search engine. However, we cannot deny that the functionality of the Google lens is pretty restricted on your PC than on Android smartphones.
We have brought this comprehensive guide to help you make the most from the Google Lens on your PC. So let us proceed to know more about the same.
Also Read: How To Install The Goodbuy Browser Extension On Google
What is Google Lens?
Google lens is revolutionary technology introduced by Google that leverages AI and image recognition to help scrape the Internet and deliver relevant information related to an image. The resulting information can be images, text, and information from websites; anything that triggers the search for that image.
Google Lens was first introduced as an exclusive feature of Google’s smartphones known as Google Pixel in 2017. Google Lens works flawlessly in the photos app, camera app, and now it is also embedded Google web browser. On your computer, Google lens functionality is similar to a search engine but instead of using textual information, it uses images to deliver search results.
Moreover, Google Lens can only fetch results for the images that are already present on the web. That means you cannot live scan images in your vicinity to get results from Google.
To use the Google lens feature in the web browser of your PC, it is essential to first enable the feature. So let’s find out how to do it.
Also Read: How To Convert Google Doc Into PDF
How to enable Google Lens on Chrome
Launch the Chrome browser on your machine.
Now put down ‘chrome://flags’ in the URL bar and press the enter key.
Press the ctrl and F key simultaneously to bring up the search bar.
Now type in Google lens to quickly access the “Search your screen with Google Lens” flag.
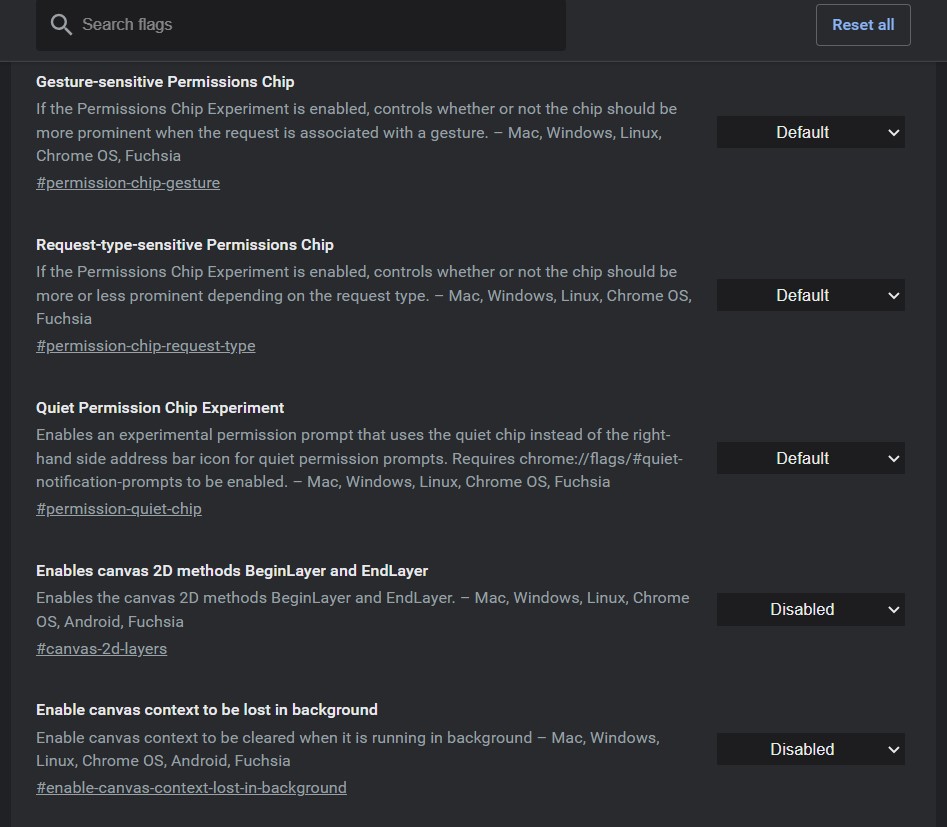
Open the drop-down menu for the “Search your screen with Google Lens” flag.
Choose the enabled option from the drop-down.
Now that you have enabled Google lens on your browser, let’s see how to make the best use of it.
Also Read: How To Enable Google Drive Dark Theme PC
Use Google Lens on Google Images
To get relevant results for visual search, here is what you need to do:
- Visit Google’s website from your browser.
- Now you will see the images option in the upper right corner.
- Click on the image option and then upload the image in the search bar to begin the search.
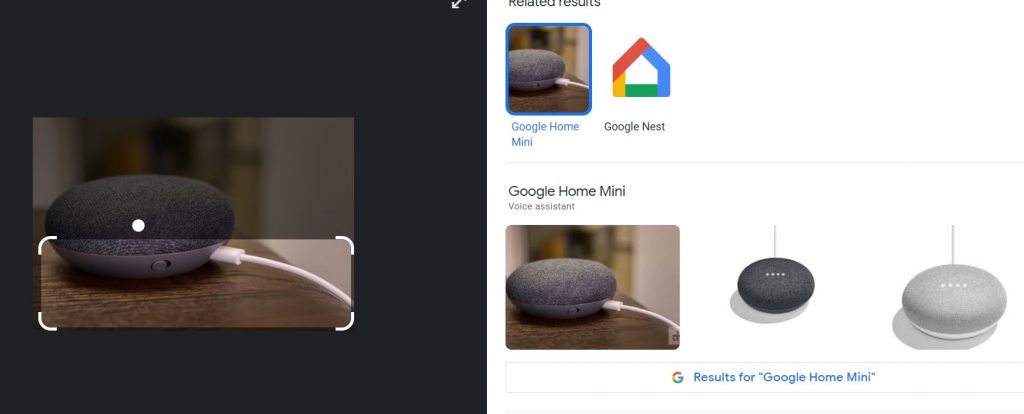
- That image will be visible on the right side of the browser. Hit the Google lens icon below it.
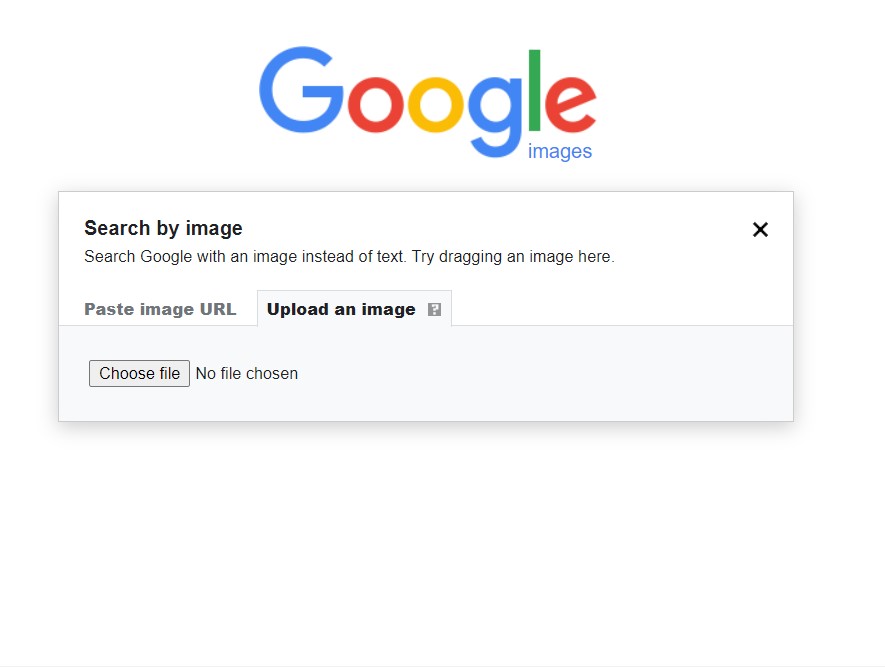
- All the important aspects of the image will be highlighted in the rectangle, and you can change the selection area.
Below the image, all the related search results will appear. Keeps scrolling to find the search results.
Also Read: How To Make Calls Using Google Voice On iOS
Use Google Lens on any website
To use Google lens on the pictures of websites, here is what you need to do:
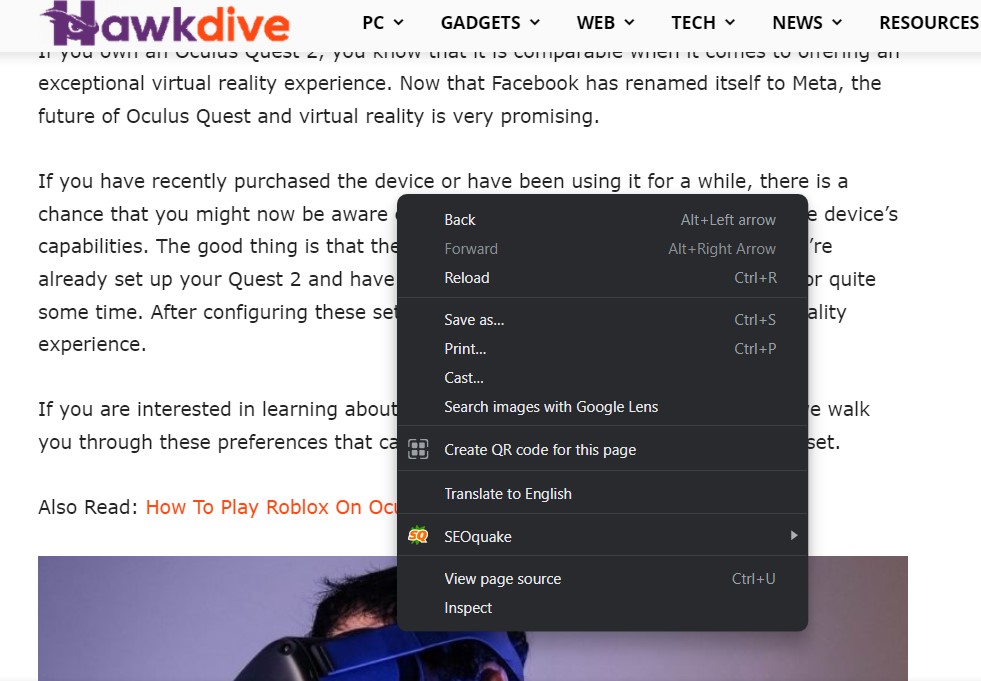
Launch the Chrome browser and then type the URL on the website on which you want to use the Google Lens search.
Now navigate to the image that you want to search using Google lens.
Right-click to access the context menu and choose search image with Google lens option.
As soon as you will do it, the Google reference search result page will appear delivering the visual search results and, a summary of the chosen area of the image.
Use Google Lens on a selected area of the website
Instead of the picture, you can also search a web page area using Google lens. Here’s how it is possible:
Launch the Chrome browser and open the website that you want to search using Google lens.
Open the web page and select the area that you want to scan using Google Lens.
Right-click in the same manner and choose the “Search images with Google Lens” option from the context menu.
Drag the rectangle to choose the highlighted area, and then leave the right click when you are done highlighting.
As soon as you will do it, a new tab will open showing the Google lens result. The visual matches from the web page will appear on the right side of the tab.
Use Google Lens in Google Photos
To use Google lens on images of your PC, you will have to upload them into Google Photos.
Once done, you can search for the images in the same way as the steps explained in the above method.
For this, visit https://photos.google.com/ from your web browser and then click on the upload icon on the website.
Note: If that image is already present in Google Photos, you can open the image instead of uploading it.
So when the picture is uploaded, click to open the recently uploaded photo and then choose the ‘Search image with Google Lens’ option.
Similar to the above method, the result page will appear in the new tab you can change the selection area to modify the search results.
Also Read: Google Classroom- A Complete Guide
Wrapping up
So that’s how you can use the Google lens technology on Google’s web browser from your Windows PC. Who would have thought that performing image search will become so mainstream? With this, signing off.


