


 Header Through Cloudflare")


In Windows 10 and Windows 11, there are many interesting and amazing built-in features. The font is also one of those features with many options. There was a time when we had to use only the default font on all the text editors and other apps in your windows. But now we have fonts which we can install in the system of your windows easily and use for all the applications of windows 10 or windows 11. There are a few ways to download and install the fonts n your windows 10 or windows 11. We will see ways to download and install the fonts in your windows.
Also Read: How To Install Fonts On Windows 11 For Free?
How to Download the fonts
There are some fonts available on Google which costs a little. But some websites provide fonts for free. If you do not how to download this font, follow the given steps and you can easily download the fonts.
Open your browser and in the search bar type Google fonts.

You can see windows full of free fonts on the screen. You have types of fonts and also different languages. Choose whichever font you like.
When you click on the font, you will be direct to another window in which you can check the font by typing any sentence.
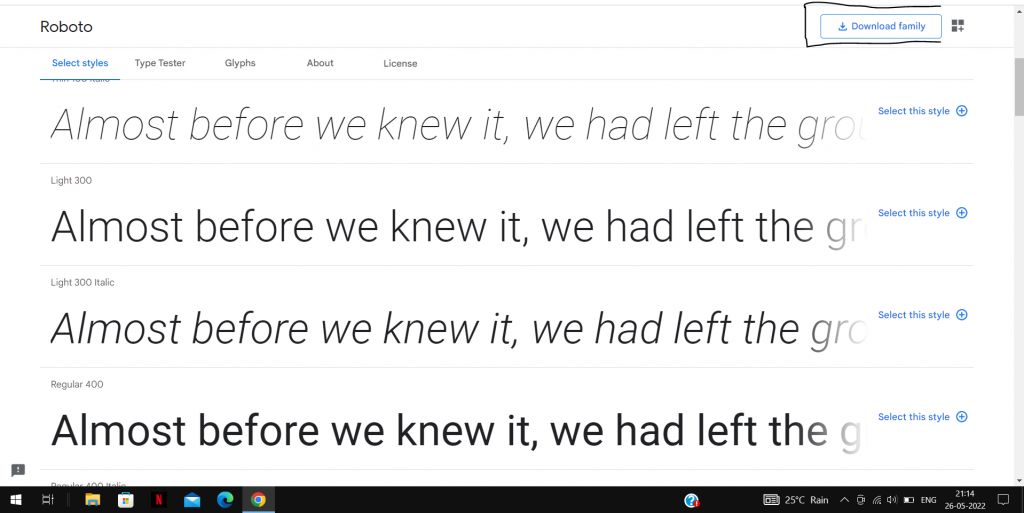
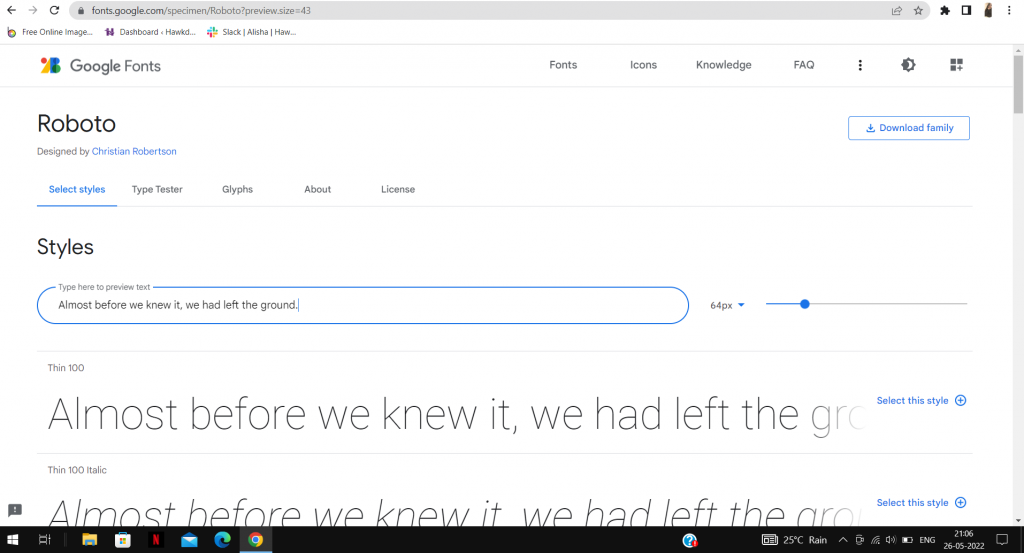 Check with different fonts and select the font you like. After you finalize the font click on the Download family which is present at the top right corner of the window. This will download all the fonts.
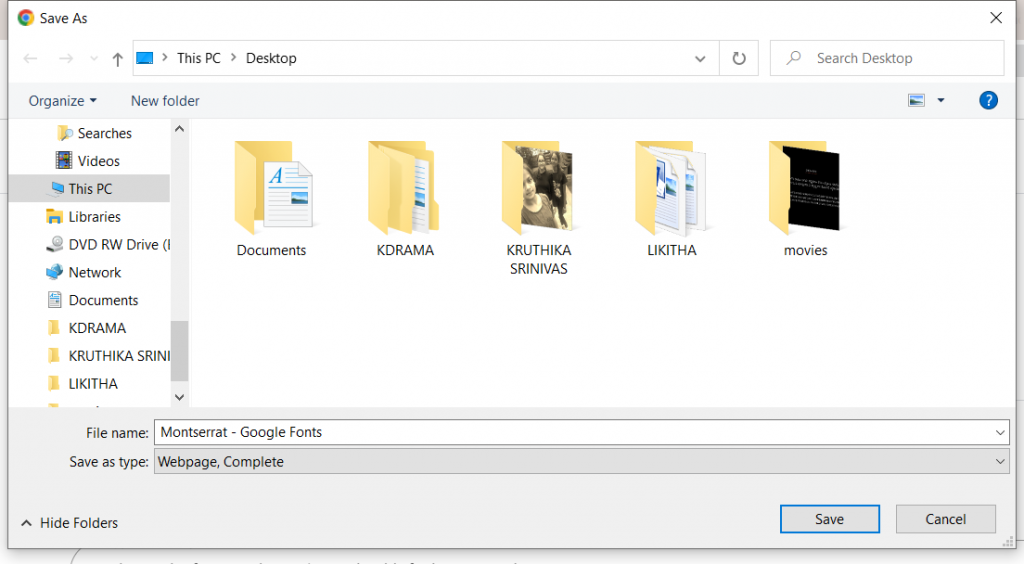
After it is downloaded, you will be directed to save the font styles. Select the path in which you want to save all the fonts and click on the Save button.
If you want to download any other font follow the same steps mentioned above and it is downloaded.
Read: How To Install Windows 11 On An Android Phone?
1. Installing using the source Folder
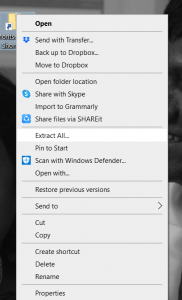
This is the most straightforward way to install the Fonts. Whenever we download any file we get a zipped folder to extract all the files. In the same way before installing the fonts of our wish we need to extract all the font files. Follow the steps to extract and install the fonts in your windows 10 and windows 11.
When you download any folder you need to extract the files always. So follow the same after you download the fonts. Right-click on the zipped folder you have downloaded and choose the option extract files.
Now select the path where you want to extract all the font files. Click on the Ok button.

Once it is extracted you can see the folder that is extracted and downloaded in the path you have chosen you see the folder.

Click on the folder and open the folder. You will be able to see a list of fonts. Right-click on any one font style and select the option Install or Install for all users. Choose any one option of your wish.
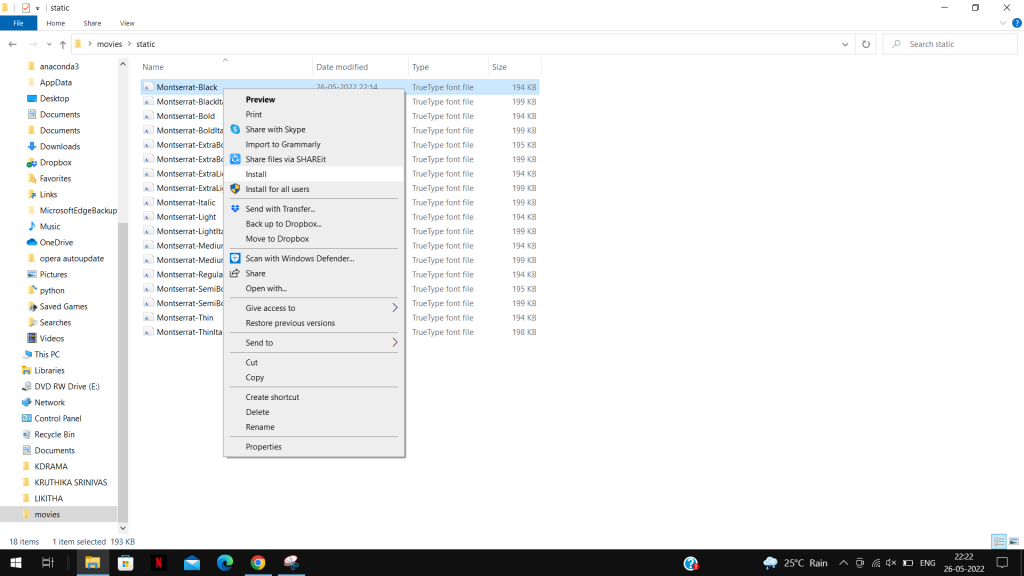
After a few seconds, the installation will be over. If you want any other font style to be installed follow the same steps mentioned above.
Also Read: How To Install Microsoft SQL Server In Windows 11?
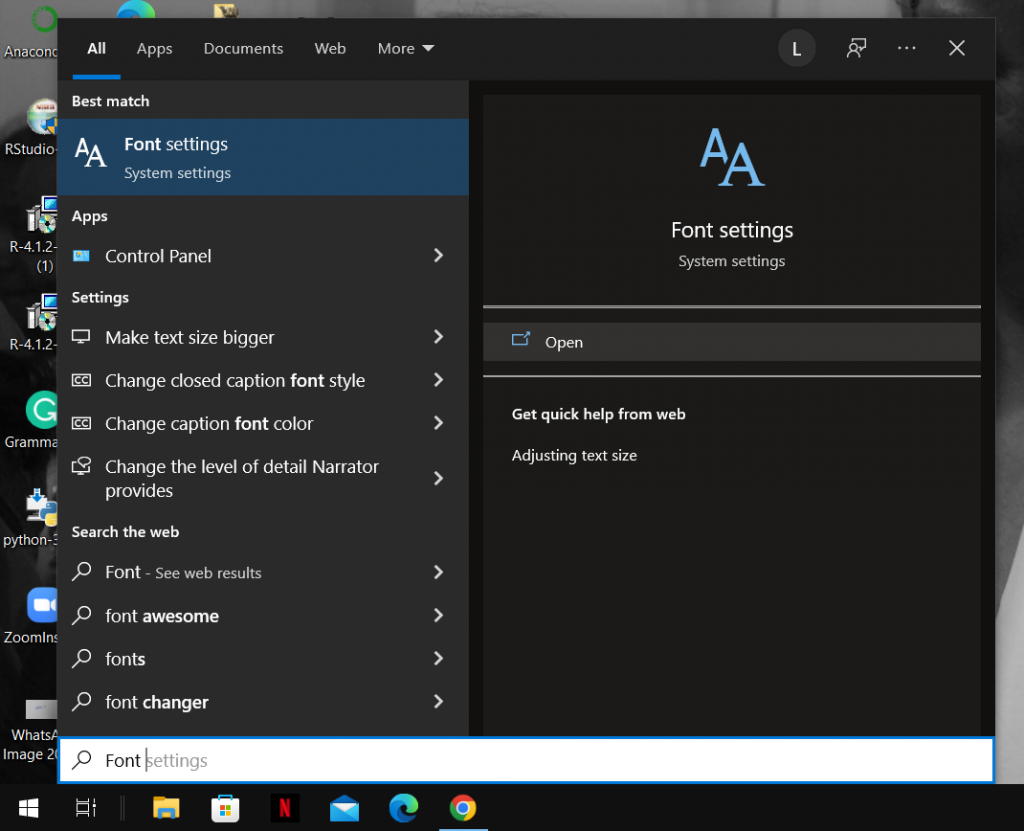
2. Installing font using the Font Settings app
This is the easiest way to install the fonts in windows 10 and windows 11. Follow the steps given below step by step.
Click on the windows button and type Font in the search bar. Click on the Open.
You can see a window that consists of many fonts. At the top, you can also see a rectangular box that says Drag and drop to install.
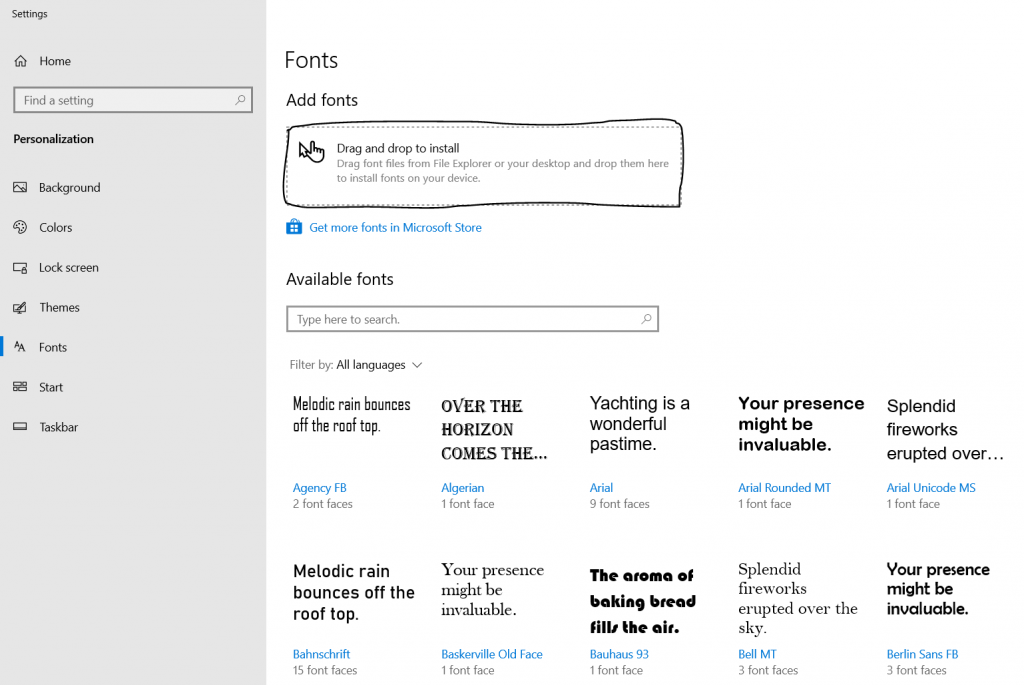
Select and open the downloaded fonts. Choose the font which you want. Simply drag and drop that font into the rectangular box. This will take a few seconds to get installed.
Must Read: How To Install Dolby Atmos In Windows 11?
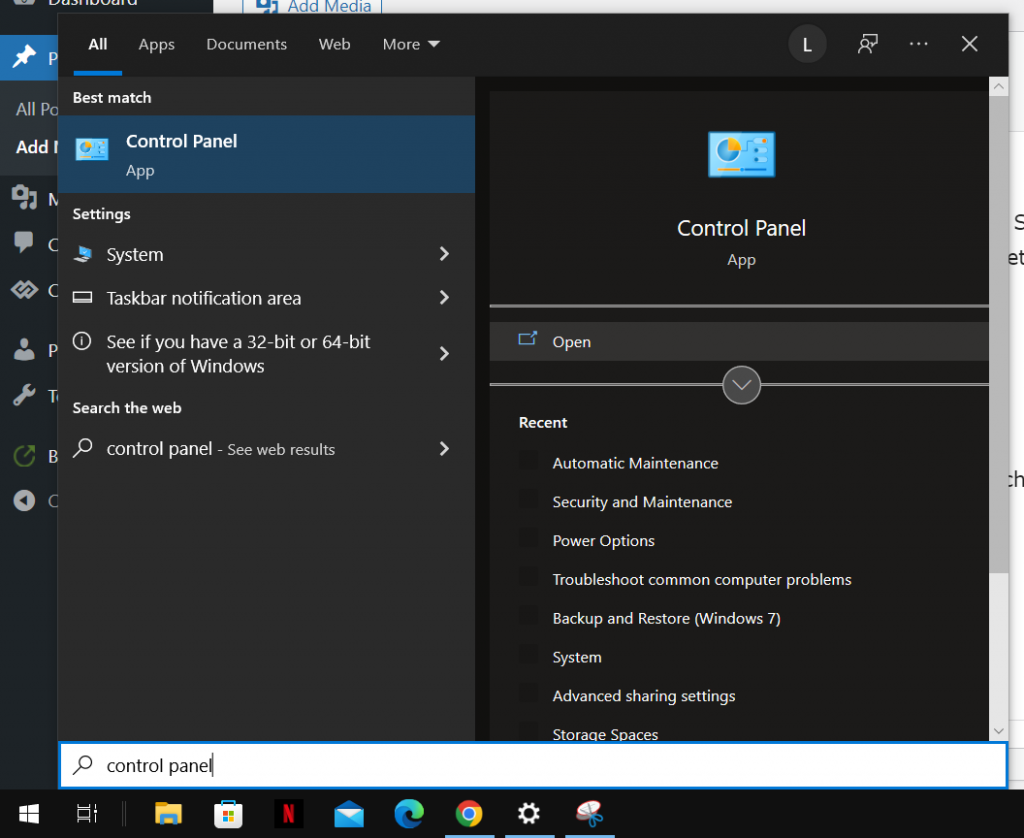
3. Installing Font through Control Panel
This is another way of installing the Fonts. Follow the steps given below.
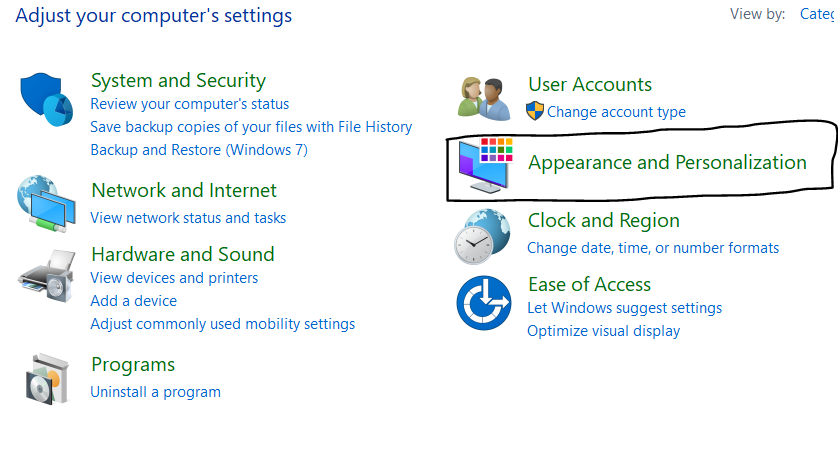
Click on the Windows start menu and type Control Panel in the search bar. Click on the Open option.
When you open the control panel window, you can see many options listed. Select the Appearance and Personalization option.
Now choose the Font option.

If you get the Font option directly as soon as the control panel opens, select that option. After you select the font option, another window appears in which you will be able to see a list of pre-loaded fonts.

Open the folder which is downloaded. Select the font which you like, and drag and drop that folder into the above grid. This will install in just a few seconds and it is done. you can use the font which you like.
Conclusion:
By using the method above you easily install and download the free font styles in your windows 10 and windows 11. Using different font styles in the windows looks attractive and interesting. You will be amazed while using your systems with different fonts which you like. Windows 10 and Windows 11 provide all these features which are useful and interesting. n this article you got the information regarding how to download and install the fonts in your windows 10 and windows 11. Hope this was informative to you.


