


 Header Through Cloudflare")


You can Shoot & Edit Dramatic Summer Light Photos on your iPhone with some of camera settings. As, Before Instagram, photo editing was only done by professionals. Any amateur photographer could only hope to convert a shot to black and white or colour it in that vintage Sepia tone.
In the modern era, anyone with a smartphone and a few applications can edit photos professionally. There are numerous one-click photo filter options to choose from, some of which can even be accessed immediately on your iPhone for those of us who would like not to spend an additional 20 minutes refining an Instagram post.
You won’t need to download apps to learn about iPhone Camera filters covered in this guide.
What are filters in photos for?
After learning how to add an iPhone filter to your images quickly, it’s time to discuss what those filters are and how to use them. The iPhone currently has 10 filters that you can use on your pictures.
What they do and who they are are as follows:
- Vivid boosts contrast in the image, making it ideal for capturing sunsets and other natural settings.
- Vivid Warm boosts contrast and apply warm tones, making self-portraits and images of other people look more attractive.
- Vivid Cool boosts contrast and overlays cool tones for flat-lay shots and taking pictures of darker landscapes.
- Portraits and close-up shots of items gain intensity when the contrast is made more dramatic by darkening the shadows and brightening the image’s highlights.
- In images taken immediately after sunset or just before daybreak, Dramatic Warm intensifies the shadows, reduces the highlights, and overlays warm tones.
- Dramatic Cool enhances the photo’s shadows, reduces its highlights, and adds cool tones, which can make beach shots and foggy landscapes look more inviting.
- Mono converts the image to black and white, which can sharpen an image that is just a little out of focus.
- Silvertone turns the image black and white and intensifies the shadows, making it perfect for dramatic portraits and cityscapes.
- Noir turns the image black and white and boosts contrast, which goes well with pictures of overcast landscapes and dimly lit scenes.
Create Photo in Summer Light
Apple has created a video on its official YouTube channel demonstrating how to take professional-looking images with an iPhone in the summer and how to edit them quickly and effectively.
Drama inspired by the warm weather of summer.
Apple created a video titled “How to Shoot & Edit Dramatic Summer Light on iPhone” that demonstrates how to take advantage of the vibrant colours of summer sunlight to produce stunning photographs with your iPhone and demonstrate how to add visual appeal to your images with no effort.
The video that apple created is part of a larger series that includes recent uploads on shooting cinematic videos and capturing animals’ nuanced expressions on film.
- By tapping the “+” in the top left corner of the “Album” tab page. You can easily build a shared album with members you wish to shoot with.
- To highlight the shadows cast by the bright summer sun, adjust the exposure by moving the sun icon down.
- A single post-shooting step can greatly enhance the dramatic potential of your images.
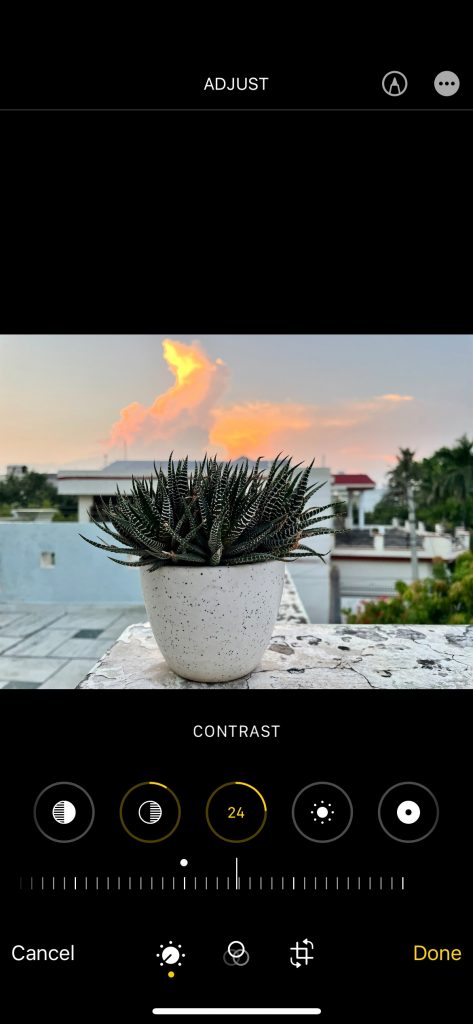
- You can give your work a new feel by clicking “Edit” and tinkering with the contrast, warmth, etc. The amount of times you can undo and redo changes is unlimited.
- Here’s the raw image, straight out of the camera.

- Here’s a shot with some added contrast (+35), warmth (+30), saturation (+55), and vibrance (+45). The photo was clear and the sunlight’s hues were vivid.


Benefit as much as can from this extraordinary opportunity.
When the sun is low in the sky and casts a golden hue. Photographers call this “magic hour” (or “Golden Hour” in English).
- Have your subjects face the sun for a more striking photograph while shooting in portrait mode.
- Improving portrait shots after the fact is an easy process.
- Here’s the raw image, straight out of the camera.
- I was able to get a better shot that makes use of the contrast. By dialing down the Shadows (-47), bringing up the Brightness (-41), and increasing the Black Point (+21).
Final Thoughts
Even if a photo is excellent in its original form. Applying photo filters is fun to give your content some flair and personality. Although some amazing filters are available in third-party apps. We hope you find the built-in filters on your iPhone just as useful.


