


 Header Through Cloudflare")


Photos disappeared from Mac can be aggravating for Mac users. As technology advances, most individuals abandon retaining actual images in their life in favor of keeping memories with the internet, such as publishing photos on Instagram, uploading to iCloud using an online server, and more. Recently, Mac users reported the typical issue of photographs disappearing. The new version of macOS introduces several new features and addresses the low version problem. Don’t be concerned if your images have vanished from your Mac. So, if you’re wondering how to recover my Photo library on Mac, keep reading. In this section, we will go over everything you need to know about recovering your Photo Library.
Also Read: Macbook Not Charging After Installing 12.4: Issue Fixed
1: What Is Mac Photo Library?
- What is Mac Photo Library?
- Photo Library in comparison to iPhoto Library
- How Come You Can’t Find the Photo Library?
2: How to Find and Restore Your Photo Library
#1: Restore the Photo Library from Time Machine
#2: Use Apple’s Photo Repair Tool to restore your photo library.
#3: Update macOS
#4: Repairing Photos Library on Mac Using Disk Utility
#5: Rebuild iPhoto’s Photos Library
3: Additional Tips for Using Mac’s Photo Library
Also Read: How To Organize Photos On Mac
Let’s discuss :
1: What Is Mac Photo Library?
Let us first explore and learn more about Photo Library on Mac before getting into how you can restore your precious photo library on Mac.
1. What is Mac Photo Library?
The Mac Photos collection contains all of your albums, photos, print projects, and slideshows. So, with the assistance of a photo library, you may store and organise your photos, as well as see them whenever you want to relive your memories.
The films and photographs you import into Photos on Mac are automatically saved in the Photos library, which is accessible in your Mac’s Pictures folder. So, when you first utilise photos, you can either select an existing library or build a new one. This library will be added to your system’s Photo Library, where you will be able to see and access the material.
Also Read: How To Set Up And Sync iCloud Photos
2. Photo Library in comparison to iPhoto Library
The Photos app, which was released in OS 10.10.3, recently superseded iPhoto. If you already have iPhoto installed on your Mac, it will continue to work as usual.
The Photos app is a significant advancement in photo management, and it includes new capabilities such as iCloud photo sharing and iCloud Photo Library. The main difference between Photos and iPhoto, despite their similarities, is their performance.
When dealing with larger libraries, iPhoto tends to choke up or slow down. It also has some limitations in terms of collection or album size. The Photos app, on the other hand, has no such limitations and can store far larger collections than its predecessor. While Photos and iPhoto may appear to be the same app, Photos is more powerful and faster.
Also read: How To Recover Deleted Photos On Mac
3. How Come You Can’t Find the Photo Library?
When you start the Photos application and try to access your Photo library on Mac, you may see an error message stating that it cannot locate your Photo library file. This indicates that the Photos app is having difficulty locating your whole photo collection. This circumstance could occur for a variety of reasons. Among them are the following:
- The majority of photo library troubles occur when you use an earlier version of macOS. As a result, updating your macOS may resolve this issue.
- Your Photo library is severely contaminated, which is why you can’t discover or open it.
Many people face these challenges on a regular basis. You may simply address the problem of not being able to find the Photo library on Mac by applying suitable and effective approaches.
2: How to Find and Restore Your Photo Library
Most Mac users become concerned when they are unable to discover or restore their Mac’s missing Photo library. However, by implementing some efficient strategies, you can immediately regain and access your lost Photo library. Here are some step-by-step instructions for restoring your Mac’s photo library.
Also Read: How To Use Live Text Feature In Photos On MacOS Monterey?
# 1: Restore the Photo Library from Time Machine
If you recently built a Time Machine backup of your Photo library, you may simply recover your lost or deleted photo library in a matter of minutes. If not, you may need to utilize a picture restoration solution to resolve all issues with locating and restoring the Photo library. Here are some steps to recover your photo library using Time Machine:
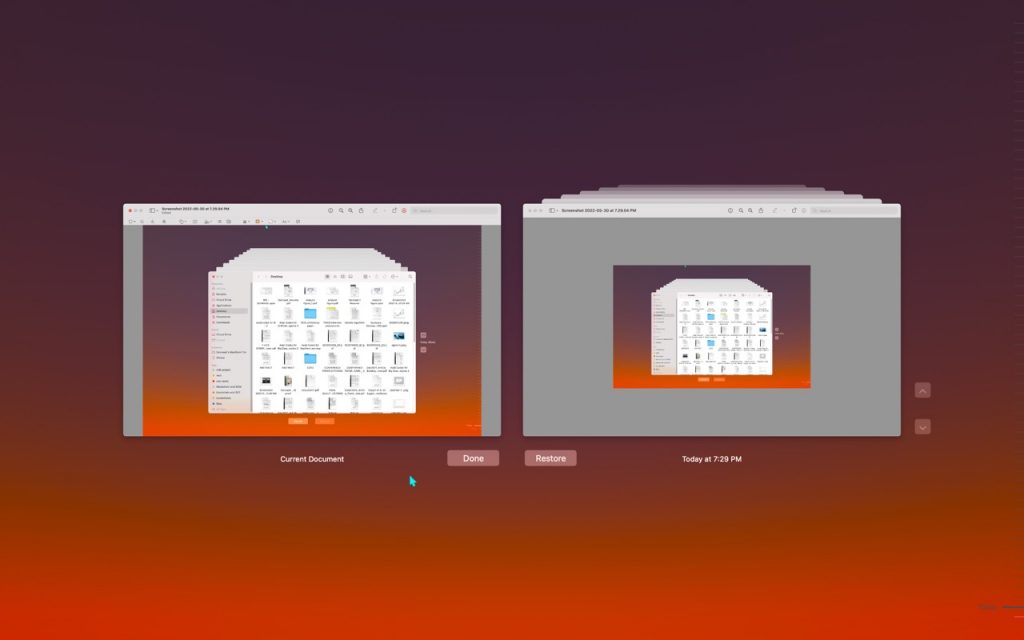
- Connect your computer to the Time Machine backup drive.
- Next, click the Time Machine icon in the menu bar and then press Enter. You can alternatively open the Apple menu, select System Preferences, and then Time Machine.
- Time Machine will now launch and display available backups. You can access your Photo library backup by clicking on the date of your last backup. Once you’ve located it, click and pick it.
- Finally, click “Restore” to recover your Photo library.
Note: Depending on the size of your Photo Library, it may take some time to restore it.
Also Read: How To Manage Albums In Photos For MacOs?
# 2: Use Apple’s Photo Repair Tool to restore your photo library.
If your Photo Library is corrupted or your photos act strangely, you can use your Mac’s photo restoration program to restore your Photo Library. Depending on your network speed and the size and number of images in your library, this procedure may take some time. Despite the long odds, the photo repair tool is worth a chance. All you have to do is be patient with it.
Before using the repair tool to repair the Photos library, ensure that you are running the most recent version of macOS and that your Mac is up to date. This will speed up the process and allow you to readily access your photographs in the Photo library. To recover photographs using the Photo Repair Tool, follow these steps.
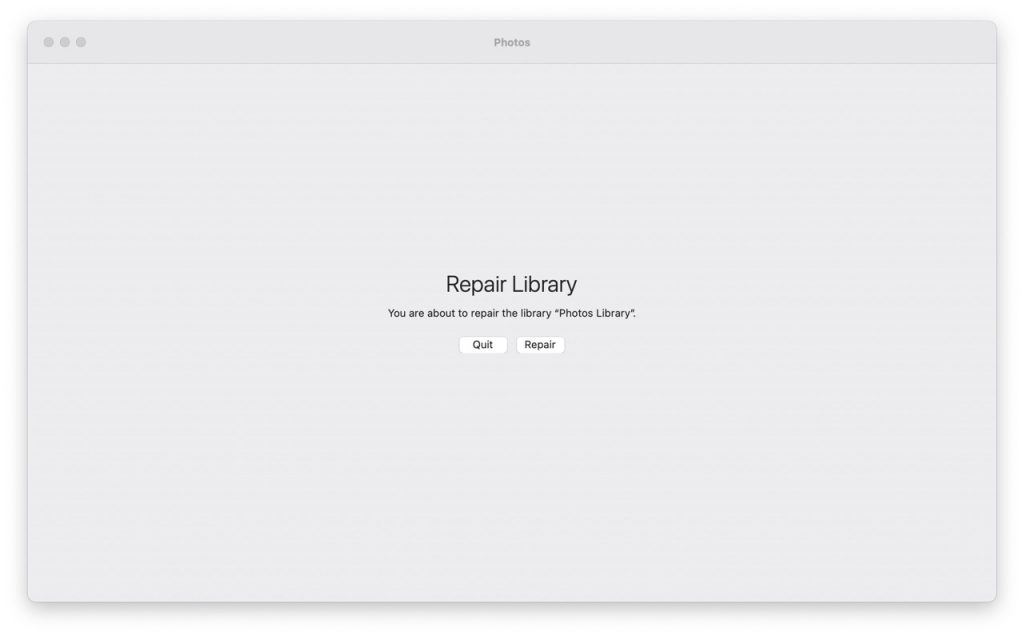
- If you currently have the Photos app open, close it before navigating to “Applications” and looking for the Photos app icon.
- Once you’ve located it, hold down the Command + Option keys and double-click the Photos app icon.
- A dialogue box titled “Repair Library” will appear. To restore your library, select “Repair.”
To continue, you may be requested to enter your admin account and password. Before continuing with the repair process, Apple recommends backing up your photo library.
Also Read: How To Set Up And Sync iCloud Photos
# 3: Update MacOS

Before you begin updating your software, make a backup of your data. Then, at that time, use the following methods to locate and install any available system updates or redesigns:
- Select System Preferences from the Apple menu on the left side of your screen.
- From the menu that appears on your screen, select Software Update.
- If your System Preferences omit Software Updates, you can download updates from the App Store.
Select one of two options:
- If you click Upgrade Now, your Mac will update to the most recent update for your installed version, such as 10.14.5 to 10.14.6.
- Then if
you click Upgrade Now, your Mac will be upgraded to a substantial new form known as macOS Monterey.
When Software Update reports that your Mac has been updated, macOS and all of the software it installs will be up to date. Safari, Calendar, Notes, Photos, Clock, and Maps are all included.
Also Read: How To Hide Photos On iOS 15?
# 4: Repairing Photos Library on Mac Using Disk Utility

If you see messages such as “Photos program shuts unexpectedly,” “a file is corrupted,” or “a volume is not working properly” on your Mac, Disk Utility is worth a try, albeit it is not intended to detect or fix disc problems. When an issue develops, it acts as an emergency fix for your disc.
- Go to the Disk Utility software on your Mac.
- Navigate to View > “Show All Devices.”
- Select a disc or volume that is causing a problem, then choose the First Aid option for additional troubleshooting.
- To begin the process, click “Run,” followed by “Continue.”
If Disk Utility fails to resolve your Photos Library issues or you obtain a message stating that the First Aid procedure was ineffective, try other methods.
Also Read: How to Convert Live Photos into GIFs on iPhone
# 5: Rebuild iPhoto’s Photos Library
If you have an older version of iPhoto on your Mac, utilize its Photos Library First Aid to resolve this issue. It enables you to recover the iPhoto library database. It allows you to select one of the four alternatives listed below:
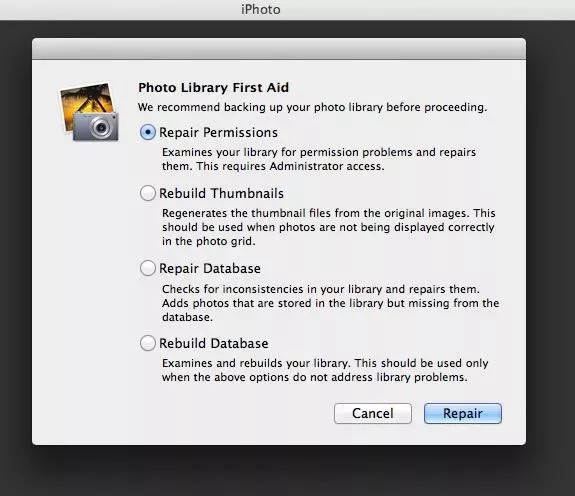
Repair Permissions: Select this option if the photographs library will not open or if you receive an error message stating that you cannot modify your photos.
Rebuild Thumbnails: Use this if your iPhoto thumbnails aren’t showing up correctly and you see dark boxes on your image documents.
Repair Database: Select this option if your Photo Library has unexpectedly lost pictures.
Rebuild Database: Use this option if iPhoto abruptly stops, won’t load, hangs, or the database is unreadable. That should be the final answer to the question of how to recover an iPhoto library.
To get rid of the photos that won’t open on Mac issue, follow the steps below:
- Close the Photos app and go to the Apps list. Locate the iPhoto application.
- Click the iPhotos program while holding down the Option + Command buttons on your keyboard.
- Hold the keys down until the iPhotos application loads and you see the Photo Library First Aid display.
- Repair Permissions should be selected.
- You can select the other alternatives if you need to do more repairs, depending on the problem.
- Select Repair.
- It will take time to perform each repair or rebuild. Thumbnail and database rebuilding typically take longer than repair.
- When finished, your iPhoto Library should function normally.
Also read: How To Convert Your Photos To PDF On iPhone And iPad
3: Additional Tips for Using Mac’s Photo Library
To improve your chances of recovering your photo collection, keep the following recommendations in mind.
1. Name the System Photo Library
If your Mac has more than one photo library, you may need to create a System Photo Library so that other applications such as Shared Albums, iCloud Photos, and My Photo Stream may quickly access the films and photos you want them to utilize. To create a System Photo Library, follow the steps below:
- If Photos is already open, close it.
- Select “Photos” once more, and then click the “Preferences” option from the menu bar.
- Then, pick the “General Tab.”
- The final step is to select “Use as System Photo Library.”
2. Transfer Your Photo Library
By default, your system Photo library is saved in the Pictures folder on your computer. If you take a lot of photos, your solid-state drive or hard disc may fill up quickly. As a result, it is recommended that you relocate your Photo library to external storage to free up space on your Mac and avoid data loss.
3. Avoid Mac Photo Loss
Photos are priceless because they preserve memories for a lifetime. And then there are those dreadful instances when your priceless images vanish or are mistakenly destroyed from your Mac. This could lead to a lot of worry and anxiety. However, you can avoid Mac Photo Loss by following the steps outlined below:
- Maintain your macOS update.
- Repair a corrupted Photos library with Apple’s built-in Repair tool.
- Make regular backups of your photographs.
Bottom Line
We cannot afford to lose our images in this digital age because they mean so much to us. Losing photographs from your photo collection due to technical failures or human error can be disastrous. However, if you follow and execute the steps outlined above, you will be able to retrieve your misplaced belongings in no time. Remember that backing up your Photo library on a regular basis will help you avoid all of the headaches and prevent photo loss on your Mac.


