


 Header Through Cloudflare")


![[Interview] The Future of Screen Experiences ②: From Watching to Understanding With Vision AI Companion](https://www.hawkdive.com/media/samsung-tvs-and-displays-vision-ai-companion-interview_thumb932-218x150.jpg "Exploring Vision AI Companion: Transforming Screen Experiences for Users")


In this guide, we will list down the troubleshooting methods to resolve the unable to change Network Locations on macOS Ventura.
The most recent iteration of macOS, Ventura, removes some features while adding many new ones. One of the functions previously a part of System Preferences was “Network Locations.” Users on Mac could swiftly move between WiFi, Ethernet, and other network settings using Network Locations settings.
The decision to disable network location change in the new System Settings app was one of Ventura’s more puzzling choices. With it, manually altering each setting would be more convenient and prone to mistakes. It’s good to know that the network locations feature is still available and working.
On macOS Ventura, the functionality though hidden is thankfully still available. All you’ll need to do is control them using command lines.

Also Read: macOS Ventura- Calculator Is Rounding Up Issue After Upgrade
Change Network Location Using the Command Lines
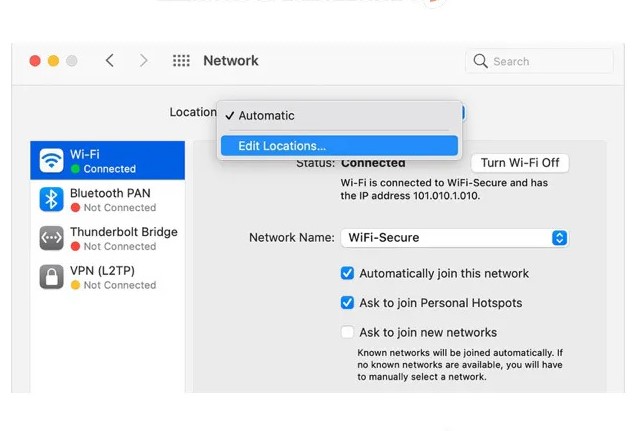
If you had two or more locations set up on your Mac before upgrading to Ventura, a “Location” submenu would appear under the apple menu in the top-left corner of your Mac’s screen. You can shift locations with the assistance of that menu. The System Settings app, which shows the network settings for the current location, can be used as usual to edit settings for a location.
However, if you have the default “Automatic” location set up, the “Location” menu won’t be present. The bad news is that there is no longer a way to add (or remove) locations using the Ventura GUI.
However, using the command line is still possible. The appropriate location options for the “networksetup” command are as follows:
- networksetup -getcurrentlocation
Give the location’s name on the screen.
- networksetup -listlocations
List every location.
- networksetup -createlocation [populate]
With the given name, create a new network location. The default services will be added to the location if the optional word “populate” is used.
- networksetup -deletelocation
Delete the location.
- networksetup -switchtolocation
Set the location you’ve given as the current one.
Consequently, you would use the following command to add a location named “Test” and fill it with the machine’s default network services:
- networksetup -createlocation Test populate
After that, you could use the apple menu to navigate to the “Test” location and set it up in System Settings.
Also Read: macOS Ventura: Preview Print Dialogue Box Too Large {Fixed}
How can I change Network Locations on macOS Ventura?
Before macOS Ventura, you could switch between network locations using either the Location button in the Apple menu or the “Network Locations” pop-up menu in System Preferences.
On macOS Ventura, the former is gone, but the fast-switching control is still available in the Apple menu. Take the following actions:
- In the top-left corner, select Apple from the menu.
- Choose the one you want to switch to by selecting “Location.”
- Change the location of your network on macOS Ventura.
Also Read: How To Restore macOS Ventura Missing Dock Icons
How does macOS Ventura set up a network location?
After switching to a new network location, you can set up the IP address, DNS, and other settings. You must configure the network if the location has just been created and has no configuration already.
- Select System Settings from the Apple menu.
- Select Network.
- On the “Other Services” section, click the button.
- Click “Add Services.”
- Pick a connection type, like WiFi or Thunderbolt.
- Create it after giving it a name.
- Pick a network type by clicking.
- To alter network settings, tap “Details.”
- To save the modified settings, click OK.
Also Read: How To Change Computer Name In macOSVentura
How do I delete a network location in macOS Ventura?
On macOS Ventura, network location removal also requires command lines. The steps are as follows:
Launch Terminal by selecting it in the Applications > utility menu.
To remove a network location, enter the following command and press Enter. (Substitute your location’s name for Name of Location.)
networksetup -deletelocation Name_of_Location
How do I make a new network location with macOS Ventura?
As instructed below, making a new network location is the initial step in implementing location-based network settings on a Mac.
Launch Terminal by selecting it in the Applications > utilities menu.
To add a new network location on a Mac, use the following command and press Enter.
If you wish to designate a brand-new location with no network configuration: (Substitute your location’s name for Name of Location.)
networksetup -createlocation Name_of_Location
On macOS Ventura, make a brand-new network location.
If you wish to create a new location with default services:
networksetup -createlocation Name_of_Location populate
After creating the network location, you can change the WiFi, Ethernet, and other network settings unique to this location in System Settings after switching to it.
Also Read: How To Change The Login Screen Wallpaper On macOS Ventura
Wrapping Up
All done. These were the procedures to fix unable to change Network Locations on macOS Ventura.


