


 Header Through Cloudflare")


Despite the fact that professional photographers prefer DSLR cameras, you can Blur a Photo on iPhone or Android device and can take beautiful pictures like they would on a DSLR. The blur effect in portrait shots is crucial when you want to draw attention away from the background and focus on the person. Even though the cameras on most recent iPhones are quite capable, you can blur an image on an earlier iPhone model if you want to. So, if you want to improve your iPhone photography skills and make your subjects pop out of the frame, here are the top five ways to blur the background.
Also Read: How To Use Memoji On Your iPhone Or iPad Pro In 2022
1. Using Portrait Mode on Your iPhone, you can blur the background.
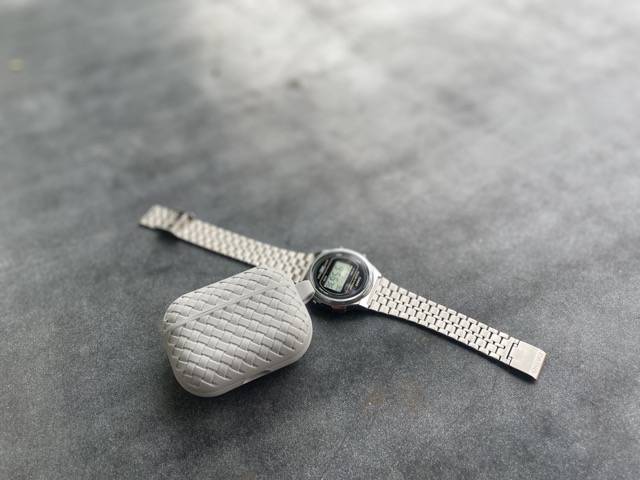
- If you want to blur a photo taken with your iPhone, look no further than the Portrait mode included in the default camera app. If you’re not familiar with the concept, the Portrait mode of your camera allows you to capture pictures with a sharp focus on your subject and a blurred background.
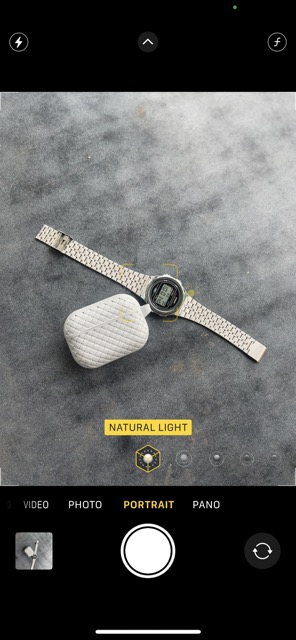
- Using the Camera app on your iPhone, choose “Portrait” mode by swiping right to left from the bottom.
- To get a good alignment shot, you’ll want to place your subject two to eight feet away from the camera. You’ll notice a change in the name of the lighting effect when the subject is perfectly aligned. To take a portrait photo with a blurred background on your iPhone, simply press the Shutter button and release it.
When using your iPhone to take a portrait photo, keep the following tips in mind:
- The camera app notifies you if you are too close, too far away, or if the scene is too dark so you can take better portrait photographs.
- There are two different zoom levels available in portrait mode on the newer iPhone Pro devices (11 Pro and up). You can toggle between the 1x and 2x settings by tapping on the corresponding icons. You can, however, toggle between a 1x and a 3x magnification on the iPhone 13 Pro series. Apple’s latest iPhones, the 13 Pro and 13 Pro Max lack a 2x zoom feature.
- To take a portrait mode photo, the iPhone XR and iPhone SE 2 must be able to identify a person’s face. They do not apply to non-living things.
Also Read: How To Unlock Or Reset An iPhone Without Knowing The Password in 2022
2. iPhone Portrait Photos: How to Adjust Background Blur

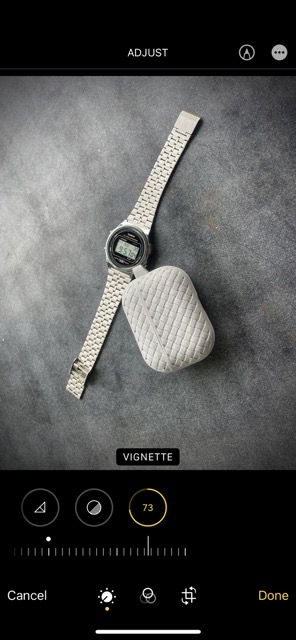
Even after you’ve taken a portrait photo with an iPhone, you can adjust the background blur.
With the Photos app, you can easily edit your photos, whether you want to improve the appearance of your portrait shots or employ an alternative lighting effect.
- In order to edit a portrait photo on your iPhone, first, launch the Photos app. Afterward, hit “Edit” in the upper-right corner.
- Now, touch on the f/number symbol at the top-left and utilize the “Depth control” slider that appears below your photo to modify the blur strength. Increasing the number lessens the blur effect while decreasing the number increases it.
- To apply a variety of studio lighting effects (enabled on iPhone 8 Plus, the iPhone X, and beyond), you can use Portrait Lighting.
Select the desired lighting effect by tapping the “Portrait Lighting” symbol (a hexagon) at the top left corner of the screen.
Also Read: iOS 15.4.1: How To Change Bluetooth Device Label On iPhone
Natural Light:
This setting allows you to use the effects of natural light in your portrait photographs, as the name implies. For those who don’t want the camera’s light effects to be altered, this option is for you.
- Studio Light: This allows you to illuminate your subject’s face using studio lighting.
- Contour Light: Use the Contour Light to apply shadows to your portraits to make your features stand out.
- Stage Light: The stage light fully darkens the background, allowing the audience’s attention to remain solely on the subject at hand.
- Stage Light Mono: The stage light fully darkens the background, allowing the audience’s attention to remain solely on the subject at hand.
- High-Key Mono: An excellent choice for official papers and photo IDs is High-Key Mono, which produces a monochrome photo on top of a white background.
4. To save your portrait blur settings, hit the “Done” button in the lower-right corner of the screen when you’ve found the perfect setting. Reverting your modifications is as simple as going to the image, editing it, clicking Revert, and selecting Revert to Original.
Also Read: 6 ways To Fix Apple Notes Not Syncing Between iPhone And Mac
Note:
- It’s worth noting that Depth Control is only available on the most recent iPhone models. iPhone SE 2 and 3, iPhone XR, iPhone XS/XS Max, iPhone 11, iPhone 11 Pro, iPhone 11 Pro Max, iPhone 12 mini, iPhone 12, iPhone 12 Pro, iPhone 12 Pro Max, iPhone 13 mini, iPhone 13, iPhone 13 Pro, and iPhone 13 Pro Max all currently enable Depth Control.
- It’s important to keep in mind that the iPhone XR’s rear-facing camera only has the ability to shoot in Natural Light, Studio Light, and Contour Light.
3. By getting closer to your subject, you can blur the background.
What if you don’t own a new iPhone but still want to blur a photo on it? Don’t worry, there’s an ancient but efficient trick for blurring the backdrop of an image on your iPhone.
To blur the background, simply draw closer to your subject. Yes, you read that correctly. The built-in camera generates a short depth of field when you photograph near to the subject. A shallow depth of field, for those unaware, allows only a small section of a picture to be in focus while blurring the rest. In a word, the shallower the depth of field becomes the closer you get the iPhone camera to your subject. To decrease jitters and take more solid photos/videos, we recommend investing in one of the finest iPhone tripods.
Keep in mind, however, that bringing the camera too near to the subject will cause the camera to lose focus. The subject will appear entirely hazy. As a result, while approaching close to the subject, keep an eye on it to ensure that it is in sharp focus. Keep your main topic crisp while blurring the backdrop. Fortunately, adjusting the focus on your iPhone camera is simple.
- To focus on the topic, open the Camera app and tap on the spot where you wish to focus. The focus point will now be indicated by a yellow box on the screen.
- If the backdrop doesn’t appear to be blurred, get in closer and tap to refocus.
Also Read: iPhone Notifications Not Working In iOS 15.4.1 [Fixed]
4. Blur Photo Background on iPhone with a Third-Party App
On an iPhone, you may blur the background of a shot using a variety of third-party apps. Focos, on the other hand, is one of the most popular and effective apps due to its ability to create professional-grade bokeh effects. You may use it to convert any image into a portrait mode image with a depth of field that you can modify. The software is free and requires iOS 11.2 or later to run.
- On your iPhone, open the Focos app. After that, select the image you wish to modify by tapping on the photo icon. Then modify the background blur of the iPhone photo with the blur effect slider.
- When you’re satisfied with the results, touch the export icon in the top-right corner to save or share your shot.
Also Read: iOS 15.4.1 Mail Not Loading On iPhone: Fixed
5. Use the blurred vignette effect to bring your subjects into focus.
Although the blurred vignette effect won’t give you the same results as the methods described above, it’s worth a go to see if you like it. Have you ever wondered how the vignette effect works? Instead of blurring a photo’s whole background, it creates a blurred vignette around the screen’s boundaries. The blurred edges draw your attention to the subject as a result.
Snapseed (Free) by Google has long been regarded as a solid tool for this purpose. It’s no surprise that it’s considered one of the best picture editing applications for iPhone and iPad. Let’s take a look at how it functions:
- On your iPhone, open the Snapseed app and tap the “+” icon to access your photo library. You can now choose between opening an image from your device, snapping an image, or opening the most recent image. Alternatively, you can choose an image to modify by scrolling through your photo collection.
- Next, select the “Lens Blur” tool from the “Tools” menu at the bottom.
- In your photograph, you should now notice a few white circles. The area inside the inner circle will be sharply focused, while the area outside will be fuzzy. In the places between the two circles, your image will move from sharp to fuzzy. You can move the circle to the desired location or even resize it by squeezing it with your fingers, depending on your demands.
To change the blur strength, swipe up or down and select “Blur Strength.” After that, swipe left or right to adjust the blur strength.
In the same way, you can alter the “Transition” and “Vignette Strength.” While Transition allows you to manage how the targeted area blurs, Vignette Strength allows you to determine how dark the image’s edges seem.
4. When you’ve finished editing your image to perfection, click the checkmark in the bottom-right corner of the screen.
5. Finally, hit “Export” and select the Save a Copy, Save, or Export option from the menu.
Also Read: 7 Methods To Fix iPhone Keeps Asking For Apple ID Password
Last Thoughts
So there you have it: the best techniques to blur the backdrop in images on iOS. Most modern iPhones now include portrait mode, which is the greatest way to obtain a realistic background blur in photos. Even on earlier iPhone models, you can use third-party apps like Snapseed and Focos from the App Store to get the most out of your photos. What’s your preferred approach for taking portrait photographs on your iPhone with a blurred background?


