


 Header Through Cloudflare")


In this detailed guide, we’ll show you how to install macOS Ventura on a Windows 11 PC using VMware. As you know, the latest macOS Ventura is more fantastic than previous versions and it brings a new design to the macOS. Through macOS Ventura, Apple has prioritized gaming in its latest desktop operating system. The stage manager, email updates, and an application that can use your iPhone as a webcam are among the notable new features.
macOS Ventura Installation on Windows 11
Below we have mentioned the step-by-step guide to show you how to install and use macOS Ventura with your Windows PC using VMware Workstation Pro/Player.
1# Install the necessary software
You should do a few things before installing and using macOS Ventura on your Windows PC or laptop. If you’ve already done the following, you can skip this step. Here is the list of files you need to install beforehand:
- VMware macOS Unlocker.
- macOS Ventura ISO image.
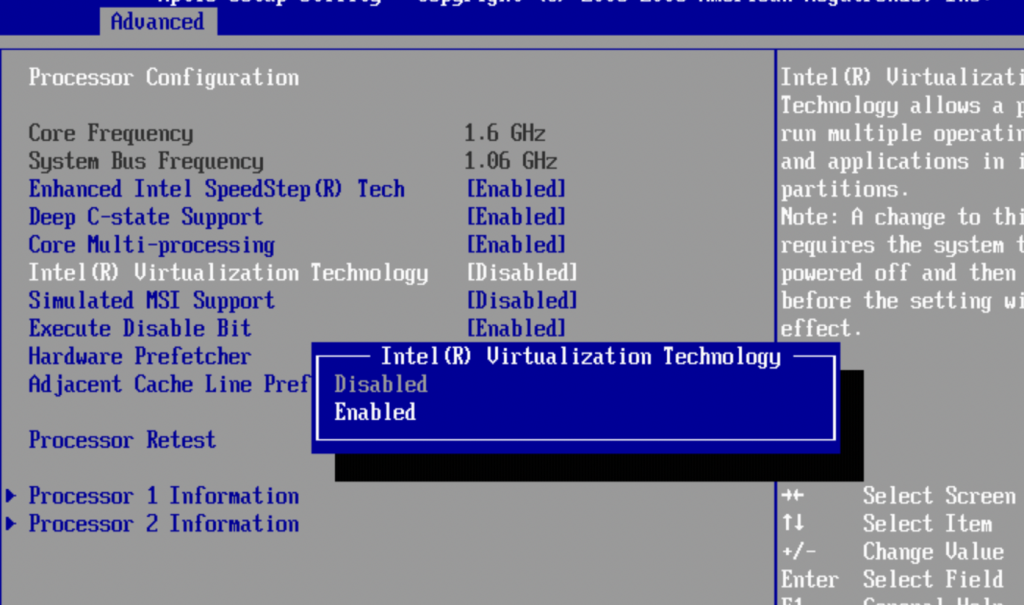
2# Enable virtualization on Windows PC
The hardware virtualization features of modern CPUs allow VMware-created virtual machines to run faster than they would otherwise. To install macOS Ventura on your PC, you must first enable virtualization. Otherwise, the error message “Can’t open a session on a virtual machine” will appear.
Also Read: How To Download macOS Ventura Developer Beta 3
2# Install Workstation Pro/Player on Windows 11 PC
Before installing macOS Ventura on Windows 11, install VMware Workstation Pro or Workstation Player on your machine. For the uninitiated, VMware Workstation Pro or Workstation Player is a very popular virtualization tool.
3# Install macOS Ventura on Windows by unlocking VMware
Now it’s time to install the unlocker we informed you to download. This is necessary because Windows 11 does not show the guest OS by default. However, the unlocker software adds macOS to the list of supported operating systems.
- First of all, you need to quit the VMware Workstation Pro/Player software on your PC.
- Now access the “File” menu and select “Exit.”
- Select Exit File > Exit from the File menu.
- Following that, you need to open and extract the unlocker file.
- Unlocker file for macOS: Right-click “win-install.cmd” and choose “Run as Administrator.”
Also Read: Wi-Fi Not Working On macOS Ventura [100% Working]
4# Create a New Virtual Machine
- Go to Start Menu and search for “VMware Workstation”. Double click to launch it.
- Then, either tap “Create a New Virtual Machine” or press “Ctrl + N” to get there.
- Then, to proceed, select “Typical (recommended)” and tap “Next.”
- Check the “I will install the operating system later” box and click “Next.”
- Now choose “Apple Mac OS X” from the list containing OS and then choose macOS 13 in the version list. Press Next after making the choice.
- Assign a meaningful name to the virtual machine.
- Tap “Browse” to select a location for virtual machine files, tap “Next,” or leave it as the default.
- Next, choose an 80 GB or larger disk capacity and tick the ‘Store the virtual disk as a single file checkbox.
- Now press the Next button to proceed.
- Then, on the Ready to Create Virtual Machine page, tap “Customize Hardware.”
- To get better performance results you can increase the memory from 4 GB to 8 GB.
- Then, select the Processors option. Then, increase the CPU processor core count from two to more for better performance on macOS Ventura.
- Select “New CD/DVD (SATA)” from the left menu, followed by “Use ISO image file” and “Browse.”
- Locate the macOS Ventura (macOS 13) iso file and select “Open.”
- After you’ve added the macOS Ventura ISO, click “Close” to save all of your changes.
- Finally, press the Finish button on the New Virtual Machine Wizard Window.
Note: The minimum memory and processor requirements for running macOS Ventura on a Windows PC using VMware are 4 GB and two processor cores.
Also Read: Why macOS Ventura Is Important to Get
5# Make changes to the macOS Ventura VMX file
To edit the VMX file, go to the virtual machine folder you mentioned earlier. The default is Document > Virtual Machine if no new location is determined.
- Now, right-click on “macOS13.vmx” and select “Notepad” or another text editor from the menu.
- Add the code given below to the bottom.
Version = “0” for smc.
- Finally, select “Save” from the “File” menu. You can now close the Notepad.
6# Install macOS Ventura using VMware
It is time to reinstall macOS Ventura on VMware Workstation Pro or Player from scratch. Let’s get this installation started.
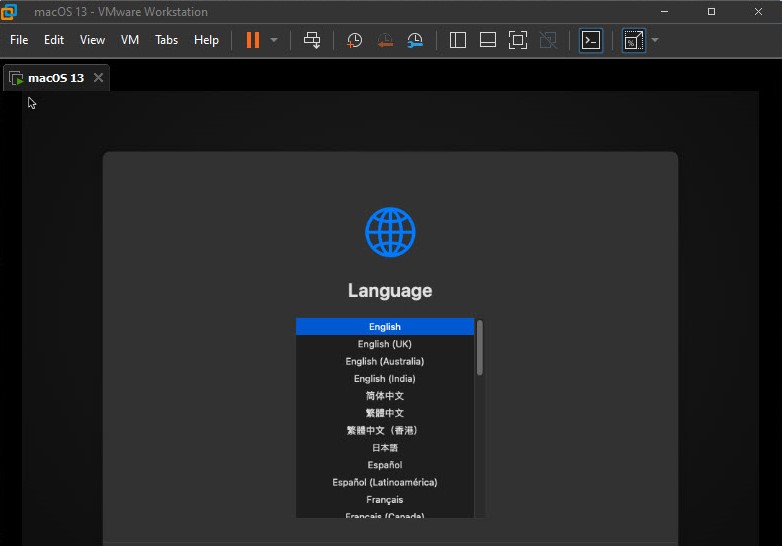
- Start VMware, then in the macOS Ventura VM panel, select “Power on this Virtual Machine” and wait until the OS restarts.
- Now you need to choose the preferred language from the language setup screen.
- Now, select “Continue” from the “Disk Utility” menu. Then, select “VMware Virtual SATA Hard Drive Media” and press the “Erase” button.
- Now, for the name, type “macOS13HD,” then select “APFS” from the Format drop-down menu and click “Erase.”
- To close the dialogue box, press the “Done” button.
- From the Disk Utility Tab, select “Quit Disk Utility.”
- Tap “Install macOS 13 Beta” twice, then continue”.
- Choose the available disk and press the Install button.
- After two or three restarts, the installation of macOS Ventura will be complete. Depending on your system specifications, the process can take up to 15 to 30 minutes.
Also Read: 7 macOS Ventura Hidden Features That You Are Unaware Of
Conclusion
That is how you install macOS Ventura on VMware on a Windows 11 PC or laptop in a simple and step-by-step manner. If you have any questions or encounter any issues, please leave them in the comments section.


