


 Header Through Cloudflare")


MacBook Pro must know tips are covered in this article. The MacBook Pros are professional devices. Now that Apple has improved the power and design, it’s up to you to improve the software experience. Take some time after you’ve unboxed your MacBook Pro to make some important productivity adjustments. These few adjustments will significantly improve the efficiency and functionality of your laptop.
1. Configure the trackpad’s tracking speed
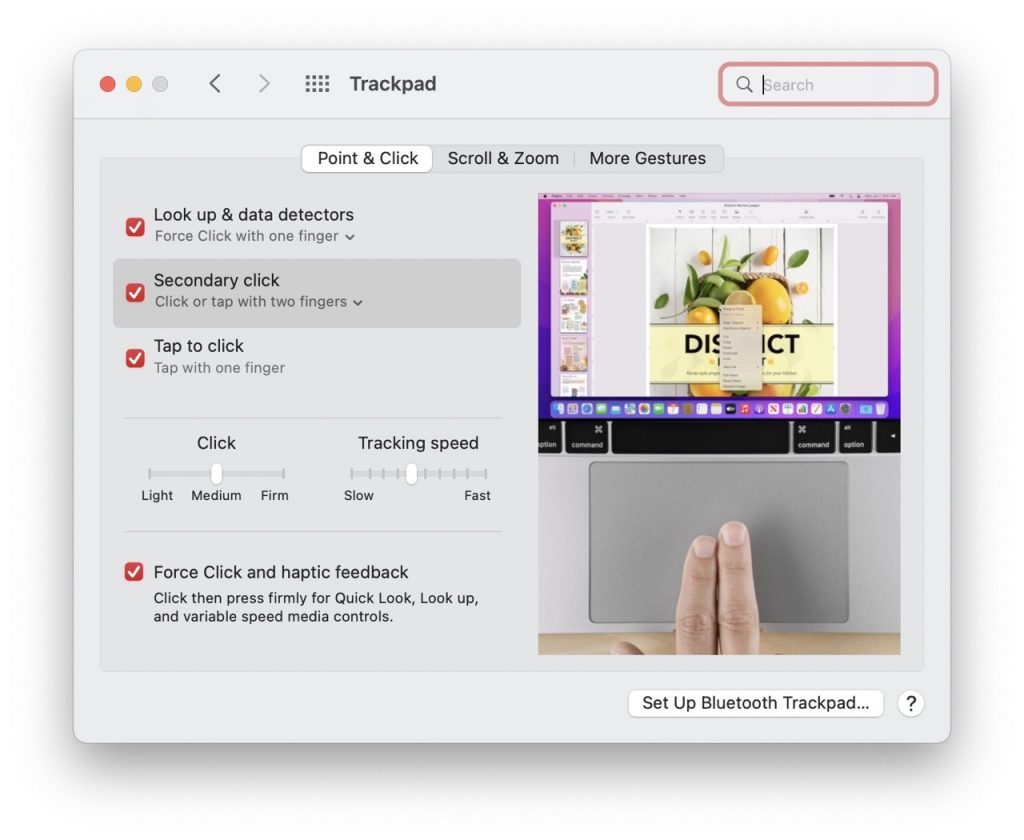
When I first set up a new Mac, the first thing I do is go to System Preferences then click Trackpad and change the trackpad tracking speed. By default, macOS sets the tracking speed to level four, which is far too slow to navigate the UI properly. I usually set my tracking speed to level 9, which is one level below the maximum.
Also Read:MacBook Air 2022 – All You Need To Know
2. Enable trackpad tap to click.
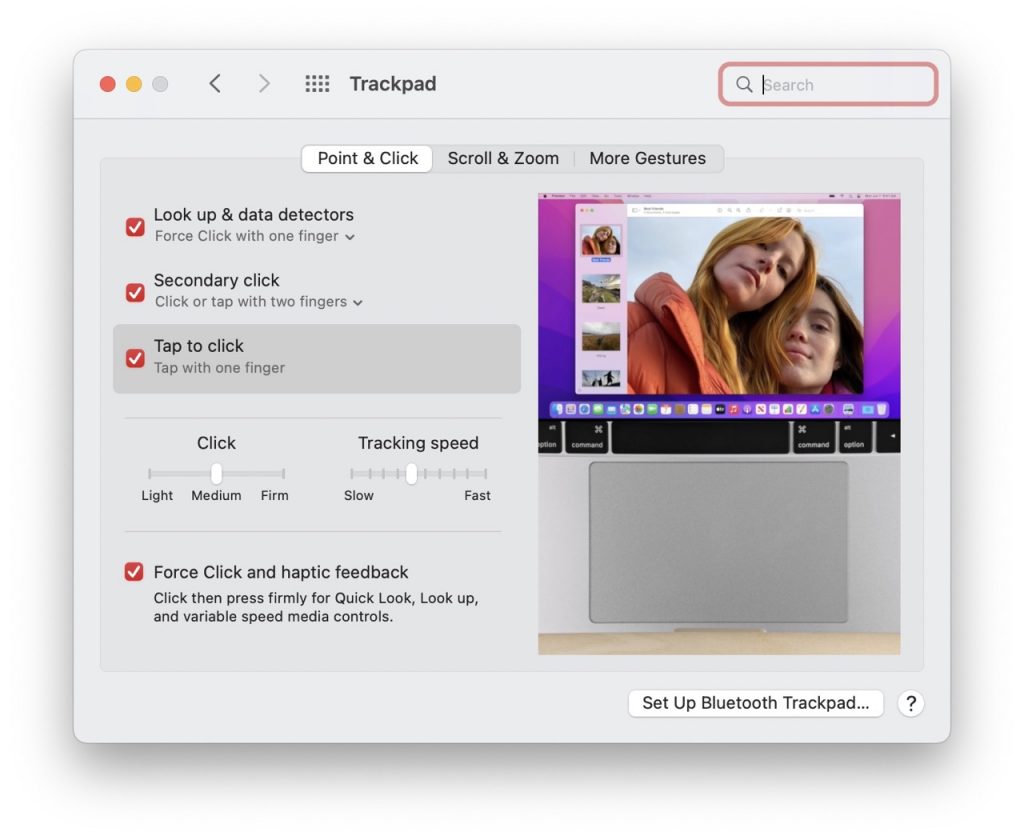
By default, macOS requires you to physically press down on the trackpad to begin a click, but you may activate tap to click under System Preferences then click Trackpad. Tap to click, as the name implies, allows you to begin clicks by simply touching on the trackpad rather than pressing down. Because we’re all used to tapping on our iPhones and iPads, it’s a simple shift to make.
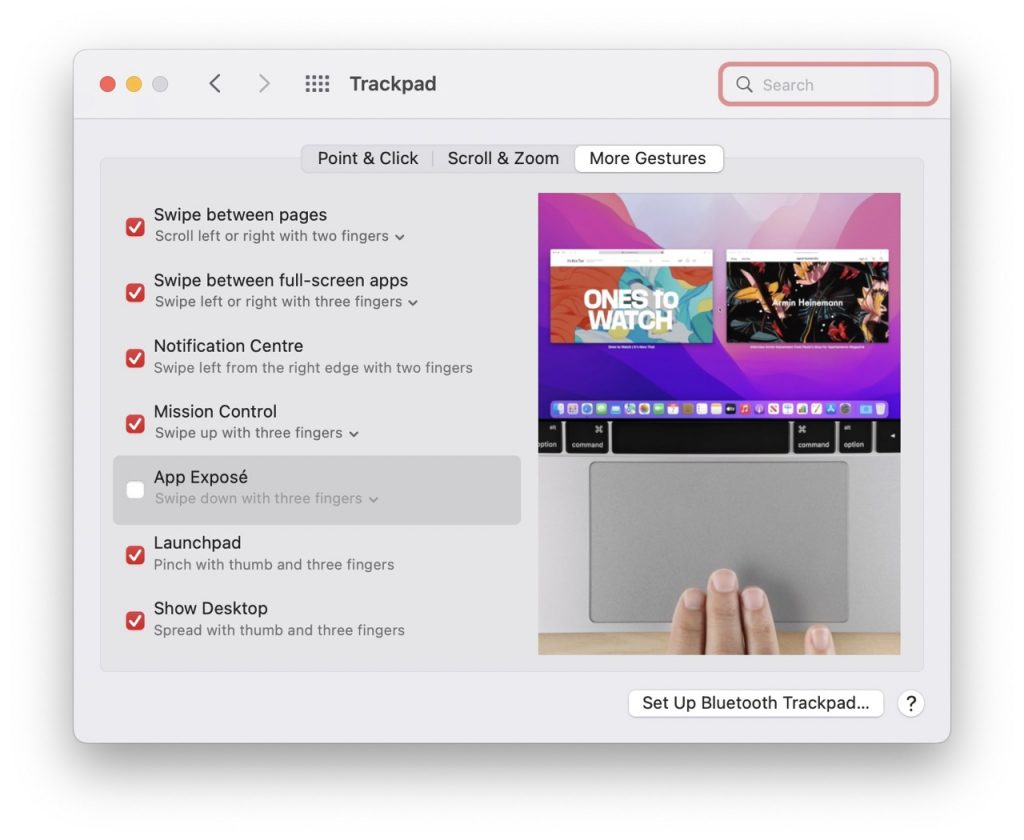
3. On the trackpad, enable three-finger drag.
You must click down on the trackpad and then move your finger on the trackpad to drag windows and other objects around macOS. Moving items feels like a step backwards in some ways if you already use tap to click. Fortunately, macOS has a three-finger drag gesture that allows users to move objects around without having to click first.
Three-finger drag is an incredibly useful feature that I believe should be enabled by default in macOS, or at the very least given a preference under Trackpad settings. Apple, on the other hand, burys the setting several tiers deep. Go to System Preferences > Accessibility, move to Pointer Control and then to Trackpad Options and tick the box next to Enable dragging to enable three-finger dragging. After that, select three-finger drag from the drop-down box.
Also Read:Android Emulators For MacBook M1
4. Set the mouse’s tracking speed.
If you use a mouse instead of a trackpad, go to System Preferences > Mouse and increase the tracking speed. For increased sensitivity and efficiency, I recommend adjusting the mouse tracking speed to level 9 much like the trackpad.
5. Enable mouse right-click.
Right-click is essential for moving about macOS, and it should be one of the first things you enable if you prefer to use a mouse with your Mac. Go to System Preferences Mouse and tick the option next to Enable Secondary Click to enable right-clicking.
Also Read:MacBook Pro Ethernet Stops Working- Fixed
6. Allow Magic Mouse to swipe between pages.
 The Magic Mouse’s great gesture functionality is what keeps me going back, despite the fact that it is far from the most ergonomic alternative. For example, the ability to navigate around macOS with just a one-finger swipe gesture in apps like Safari is really useful. If you’re using a Magic Mouse, go to System Preferences > Mouse More Gestures > Swipe between pages and tick the box next to Swipe between pages.
7. Turn on Apple Watch unlocking.
If you have an Apple Watch, go to System Preferences > Security and Privacy and check the box to enable the option for To unlock apps and your Mac, use your Apple Watch. Not only this allow your Apple Watch to automatically unlock your Mac when you wake it from sleep, but it will also allow you to access apps like 1Password and other portions of macOS that require administrator login.
Because desktop Macs, like as the iMac and Mac mini, don’t have Touch ID, this is the fastest way to unlock your Mac on these computers. Even though your MacBook has Touch ID, Apple Watch unlock can be useful for unlocking your Mac while it’s connects to an external monitor.
Also Read:How To Remove Or Install Memory- MacBook Pro
8. Turn on Hot Corners.
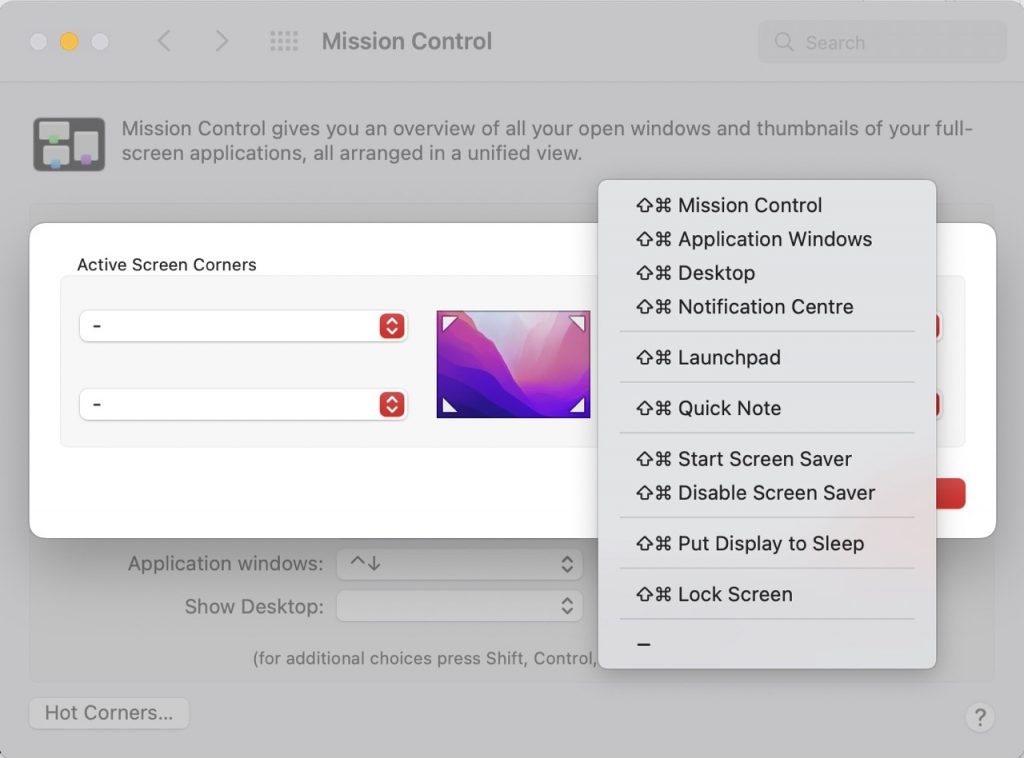
Hot Corners are one of macOS’s most underrated features, and I strongly advise you to use them. Go to System Preferences> Mission Control> Hot Corners and select one or more of the four corners from the dropdown boxes to enable Hot Corners.
When you move the cursor to one of the four corners of your Mac’s display, Hot Corners perform a specific action. You can do things like put your display to sleep, reveal the desktop, access Mission Control, and more with just a flick of the wrist.
9. ‘Hard drives’ should be included on the desktop.
Enable hard discs on the desktop in the General tab of Finder preferences to add links to your Mac’s internal storage device. This shortcut opens the Applications, Library, System, and Users folders quickly.
10. When sorting by name, keep folders at the top.
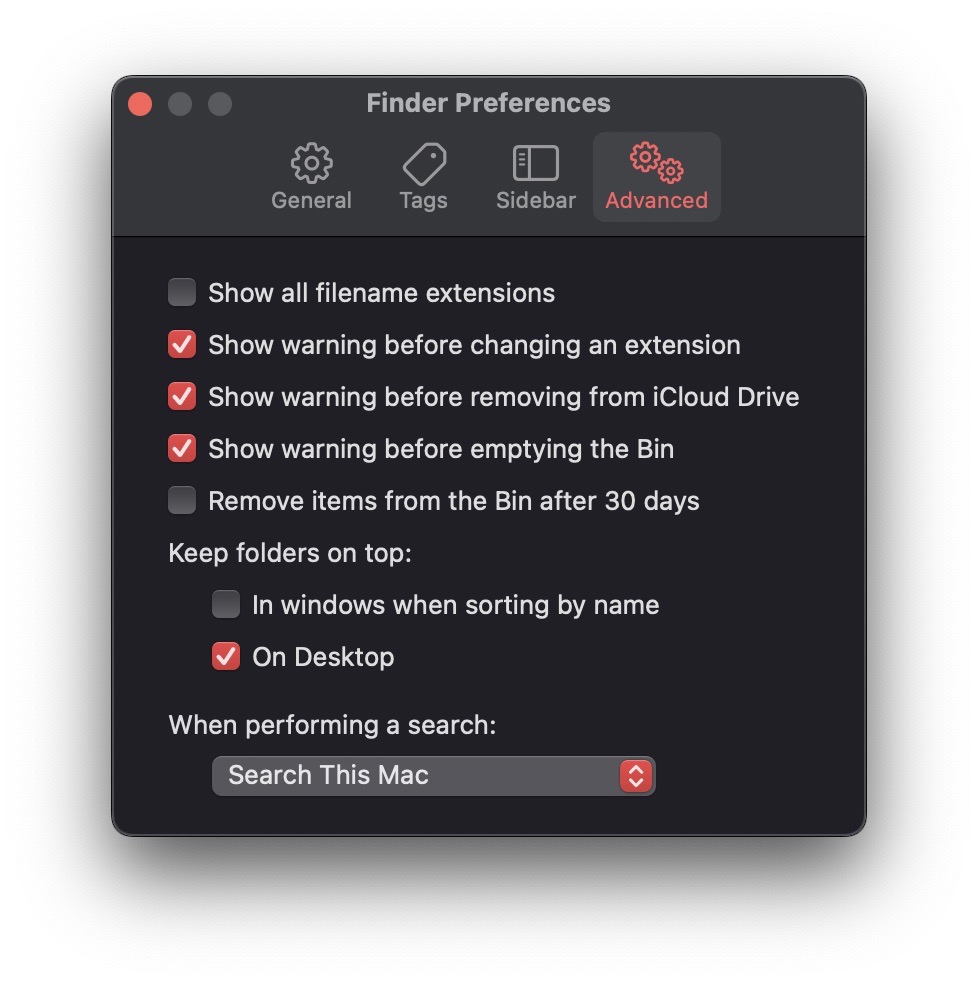 When sorting by name, folders can get lost in the shuffle. You can solve this problem by setting the Finder to always show folders at the top of a list. Go to the Advanced tab in Finder settings and check the option under the Keep folders on top heading.
11. Use the current folder to conduct searches.
When you search in a Finder window, macOS searches everywhere on your Mac by default. Go to Finder preferences> Advanced and pick the Search the Current Folder option in the dropdown box beneath When doing a search to make searches always default to the current folder.
Also Read:How To Upgrade MacBook Pro Memory From 8 To 16gb
12. To move the focus, enable keyboard navigation.
When you click the Tab key on your keyboard to switch between fields, macOS restricts the accessible fields to a few regions, such as text input boxes. Go to System Preferences Keyboard Shortcuts and tick the box next to Use keyboard navigation to move attention across controls to change the default behaviour to traverse amongst all available objects.
13. Change the name of your machine.
Go to System Preferences Sharing and modify what’s in the Computer Name text input field to change the name that’s displayed for your Mac on your network and in places like AirDrop.
14. Incorporate volume controls within the menu bar.
Volume controls are available in macOS Big Sur’s new Control Center, but I like to have a single volume control button in the menu bar for faster access. Drag the Volume module from Control Center to the menu bar and release it to add the volume shortcut.
Also Read:Siri Not Working On MacBook-Fixed
15. Remove the menu bar’s Spotlight.
I propose deleting the Spotlight shortcut from the menu bar, which is slower and takes up space since you can access Spotlight search with a simple Command+Space keyboard combination. To uninstall Spotlight, press and hold the command key while dragging the Spotlight symbol from the menu bar to the center of the desktop until a ‘(x)’ icon appears.
16. New Finder windows show desktop
macOS defaults to showing the Recents folder whenever a new Finder window is opened, but Recents is typically cluttered, so I prefer to make new windows default to the desktop instead. To make a similar adjustment, open Finder and navigate to Finder Preferences > General, then select your preferred destination in the dropdown box under New Finder windows show.
17. Set up the Finder’s sidebar
I like to personalize the Finder on new Mac installations by going to the Sidebar tab of the Finder preferences. Users can use the Sidebar tab to make Favorites of folders like Movies, Music, Pictures, and the User folder for quick access in the Finder sidebar. Because I rarely use Tags on macOS, I also uncheck the Recent Tags shortcut.
Conclusion
You’ll have a better overall workflow if you take the time to correctly organise your system at the start. These helpful Mac tips can make using your computer more productive and pleasant, whether you’re reinstalling macOS or setting up a brand new Mac.


