


 Header Through Cloudflare")


High-resolution video, images, music, and other vital things like Macbook apps take storage space these days, compared to the days when our computers had hard drives.
In order to keep your Mac running at its peak performance, you need to keep at least 10% of its storage space empty at all times. If you don’t, your Mac will suffer, Your Mac might become unusable if you don’t clear up some of the clutter that’s taking up space on your hard drive. It’s not a good idea to disregard alerts that your start-up disc is nearing capacity.
For a number of reasons, people need to examine their storage space. For the sake of efficient storage management, or when your computer is running slowly and storage is the first thing you can think of as a cause. In order for your Mac to perform smoothly, roughly 10% of its storage space should be free at all times.
Depending on the model, this may be difficult to perform on a regular basis. The app may no longer be supported, or you may need to uninstall certain outdated programs that you no longer use.
Also Read: How To Clear System Data Storage On Mac?
How can I check my Mac’s storage?
Before we start removing items, it’s a good idea to double-check your storage details. This is how my disc storage appears, for example:
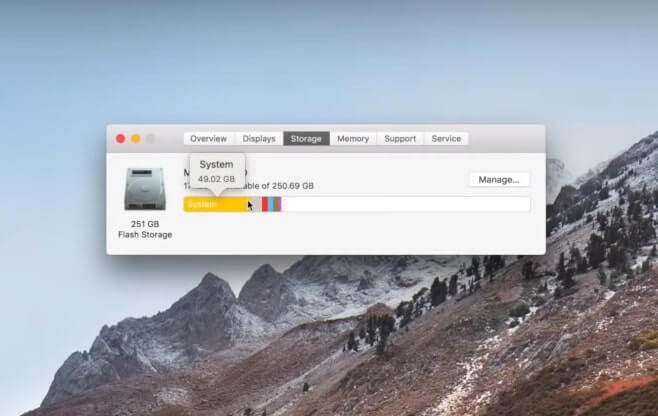
Documents: Your hard drive is overflowing with downloads and media files.
Apps: Your Mac is likely to have a slew of hidden and forgotten apps
System: Caches, temporary files, and software localizations all take up space in your operating system.
To see your storage details, go to the Apple symbol > Storage. This Mac’s Features > Storage
Also Read: 8 Ways To Use The macOS Recovery Tool On Mac
Mac: Free up disc space
1. Cleanse the Downloads directory
2-5 GB of recoverable storage space
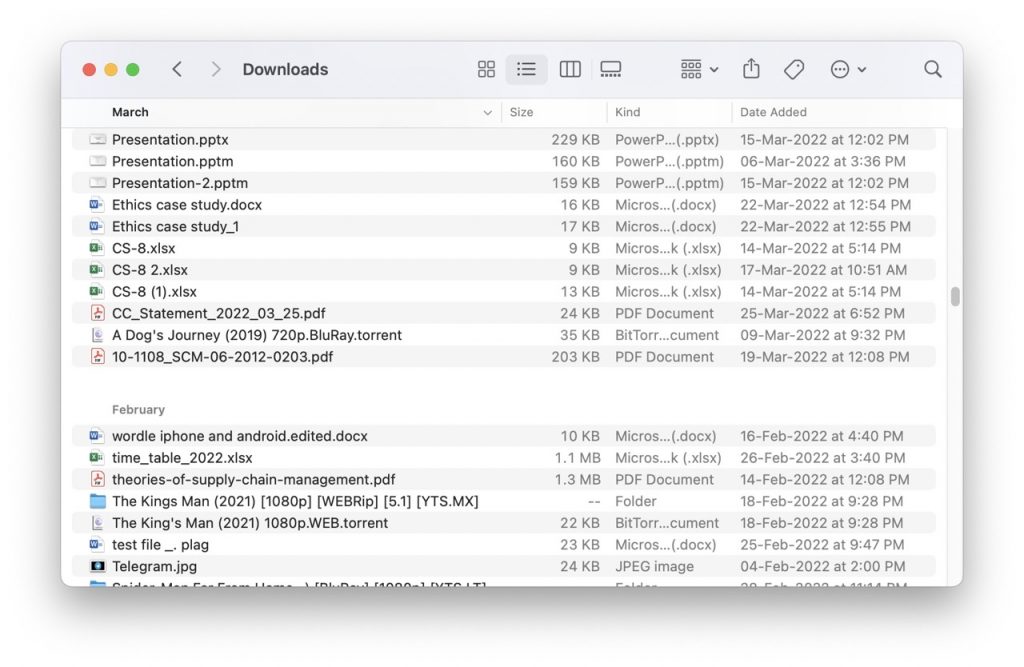
The Downloads folder is the best spot to begin cleaning up your Mac as soon as you decide to do so. Users download an infinite quantity of data onto their machines. And if we’re being honest, we don’t even need half of it! Time to eliminate clutter by discarding any unnecessary files. Here’s how to proceed:
- Navigate: Finder > Downloads
- Right-click the files you wish to delete and then select Move to Trash.
- After you’re finished removing files, remember to clear the Trash.
2. Transferring media files to external or cloud storage
2-5 GB of recoverable storage space
Now you have deleted the unnecessary huge files. Your media is the next item up for inspection. I am fully aware that they are not ordinary files; rather, they contain cherished memories. Desire to retain them? The optimal method is to save them on iCloud or an external disc.
Follow these procedures to transfer your images and audio to iCloud:
- Select Apple > About This Mac > Storage > Manage from the main menu.
- Click Save in iCloud and choose the items you wish to store.
- Click iCloud Storage again.
- Keep in mind that the free iCloud plan allows you to save up to 5 GB of data. To transfer more than that, you must purchase one of the following premium storage plans: 50 GB, 200 GB, or 2 TB.
Follow the steps below if you wish to move media files to external storage.
- Select Apple > Go > Home from the menu.
- Select the Pictures folder and drag it to the external storage device.
- Done! To save up space, you may now remove the original Photo library. Simply drag it to the Trash bin. Empty the trash can.
Also Read: Block or Disable USB storage devices on Mac
3. Delete system junk
2-5 GB of recoverable storage space
Numerous articles have been written regarding system rubbish, and some Mac users assert that system junk is pure evil and slows down your Mac. In my opinion, having outdated files, browser caches, program localizations, and old Time System backups on your machine is a burden.
4. Clear browser cache
If you use the Internet frequently, as I do, your Mac’s hard disc is filled with browser cache. These are the bookmarks left on your hard disc by every website you’ve visited. What is your preferred web browser? Here are the Chrome and Safari solutions:
To remove Chrome’s cache
While on Google Chrome,
- Click the three-dot symbol in the upper right to access further settings.
- Click More resources > Remove browsing history
- Select a time frame to delete browsing data.
- Additionally, remove “Cached pictures and files.”
To remove Safari’s cache
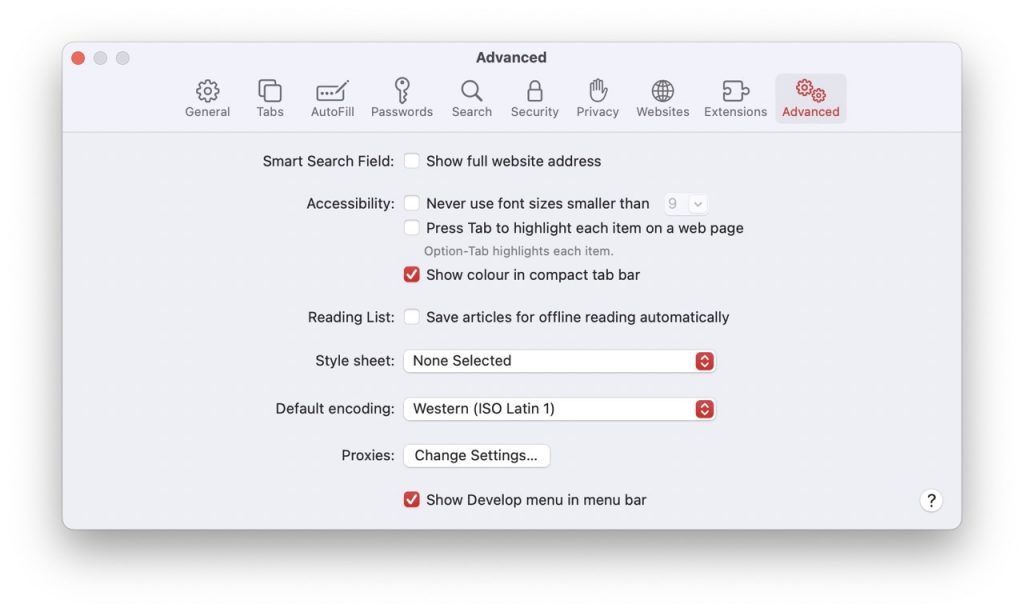
- Open the Safari web browser.
- Select Preferences > Advanced from the Safari menu.
- In the menu bar, check the box next to the Show Develop menu.
- Return to the Safari menu, choose Develop, and then Empty Caches.
Also Read: Safari Not Working After Updating To macOS Monterey? Try These Fixes
5. iCloud storage
If you want to save up a lot of disc space on your Mac, we recommend using the Store in iCloud feature first. iCloud+ has been improved by Apple, but the price hasn’t gone up; instead, it now contains a variety of extra capabilities.
You may store files in iCloud by selecting the Store in iCloud option. If you just have a little amount of storage on your Mac, there is a perfect solution: acquire a large amount of cloud storage and save whatever you need there. You may get a lot more storage space if you don’t mind spending a little extra money.
For free, Apple offers 5GB of iCloud storage, but it isn’t going to be much assistance here. Depending on your needs, Apple provides a variety of subscription-based storage options. The following are the costs for iCloud storage:
- 5 GB of storage space is provided without charge.
- Monthly cost for 50GB is 79p/99c.
- £2.49/$2.99 per month for 200GB of storage
- £6.99/$9.99 per month for 2TB of data
It’s also worth noting that Apple One, a package deal that includes iCloud storage, Apple Music, Apple TV+, and a subscription to Apple Arcade, is available through the company, as well. A month’s subscription costs £14.95/$14.95.
As a bonus, you’ll be able to access your files and photos on any Apple device you own or by logging into iCloud with your Apple ID, saving you a tonne of storage space and making it easier for you to keep track of everything.
In order to free up space on your Mac, you’ll need to perform the following steps:
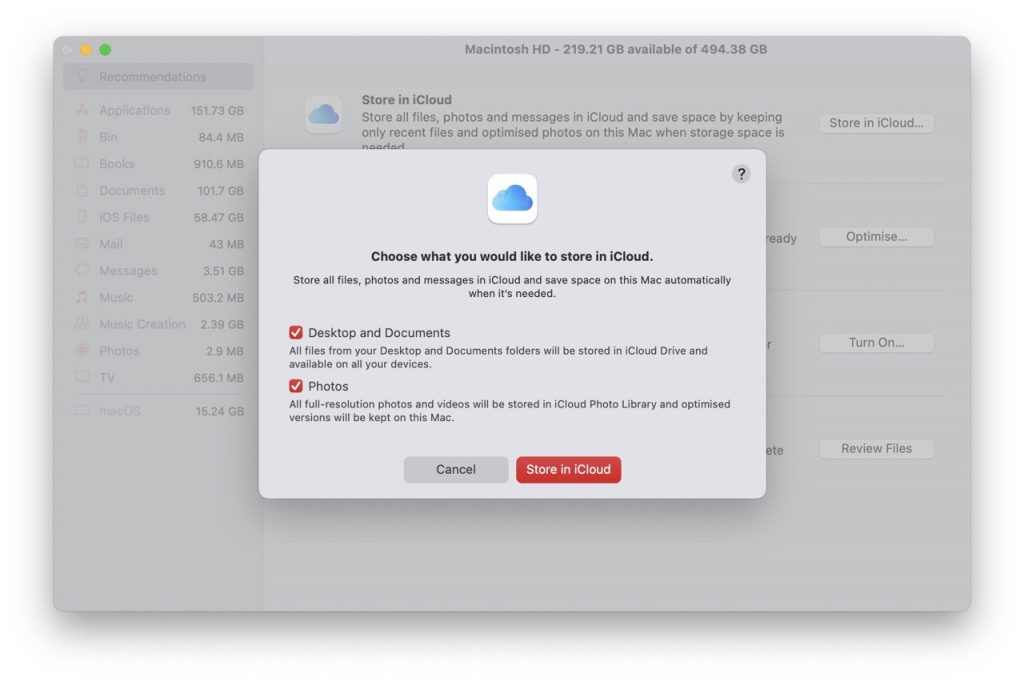
- Go to “About This Mac > Storage > Manage” and choose “Store in iCloud.”
- You’ll be presented with a menu asking you what you’d like to save in iCloud. All of the files on your Mac Desktop, as well as your Documents folder, and all of your photos, may be included in this. Both are acceptable choices.
- Select “Store in iCloud”
Also Read: How To Set Up And Sync iCloud Photos
6. Optimize the storage
Turning on Optimise Storage is a simple approach keeping your Mac’s storage from filling up.
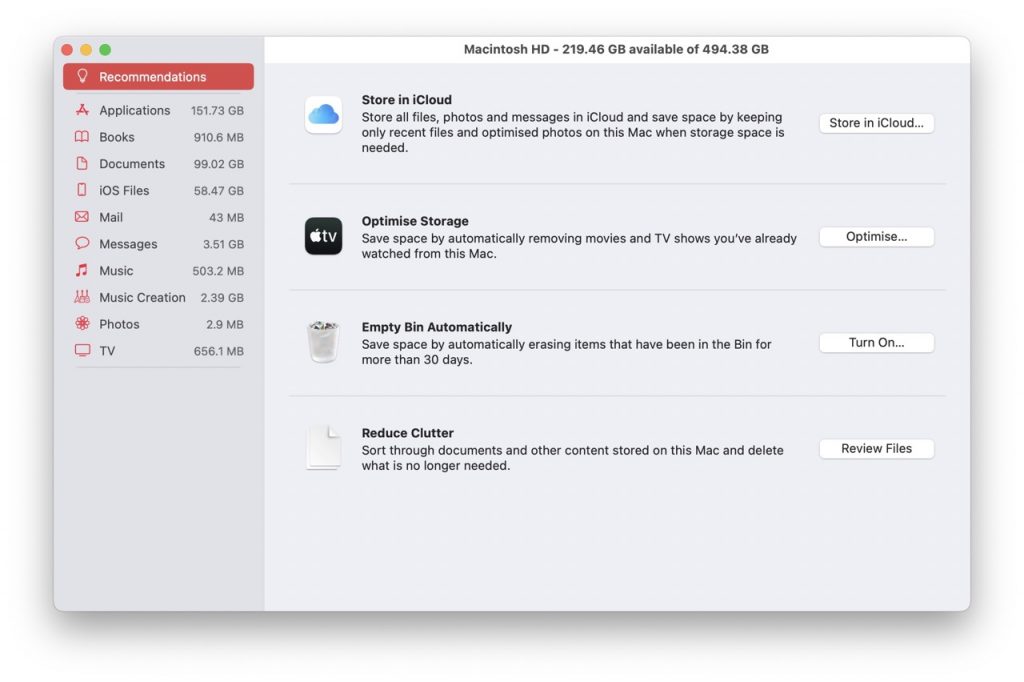
After Store in iCloud, Apple recommends Optimising Storage.
You may switch on Optimise Storage and it will eliminate old email attachments and TV episodes you’ve already seen. The emails will remain on the email server, and the shows you purchased from Apple’s iTunes Store may always be redownloaded for free if you ever misplace them.
Go to About My Mac > Storage > Manage and select Optimise Storage from the drop-down menu to select it.
Choosing this option will automatically optimize your storage space.
7. Empty Trash Automatically
This is one of the quickest methods to free up space on your Mac.
To empty your trash, just right-click on the trash icon and select Empty Trash/Empty Bin from the context menu that appears.
However, you may also remove it from the sidebar on the left of yours , About My Mac > Storage > Manage window by clicking on Bin/Trash.
You should empty your Trash periodically, and Apple provides a terrific solution to make this happen automatically.
The files in your Trash (or Bin if you’re in the UK) will be automatically deleted after 30 days if you select Apple’s option to Empty Trash Automatically. Set it up as follows:
- On your Mac, go to About My Mac > Storage > Manage and turn this option on.
- The option to have the trash automatically emptied should be selected.
- Turn On.
- A message will appear asking whether you’re sure you want to automatically delete Trash from your computer. Turning on the option is a good idea since 30 days is a significant period of time in which you could forget that you deleted something.
Also Read: How To Fix Apple Apps Not Syncing With iCloud Issue
8. Get Rid of Clutter
This is Apple’s last suggestion, which can be found in About My Mac > Storage > Manage.
Reduce Clutter will scan your Mac’s contents and make it simple to eliminate stuff you don’t need.
TIP: Instead of opening files or documents to examine what you’re thinking of deleting, pick the file and hit the space bar to see a preview.
- You’ll be transported to a window with tabs for Large Files, Downloads, Unsupported Apps, Containers, and a File Browser when you click on Review Files (depending on which version of macOS you have). This is the same view you’d see if you went to the left-hand sidebar and clicked on Documents.
- We don’t have any Large Files on our MacBook Pro, but we could view them here if we did. Based on the information supplied, such as when you last accessed them and their size, you may decide whether or not to remove them.
- Downloads is the next choice. You’ll find the files you’ve downloaded from the internet in this folder. It’s a good idea to remove the contents of this folder from time to time, just like you do with the trash, because it’s astonishing how much space a few downloads may take up.
- To erase what’s currently in your Downloads, choose the files you wish to get rid of and hit Delete. The advantage of eliminating Downloads this way is that they will not be moved to your Trash. You’ll need to Empty Trash if you remove it directly from the Downloads folder.
- Unsupported Apps will be included in this area if you have any. Old 32-bit programs, for example, may be found here.
- We’ll skip Containers because you’re unlikely to find anything to remove in that view.
- You can rapidly access folders for Pictures, Desktop, Music, Movies, Documents, and more in File Brower.
Also Read: How To Free Up Storage Space On iCloud
9. Remove any programs that you don’t want.
Unsupported programs may be removed from Mac > Storage > Manage, but what about the other apps you have installed but don’t use or need?
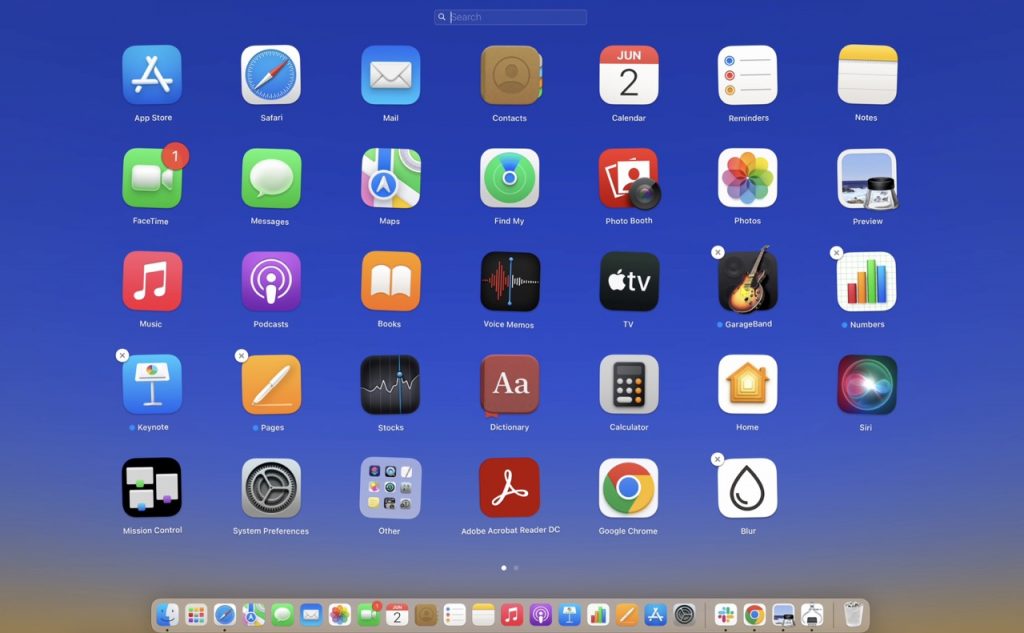
- Normally, deleting programs on a Mac is rather easy. You may either remove a program from the Finder’s Applications folder by right-clicking on it and selecting Move to Bin/Trash.
- Alternatively, use F4 to launch Launchpad, locate the program, press Alt/Option, and hover over it. To delete it, click the x.
- Some macOS programs, on the other hand, feature preferences (plist) and application support files, which can be found in a variety of locations on your Mac. In some circumstances, the procedures above will not erase all of an app’s related files and libraries.
- If you want to be certain that all traces of an app have been removed, you may use an app that deletes programs completely.
- Uninstallers are included in certain big software. One of them, for example, maybe found in Microsoft Office’s Additional Tools folder. The installer for certain apps also serves as an uninstaller. However, macOS lacks a dedicated uninstaller, which is a severe oversight.
10. Remove any languages you don’t need.
macOS is available in a variety of languages, with over 25 of them automatically installed during the installation process. Go to System Preferences > Language & Region; here you may arrange languages in a preferred order to make switching between them easier.
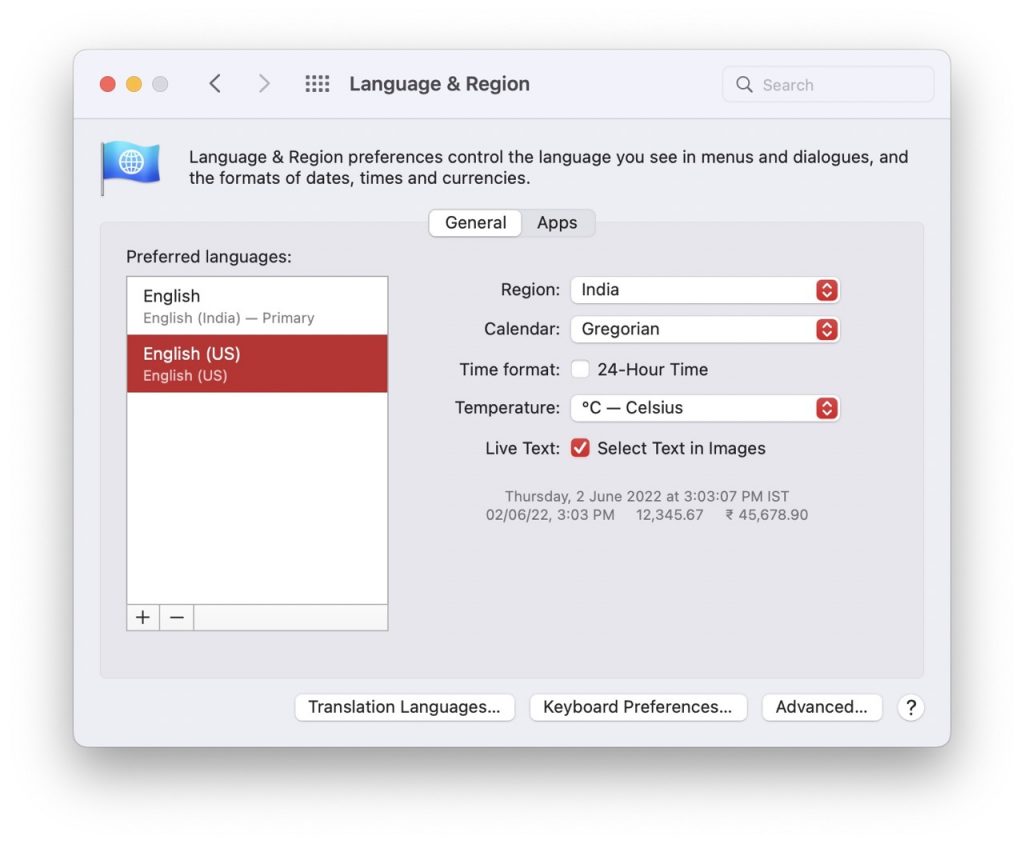
Many big programs also support many languages; if the app doesn’t support your primary language, use the order from Language & Text to choose one. The issue is that if you just want to utilize one or two languages, macOS and many of your programs will be bloated with the others.
Go to the Resources folder and check for folders ending in.lproj if you wish to eliminate unnecessary language files you won’t be using. A language file will be included in each of those directories. You should be able to delete these directories with no difficulty.
Also Read: Frozen Macbook Or Mac: Fixed
11. Back up or archive
You may believe I require the additional space, but I do not wish to erase anything! Here are a few basic recommendations if you are the proverbial data squirrel:
Any files you aren’t likely to use on a frequent basis should be archived. Select the compress option by pressing Ctrl+clicking on a folder. The amount of space saved depends on the type of file being archived: JPEGs and DMGs, for example, are unlikely to compress significantly. Archive files can be saved to an external device or left on your Mac once they’ve been generated.
Finally, if you decide to remove files or folders, make a backup of them beforehand.
Final Thoughts
Freeing up space on Mac not only speeds up the system but gives us more space to utilize our data well. So we discussed all the ways possible to clear the space without using any third-party apps. You can use the apps but they may come with a Subscription.


